Cannabis Seed to Harvest: The 4 Growth Phases
Royal King Seeds Editorial Team
Cannabis Cultivator & Seed Specialist
Most grow failures are not random. They happen at predictable transition points between growth phases, the moments when the plant's requirements change and the grower continues doing what worked in the previous phase.
Understanding the cannabis growth cycle as four distinct phases with different environmental, nutritional, and management requirements is the single most valuable framework any grower can internalize. This guide covers all four phases with the specifics that actually matter: what the plant needs, what growers consistently get wrong, and what separates a marginal harvest from a great one.
Royal King Seeds Editorial Team, phase-by-phase framework drawn from published cultivation research and aggregated grower-community reports.
Phase 1: Germination (Week 0–2)
Germination begins when the seed absorbs enough moisture to activate dormant enzymes and initiate cell division. The seed coat splits, the tap root emerges and grows downward, and the hypocotyl (embryonic stem) pushes upward, carrying the cotyledons (seed leaves) toward light. The entire process from seed to established seedling takes 1–2 weeks.
During germination and the early seedling stage, the plant lives on nutrients stored within the seed. External feeding is not required and should not be provided during this phase. The primary inputs are: moisture (consistent, not saturated), warmth (22–28°C), and minimal light after emergence (dim, 18 hours). High-intensity light is counterproductive on seedlings with limited root systems, it drives transpiration faster than the undeveloped roots can supply water.
Recommended approach: We track germination-to-seedling transition as a separate data point from germination rate. A seed that germinates successfully but shows slow, weak early growth often indicates temperature issues (below 22°C) or early nutrient exposure. The best indicator of a healthy phase 1 is a seedling with a compact internodal distance on its first two node sets, tight early growth predicts vigorous vegetative performance.
Key indicators of phase completion: the seedling has developed its first true set of cannabis leaves (beyond the seed leaves), the root system is beginning to establish at the container base, and the plant is actively photosynthesizing. At this point, increase light intensity and begin the transition to vegetative management.
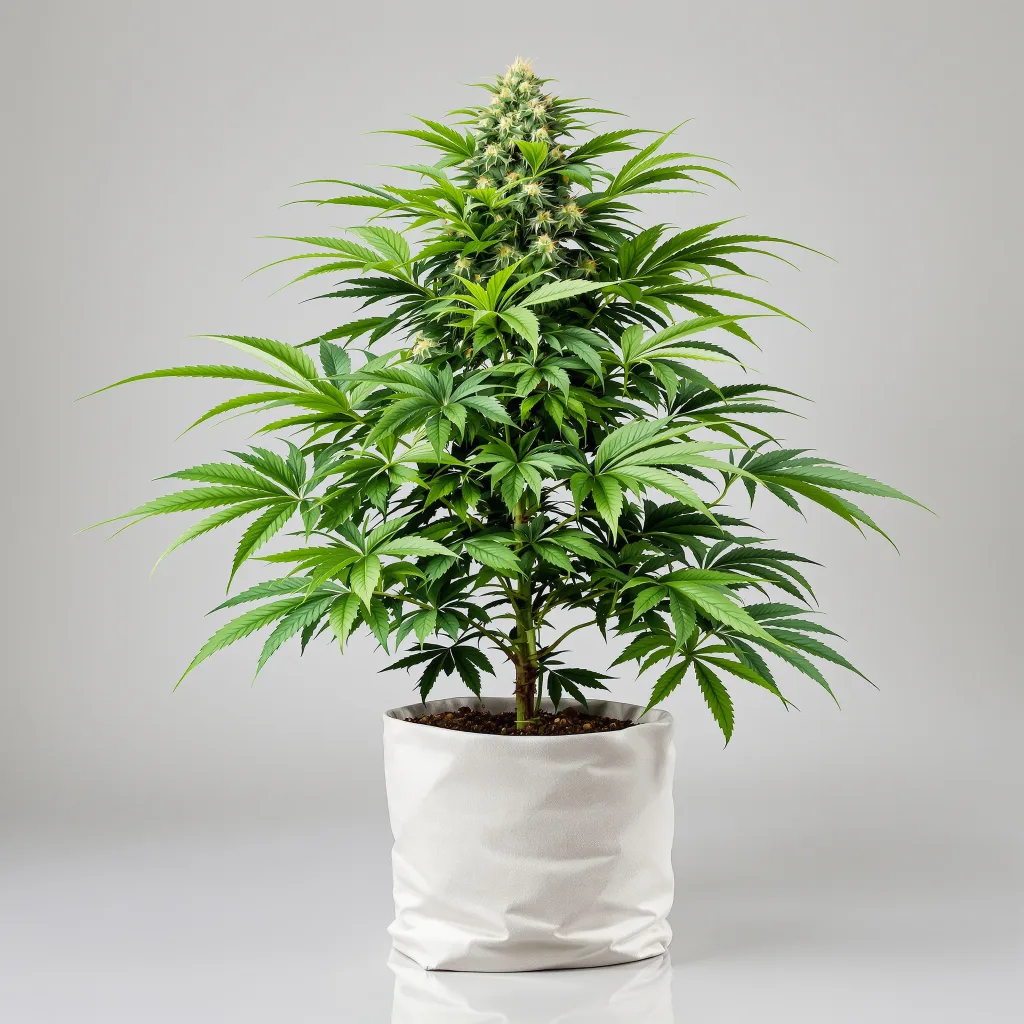
Phase 2: Vegetative Growth (Week 2–10)
The vegetative phase is defined by continuous stem elongation, leaf production, and root system expansion. The plant is building the structural framework, canopy area, stem thickness, root volume, that will determine its maximum flowering yield. A larger, healthier vegetative plant produces more during flowering. Rushing this phase by inducing flowering on an undersized plant limits the harvest ceiling permanently.
Indoor photoperiod plants vegetate under 18/6 or 20/4 light schedules (18–20 hours of light per day). They do not flower under these conditions. Vegetative duration is controlled entirely by the grower, you flower the plant when it has filled the canopy space available to it. For a 2x2 tent with a single plant, 4–6 weeks of vegetative growth is typically sufficient. For a 4x4 tent, 6–10 weeks allows proper canopy development.
Nutritional requirements during vegetative growth center on nitrogen (N) as the primary macronutrient, with adequate phosphorus (P) and potassium (K) for root development and overall metabolism. Calcium and magnesium are the most common secondary nutrient deficiencies in vegetative cannabis. Vegetative EC targets: 1.2–1.8 in soil, 1.0–1.4 in coco/hydro.
| Vegetative Parameter | Target Range | Notes |
|---|---|---|
| Temperature | 22–28°C (72–82°F) | Lights-on; allow 4–6°F drop lights-off |
| Relative Humidity | 55–70% | Higher RH promotes leaf development |
| VPD | 0.8–1.0 kPa | Lower VPD supports rapid leaf growth |
| PPFD at canopy | 400–600 µmol/m²/s | Ramp up as canopy develops |
| Soil pH | 6.0–6.5 | Maintain consistently; test monthly |
Training during vegetative growth, low stress training (LST), topping, FIM, or ScrOG, shapes the canopy to maximize bud site count and light distribution. All high-stress training (topping, FIM) should be completed with at least 2 weeks of recovery time before inducing flower. For genetics selection that rewards vegetative training investment, our feminized seeds include genetics specifically suited to ScrOG and intensive training techniques.
Phase 3: Flowering (Week 8–18+)
Flowering begins when photoperiod plants receive 12 hours or less of uninterrupted darkness, either from a schedule change indoors or from seasonal day-length reduction outdoors. In autoflowers, flowering begins based on age (typically week 3–5 from seed) regardless of light schedule.
Flowering has three distinct sub-phases, each with different management requirements:
Early flower (weeks 1–3): Pre-flower stretch, bud site development. The plant continues growing in height (often 50–100% of vegetative height) and transitions from vegetative to reproductive metabolism. Nitrogen stays elevated for the first week, then begins reduction. New pistils emerge at all node sites.
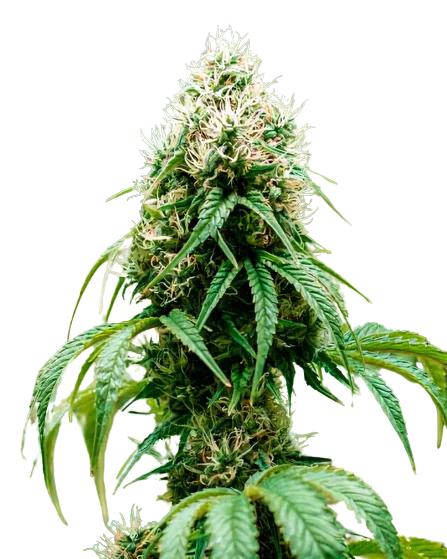
Mid-flower bulk (weeks 3–7): Bud formation and size increases rapidly. This is the most nutrient-demanding period, high phosphorus and potassium, declining nitrogen, continuous calcium/magnesium support. This is when most of the final bud mass accumulates. VPD should increase to 1.2–1.5 kPa to promote trichome density. Light intensity should be at its maximum (800–1200 µmol/m²/s).
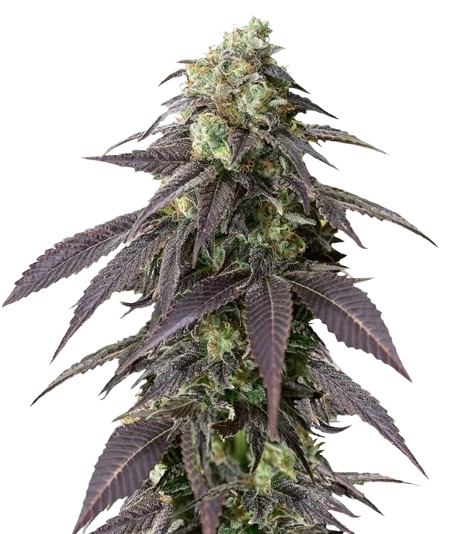
Late flower and ripening (weeks 7–11+): Bud development slows, trichomes mature from clear to cloudy to amber. Nutrients are reduced significantly or eliminated (the flush/ripening debate remains active, but reducing input EC in the final 1–2 weeks is universally practiced). Ripening is assessed by trichome color under magnification, the definitive harvest readiness indicator.
Our detailed breakdown of the flowering phase by week is covered in the cannabis flowering stage week-by-week guide, the most comprehensive resource we publish on flowering-period management.
Phase 4: Harvest and Cure (Days 1–90+)
Harvest is a phase, not a moment. The window between optimal harvest and over-mature harvest for most strains is approximately 1–2 weeks. Harvesting before the window produces less potency, less weight, and an incomplete cannabinoid profile. Harvesting after the window produces degraded THC (converting to CBN), amber-dominant trichomes, and a sedative, couch-lock effect profile.
The harvest readiness assessment requires magnification. A 30–60x jeweler's loupe or a USB digital microscope provides clear trichome visibility. The target depends on effect preference: predominantly cloudy trichomes (few amber) for a clear, energetic effect; 10–20% amber mixed with cloudy for a balanced effect; 30%+ amber for maximum sedation and body effect.
After harvest, drying and curing are separate processes that together determine final product quality. Drying removes bulk water from fresh-cut buds over 7–14 days at 60–70°F, 55–60% RH. Curing, storing dried buds in sealed glass jars at 62% RH, develops flavor, aroma, and smoothness over 2–8 weeks through enzymatic and chemical processes that cannot be replicated by quick-drying. The cure phase is where commercial-quality cannabis separates from home-grow quality. For the complete drying and curing protocol, our cannabis harvesting and curing guide provides the full step-by-step process.
Autoflower Timeline: A Compressed Lifecycle
Autoflowering cannabis genetics complete the full seed-to-harvest lifecycle in 8–12 weeks because their flowering trigger is age-based rather than photoperiod-based. The phases are the same but compressed and overlap differently:
| Week | Autoflower Stage | Key Focus |
|---|---|---|
| 1–2 | Germination / seedling | Moisture, gentle light, no nutrients |
| 2–4 | Early vegetative | LST training, low-N veg nutrients |
| 3–5 | Pre-flower / flowering trigger | First pistils appear, begin P/K shift |
| 5–9 | Active flowering | High P/K, max light, VPD 1.2–1.5 |
| 9–11 | Ripening and harvest | Trichome check, reduce nutrients, harvest |
The compressed autoflower timeline means there is almost no margin for stress events. Any significant stress in weeks 1–4 (transplant shock, overwatering, heat stress, nutrient burn) occurs during the brief window before flowering begins and cannot be fully recovered from before the harvest window arrives. Browse our autoflowering seeds for modern genetics that push the performance ceiling of this compressed lifecycle format.
The 4 Most Common Phase Transition Mistakes
1. Triggering flower too early (photoperiod): Growers switch to 12/12 when the plant looks "big enough", but big enough for what? The plant will stretch 50–100% during early flower. A plant that has only filled 40% of the canopy at flower trigger will only utilize 60–80% of available canopy after stretch. Let the plant fill the available canopy before triggering.
2. Continuing high nitrogen into flower: Nitrogen drives vegetative growth, green leaves, stem elongation. In flowering, the plant's priority shifts to bud production. Excess nitrogen during mid-to-late flower inhibits resin production, produces loose buds with a green herbal taste, and delays ripening. Begin nitrogen reduction at week 2 of flower and continue reducing through harvest.
3. Harvesting by calendar rather than trichomes: Strain breeders advertise flowering times (e.g., "8–9 weeks") as estimates under ideal conditions. In actual home grows with varying conditions, the same genetics may take 9–12 weeks. Harvesting at the advertised calendar date without checking trichomes results in harvesting immature buds. Trichome color is the only accurate harvest readiness indicator.
4. Rushing the dry and cure: The final phase, drying and curing, is treated as a formality by many growers after the effort invested in growing. Rushing the dry (high temperature, low humidity) produces harsh, hay-flavored buds that do not represent the genetics. Skipping the cure produces cannabis that is technically dried but lacks developed terpene complexity. Budget 3–4 weeks post-harvest minimum for the drying and curing process.
Myth vs. Reality: The Cannabis Lifecycle
"Autoflowers don't need the same care as photoperiod plants, they basically grow themselves."
Autoflowers actually require more careful management than photoperiods because the compressed timeline eliminates any recovery margin. A photoperiod plant given extra vegetative time to recover from stress can still produce well. An autoflower that was stressed during weeks 2–4 has no recovery window, it enters flowering in a compromised state and delivers a compromised harvest. The same fundamentals (correct pH, appropriate nutrients, proper watering, stable temperature) apply to autoflowers with less room for error.