Table of Contents
I’ve grown cannabis for years across a few very different setups: a small indoor tent with LED panels, a modest hydro corner, and a handful of outdoor runs where weather wrote the schedule. When people ask me what are autoflower seeds, I answer with two ideas: they’re predictable in their timing, and unforgiving about early mistakes. That sounds dramatic, but it’s what makes them both beginner-friendly and surprisingly technical.
Autoflowers are the plants I reach for when I need a quick turnaround, when I’m testing new equipment, or when I’m squeezing a crop between travel or seasonal changes. I’ve also used them as “gap fillers” next to photoperiod marijuana plants—because they don’t care about daylength in the same way. In this guide I’m going to explain what I’ve learned the hard way: how these plants work, what makes them different, and what I do to keep yields and quality consistent from seed to jar.
The straightforward answer: what are autoflower seeds?
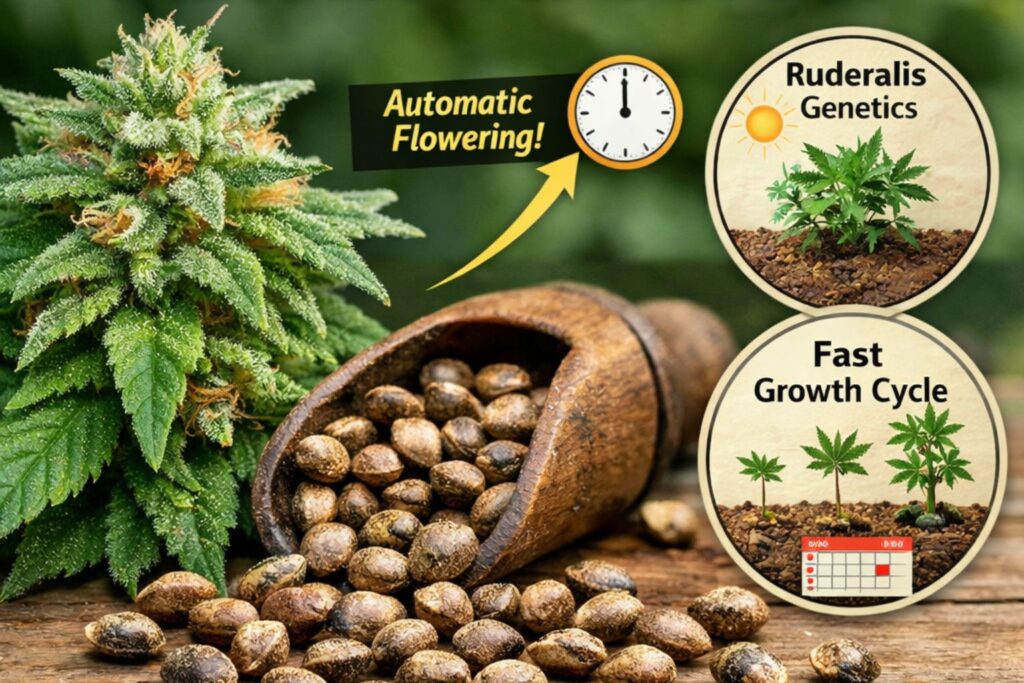
So, what are autoflower seeds? They’re cannabis seeds bred to flower based on age rather than the length of the light period. In practical terms, an autoflowering plant transitions from vegetative growth into bloom on its own, typically a few weeks after it sprouts, even if you keep the lights on a long daily schedule.
That “age-based” flowering trait is the entire point. It’s also the reason autos can be finished quickly, why they can work in places with short summers, and why they demand good early root development. If the first two to three weeks go sideways, you don’t get that time back—because the clock keeps ticking.
I’m going to keep repeating the phrase what are autoflower seeds in this article because it’s the question people actually type into Google. But the useful part is what comes next: how to grow them with fewer surprises.
Why autoflowers flower without changing the light

Autoflowering genetics are tied to Cannabis ruderalis, a hardy subspecies that adapted to northern latitudes with short summers. Breeders crossed ruderalis traits into modern indica, sativa, and hybrid lines, which is why you’ll see autos described as indica-dominant, sativa-leaning, or balanced hybrids. The ruderalis influence is mostly about flowering behavior and resilience, not about forcing a specific effect or flavor.
In my grows, the “auto trait” doesn’t mean the plant is indestructible. It usually means:
- The plant has a built-in timeline.
- The plant is less sensitive to small light leaks.
- The plant can still be stressed by heat, overfeeding, poor root zone oxygen, or pests.
- Phenotypes can vary, even within the same seed pack.
If you’re shopping for short-season autoflower seeds, autos are the category you’ll see first, but it pays to read breeder notes closely. Two “fast” varieties can behave very differently in stretch, appetite, and finishing time.
The autoflower life cycle timeline I plan around
When someone is new, I like to map out an autoflower life cycle timeline before I even germinate. It prevents most beginner errors—like topping too late or pushing nutrients when the plant is already transitioning.
Here’s the autoflower life cycle timeline that matches what I see most often indoors:
- Days 1–3: Germination and first root. Keep conditions stable and don’t overwater.
- Days 4–14: Seedling building roots and first true leaves. This is where I focus on gentle light, oxygenated medium, and consistent moisture.
- Days 15–28: Early vegetative push. Training decisions happen here.
- Days 21–35: Many plants begin preflower; you’ll see pistils at the nodes.
- Days 35–60: Bulk flowering. Light intensity and airflow matter more and more.
- Days 60–85+: Ripening and finishing. Some strains go longer, especially larger sativa-leaning autos.
Outdoors, the autoflower life cycle timeline can shift with temperature and day-to-night swings. In cool springs I’ve had plants stay small and finish earlier; in warm, bright conditions they stretch and fill out longer. Either way, I use the same planning mindset: the first month sets the ceiling for the harvest.
Choosing genetics: feminized, size, and expectations

Most growers buying autoflower seeds want simplicity, and feminized seeds deliver that. A feminized auto should produce female plants without needing to sex them. That said, I still treat every seed as its own plant because phenotype variation is real.
When I choose an auto, I look at:
- Target size: compact autos are great for small tents; larger autos want bigger pots and strong light.
- Reported flowering time: treat it as a range, not a promise.
- Nutrient sensitivity: some autos are light feeders; others handle higher EC.
- Terpene profile and structure: tight flowers need better airflow and stronger IPM routines.
If your goal is short-season autoflower seeds for a quick harvest, pick a variety known for consistent finish times and stable structure. If your goal is maximum yield, be prepared to treat the run like a technical grow: strong light, controlled environment, and careful feeding.
Germination and early root work (where autos are won or lost)
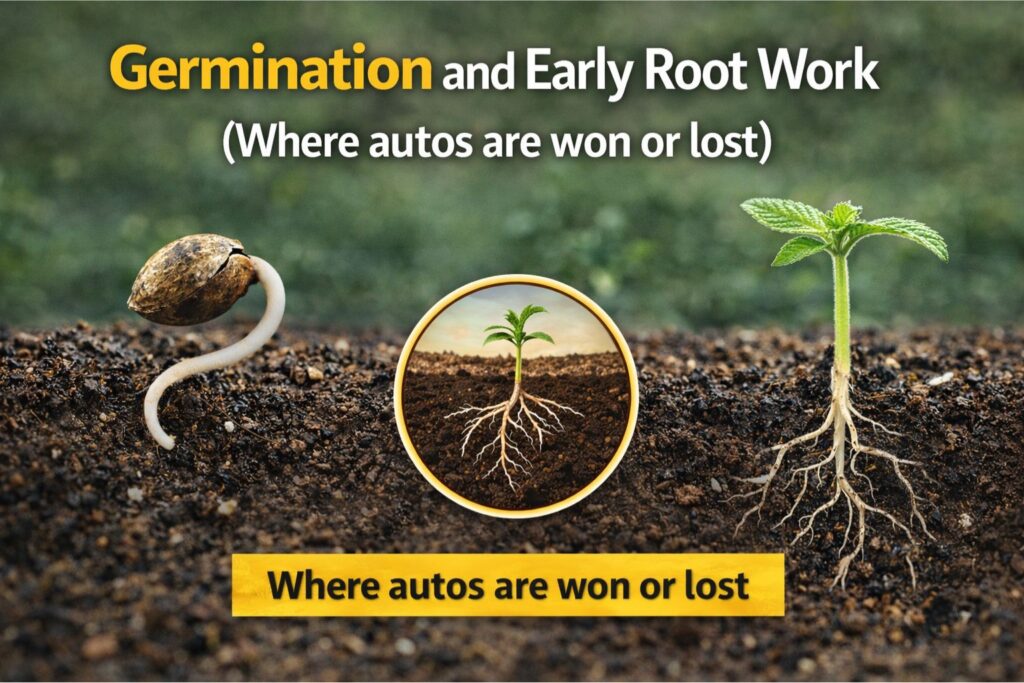
If you only remember one thing from this article, remember this: autos don’t give you extra time to recover from a slow start. That’s why I keep germination boring and repeatable.
My practical routine:
- Start with clean hands and clean tools. Damping-off and early fungus problems are usually preventable.
- Hydrate seeds in a lightly moist medium, not soaking wet conditions.
- Keep temperature stable. Indoors I aim for the mid-20s °C during sprout and early seedling. As a starting point, I’m usually around 24–26°C with 70–80% relative humidity for seedlings, then I tighten it to roughly 24–28°C with 55–70% RH once plants are established. Those numbers are not rules, but they keep the root zone warm enough for fast growth without turning the tent into a mold incubator.
- Keep humidity moderate-high for seedlings, but maintain airflow so the surface doesn’t stay stagnant.
I prefer to place the sprout directly into its final container more often than not. Autos can be transplanted, but the risk isn’t the transplant itself—it’s the stall afterwards. If I do transplant, I do it early, before the root system starts circling.
Autoflower seedling stretch prevention in the first two weeks
Autoflower seedling stretch prevention is mainly about light distance and environment, not about adding more nutrients. Stretch happens when the plant is reaching for intensity or when the temperature-to-light balance is off.
What I do for autoflower seedling stretch prevention:
- Provide a gentle but consistent light level from day one. I start lower and ramp up over a week.
- Keep day temperatures slightly warmer than night temperatures to reduce elongation.
- Use a mild breeze to strengthen stems, but avoid blasting seedlings with a fan.
- Don’t overwater. Wet, cold media leads to slow roots and lanky growth.
I’ve learned that autoflower seedling stretch prevention is easier than fixing stretch after it happens. Once the node spacing stacks long, the plant rarely becomes as sturdy as it could have been.
Light schedules and the numbers that actually matter
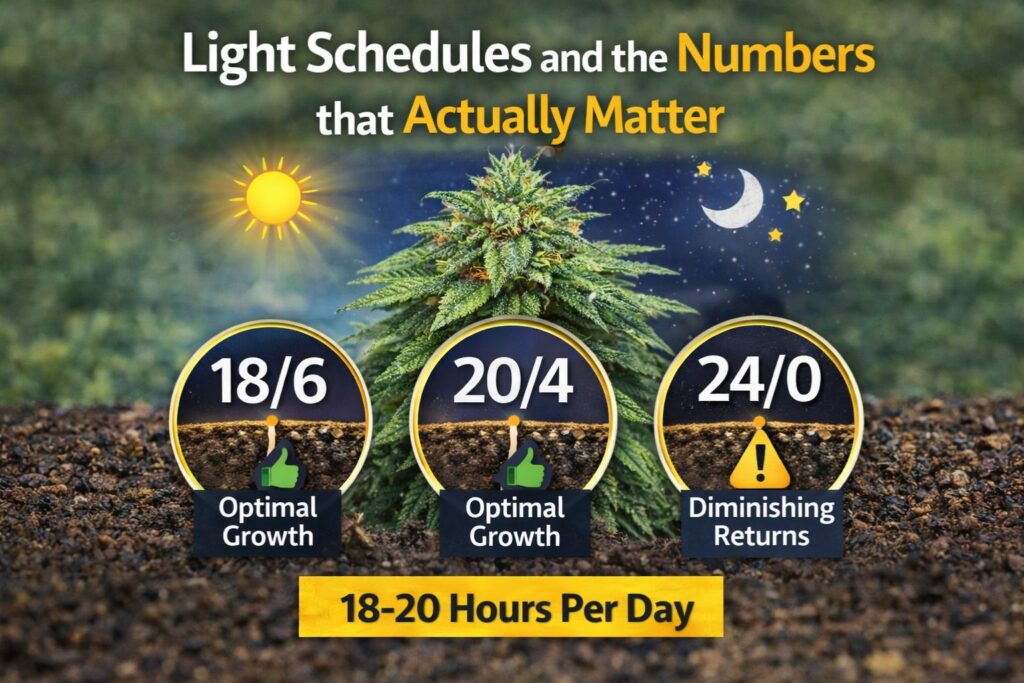
Because people often ask what are autoflower seeds in the context of indoor growing, light deserves its own section. Autoflowers don’t require a strict “flowering” light schedule. I’ve run them under long days from start to finish with good results. Outdoors, they run on the sun’s schedule.
Indoors, I typically choose between these options:
- 18 hours of light and 6 hours of dark: a balanced schedule that keeps electricity reasonable.
- 20 hours of light and 4 hours of dark: more daily light, often more growth.
- 24 hours of light: possible, but not always necessary, and some cultivars like a dark period.
Instead of obsessing over the schedule, I focus on daily light amount and intensity, plus heat management.
Autoflower PPFD targets I use as guardrails
Autoflower PPFD targets depend on the plant’s stage and your environment. Autos can handle strong light, but they’re smaller and can be easier to overdrive—especially in hot, dry air.
My autoflower PPFD targets in a well-managed tent:
- Seedling: 200–300 µmol/m²/s
- Early veg: 300–500 µmol/m²/s
- Preflower and early bloom: 500–700 µmol/m²/s
- Mid flower: 700–900 µmol/m²/s if temperature, CO2, and feeding support it
Those autoflower PPFD targets aren’t a trophy. They’re a range I use to prevent problems like leaf tacoing, bleaching, and stalled growth. If you don’t have a meter, use manufacturer maps and plant feedback, but know that a simple meter pays for itself by preventing mistakes.
I’ll say it again because it matters: autoflower PPFD targets should be adjusted to your temperatures and humidity. Intensity without climate control is a recipe for stress.
The autoflower VPD chart approach for steady growth
I don’t treat VPD as a buzzword. I use an autoflower VPD chart as a sanity check. When temperature and humidity are aligned, autos drink and feed predictably. When VPD is off, issues show up as droop, slow growth, or calcium-related symptoms.
A simple autoflower VPD chart mindset I follow (with real-world ranges):
- Seedlings: about 24–26°C with 70–80% RH
- Vegetative: about 24–28°C with 55–70% RH
- Flowering: about 22–26°C with 45–55% RH (lower if buds are very tight)
Those ranges aren’t the only way to do it, but they keep me out of the danger zones where plants stop transpiring or where mold risk spikes.
I also use the autoflower VPD chart as an early warning system. If leaves droop at lights-on every day, I check VPD before I change nutrients.
Watering and feeding without burning small plants
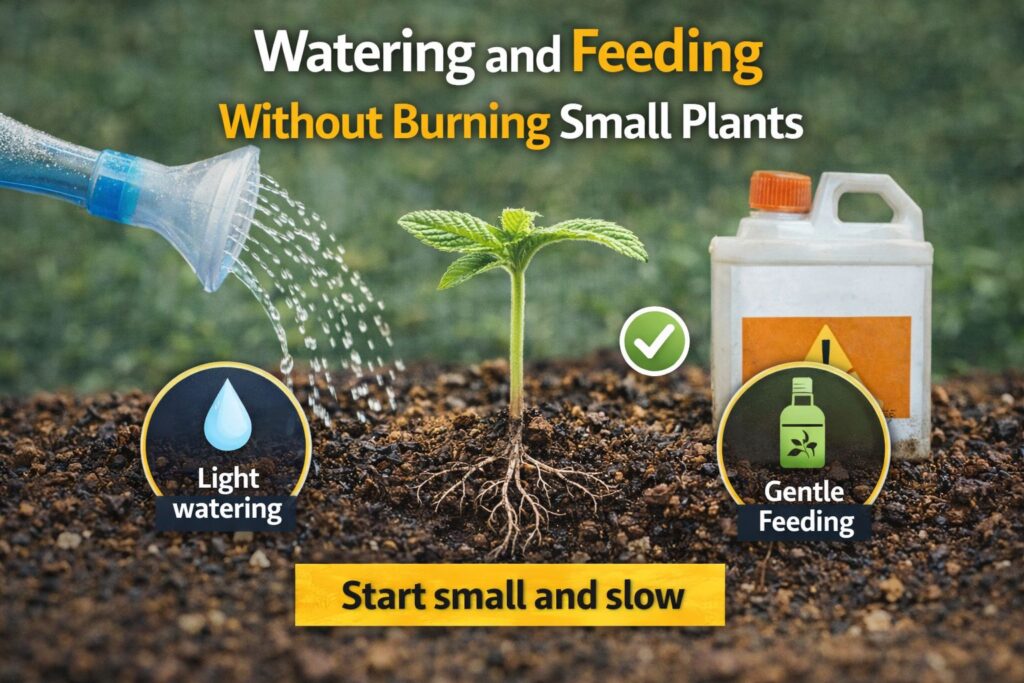
Autoflowers can be light feeders early, then surprisingly hungry later. I avoid “feeding by calendar” and instead watch leaf color, growth speed, and runoff.
Autoflower feeding EC targets that keep me out of trouble
I measure feed strength because it’s easier than guessing. Autoflower feeding EC targets will vary by cultivar and medium, but here are ranges that work for me in most indoor runs:
- Early seedling: 0.4–0.8 EC (or very mild nutrient solution)
- Early vegetative: 0.8–1.2 EC
- Early flowering: 1.2–1.6 EC
- Mid flowering: 1.4–1.8 EC for plants that are actively bulking
- Late flower: I taper down as the plant ripens
Those autoflower feeding EC targets assume you’re also keeping pH in the correct range for your medium and that you’re not letting the root zone swing from bone-dry to soaked. For reference, I generally target pH 5.8–6.2 in coco or hydro, and about 6.2–6.8 in soil. If you use PPM, remember that meters can use different scales, so I stick to EC as the common language.
I’ve seen more autos ruined by “helpful” overfeeding than by underfeeding. If tips burn, back off slightly and check environmental stress before adding more bottles.
Medium choices: soil vs hydro and my default approach
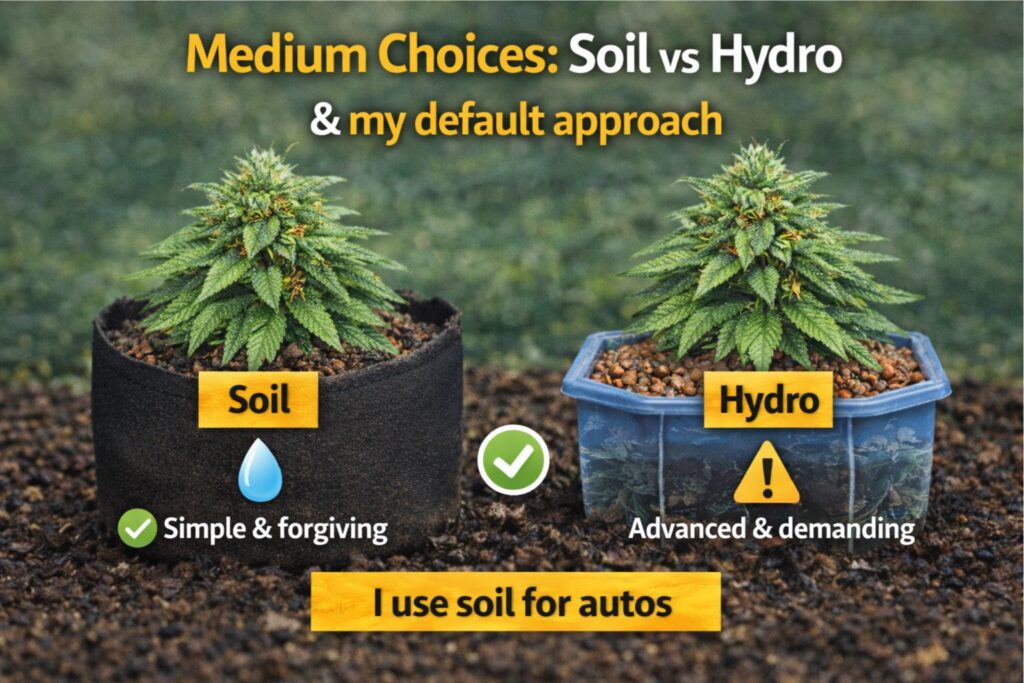
I’ve grown autos in soil, coco, and hydro. Each works. For most people, especially those asking what are autoflower seeds for the first time, a quality soil-based setup is forgiving as long as you don’t drown it.
My autoflower root zone blend for consistent root health
I like building media that holds moisture but still breathes. Here’s an autoflower root zone blend that has treated me well:
- A base of quality potting soil or peat-based mix
- 20–30% aeration (perlite, pumice, or similar)
- A small portion of compost or worm castings for biology
- Optional: buffered coco for structure and moisture balance
I keep the autoflower root zone blend light on “hot” amendments for the first two weeks. Autos don’t need aggressive early feeding if the medium is balanced. If I’m using dry amendments, I top-dress lightly rather than mixing heavy into the entire pot.
I’ll repeat: the autoflower root zone blend should prioritize oxygen in the root zone. Air is the hidden nutrient.
Training: shaping plants without stalling them

Training autos is a game of timing. You can absolutely shape an autoflower, but the window is shorter than with photoperiod weed plants.
Low stress training autoflowers the way I do it
Low stress training autoflowers is my default. I start early, usually once the plant has a few healthy nodes and the stem is flexible.
My low stress training autoflowers routine:
- Anchor the base of the stem gently so the root zone doesn’t twist.
- Bend the main stem sideways to open the canopy.
- Guide secondary branches outward as they grow.
- Re-adjust ties every few days; autos can change quickly in stretch.
The whole point of low stress training autoflowers is to spread light across multiple tops without causing a growth pause. If I see a plant slow down after training, I reduce handling and focus on environmental stability.
Low stress training autoflowers also improves airflow, which is a mold-prevention strategy, not just a yield trick.
Topping, defoliation, and the trade-offs
I top some autos, but only when the plant is vigorous and only early. If I’m uncertain, I don’t top. A topped auto that stalls can finish with less yield than an untrained plant.
Defoliation is similar. I remove leaves only when they are blocking multiple bud sites or trapping humidity in the center. With autos, I’d rather tuck leaves than strip them, especially in the first half of life.
Integrated pest management that works in real grows
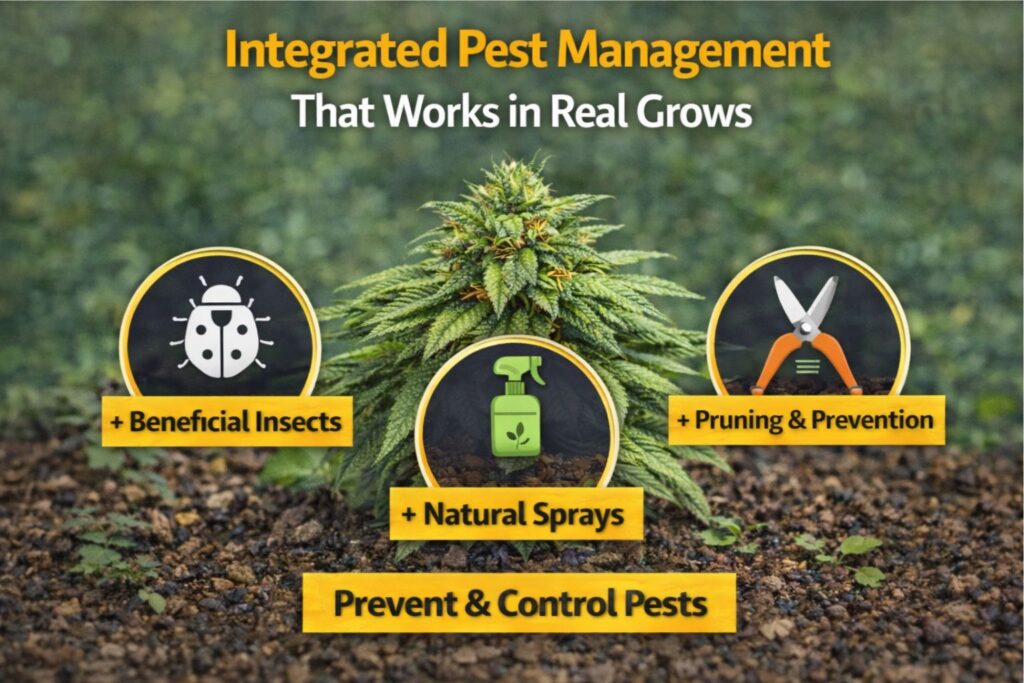
Cannabis attracts pests because it’s a tender, aromatic plant. Outdoor runs bring more pressure; indoor runs bring fewer pests but can still get mites, fungus gnats, and powdery mildew if the environment drifts.
My IPM basics:
- Quarantine any new clones or houseplants away from the grow.
- Keep the floor and corners clean; debris is a pest hotel.
- Use sticky traps early as a monitoring tool.
- Maintain steady airflow under and over the canopy.
- Avoid overwatering to reduce gnat pressure.
In flowering, I’m conservative about sprays. I prefer prevention over “rescue mode,” especially because residue on buds can be unpleasant.
Flowering, finishing, and reading the plant instead of the calendar
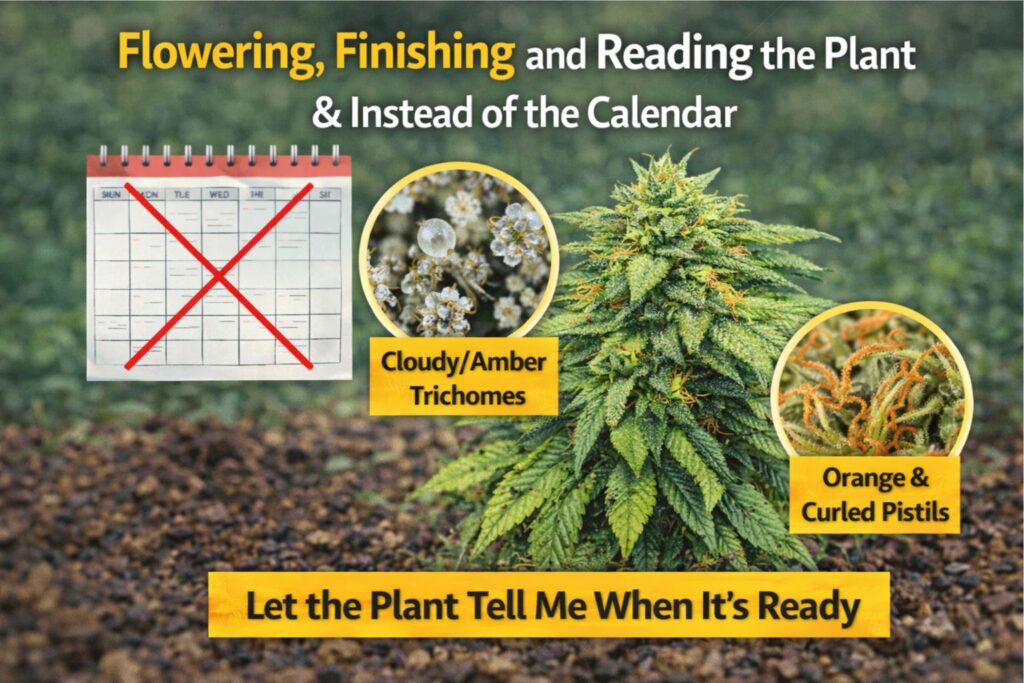
Autoflowers often start flowering while they still look small. That’s normal. The plant will stretch and build structure as buds form, especially in the first few weeks of bloom.
To decide harvest time, I look at:
- Flower structure and aroma development
- Pistil color and recession
- Trichome maturity with a loupe
I avoid harvesting based purely on the breeder’s day count. Two plants from the same pack can finish a week apart. If you’re shopping for short-season autoflower seeds, expect a fast range, not an identical finish time.
Drying and curing for flavor (and why rushed jars taste harsh)
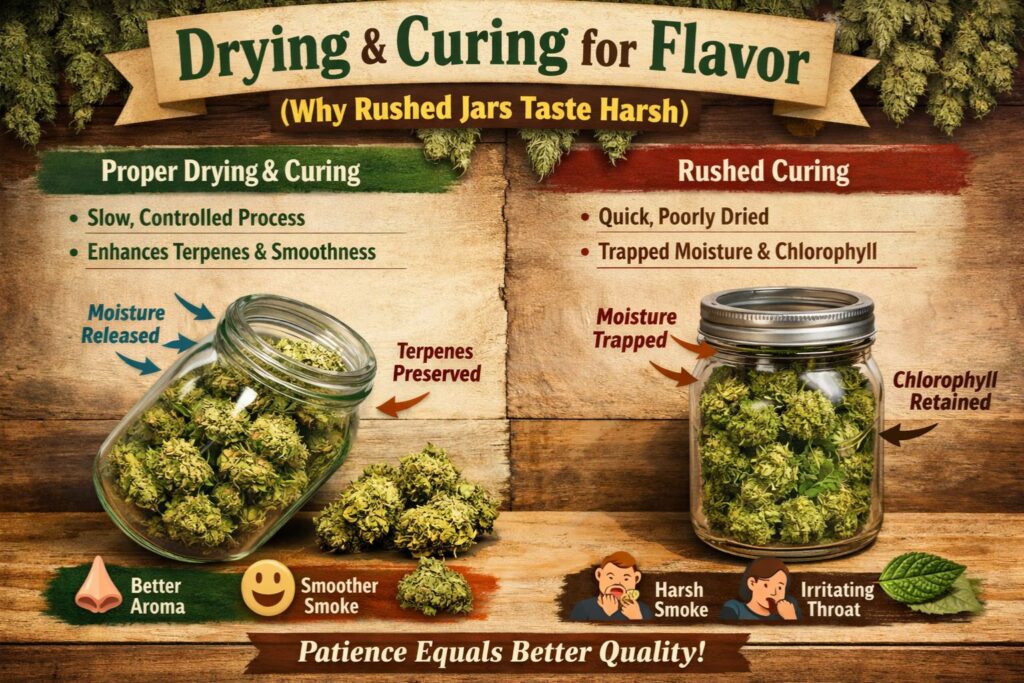
Many growers underestimate post-harvest work. If you nail the grow but rush drying, the final marijuana quality suffers.
The autoflower drying and curing guide I follow
This autoflower drying and curing guide is simple and repeatable:
- Trim style: I prefer a partial wet trim to reduce humidity pockets, then finish trimming after dry.
- Drying conditions: cool, dark, gentle airflow, and stable humidity. In practice, I aim for roughly 18–20°C and 55–60% RH with air moving around the room, not directly blasting the buds.
- Target: slow dry over about 7–14 days depending on bud size and environment.
- Curing: jar the buds when stems snap rather than bend, then burp jars to release moisture.
In my experience, the autoflower drying and curing guide lives or dies by humidity control. Too dry too fast and terpenes flatten. Too wet and you risk mold. A small hygrometer in each jar makes curing less of a guessing game.
I use this autoflower drying and curing guide on weed from both indoor and outdoor runs. The basics don’t change; the only difference is outdoor buds may need extra inspection for dust and pests before hanging.
Autoflower vs photoperiod yield: setting realistic expectations
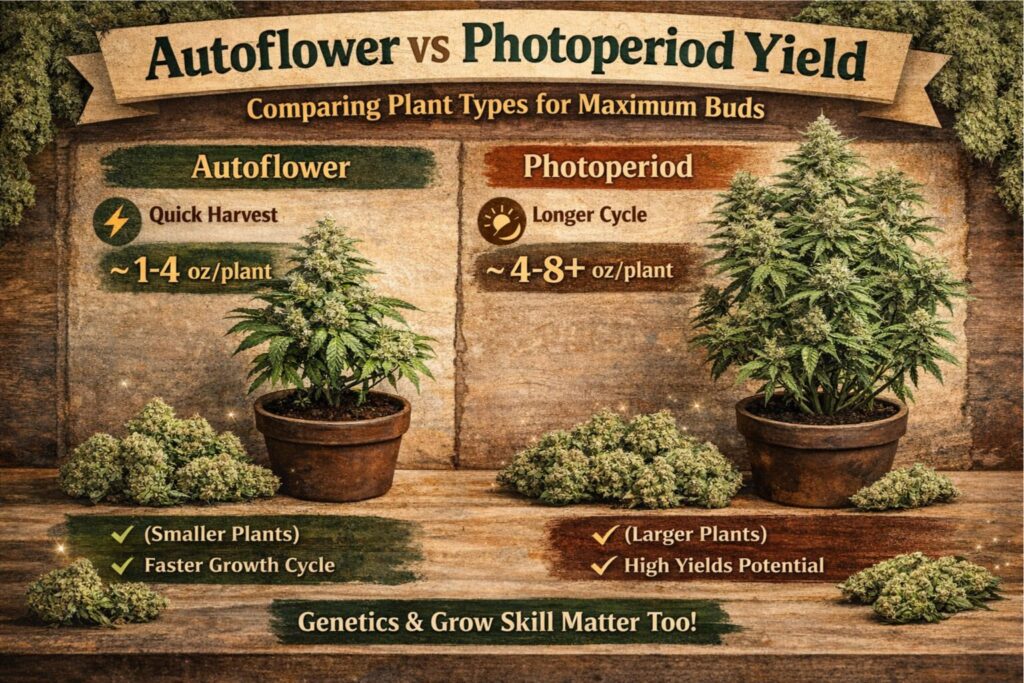
Autoflower vs photoperiod yield is a fair comparison, but it has to be framed correctly. A big photoperiod plant can veg for as long as you allow and can be trained aggressively. Autos have a shorter runway.
Here’s how I think about autoflower vs photoperiod yield:
- Autos are about speed and predictability.
- Photoperiods are about control and maximum size.
- Autos can be highly productive in a tight rotation because you can start them anytime indoors.
- Photoperiods can dominate a tent if you’re willing to veg longer.
In grams per plant, autoflower vs photoperiod yield often favors photoperiods when the grower is experienced and has time. But in grams per month, autos can compete because the cycle is shorter and you can stagger starts.
I’ve run cycles where autoflower vs photoperiod yield was closer than expected because the autos stayed healthy from day one and finished clean.
What to look for when buying seeds online
If you’re ready after reading what are autoflower seeds, the next question is usually where to buy and what to trust. I won’t give legal advice about your region’s grow laws, but I will say this: do your homework on genetics, shipping practices, and customer support.
When I buy cannabis seeds online, I look for:
- Clear breeder information and realistic time ranges
- Germination policies and support
- Storage and packaging details (seeds should be protected from heat and crushing)
- Shipping options that match my climate and season
- Reviews that talk about growth behavior, not just effects
Autoflowering seeds are often sold as feminized seeds, and that’s usually what home growers want. If you’re growing outdoors in a short season, short-season autoflower seeds can be the simplest path to a finished crop.
Frequently asked questions about autoflowering cannabis
What are autoflower seeds good for in a small tent?
What are autoflower seeds good for? In my grows, they’re ideal for small tents because they stay compact, finish fast, and don’t demand a strict flowering schedule. With good airflow and the right light intensity, you can run a steady rotation of cannabis without long downtime.
Can I run autos and photoperiod plants in the same room?
Yes, I’ve done it. Autos can flower under long days that keep photoperiods in vegetative growth. The challenge is dialing light intensity and feed so both types stay happy. This is where autoflower PPFD targets and an autoflower VPD chart help you keep conditions stable.
Do autoflowers need different nutrients than regular weed plants?
They don’t need magical nutrients, but they often prefer lighter feeding early and steady minerals later. I keep an eye on autoflower feeding EC targets to avoid burning small roots. If a plant is pale and growing fast, I increase gently; if tips burn, I back off.
Is soil or hydro better for autos?
Both work. For most people, soil is more forgiving. If you’re experienced, coco or hydro can push fast growth with precise control. Regardless of medium, start with a solid plan, and treat the autoflower life cycle timeline as your guide.
How do I avoid stunting an autoflower?
Avoiding stress is the name of the game. Keep the root zone oxygenated, keep watering consistent, and don’t over-handle the plant. Low stress training autoflowers early is safer than heavy pruning later. Also, take autoflower seedling stretch prevention seriously so the plant doesn’t start weak.
Are autoflowers always lower potency?
No. Modern breeding has improved a lot. Potency still depends on genetics, environment, and harvest timing. The bigger difference is often yield and plant size, not whether the weed can be strong.
How long do autoflowers take from seed to harvest?
Most indoor runs I’ve done fall into a 10–12 week window from sprout to harvest, but there’s variation. Use an autoflower life cycle timeline as a planning tool and watch the plant to decide when it’s truly finished.
What should I prioritize if I want quality over speed?
Keep the environment steady, avoid stress, and don’t rush drying. Follow a reliable autoflower drying and curing guide and keep humidity controlled so terpenes stay intact.
How do I choose between fast autos and bigger yielding options?
Think about your goals. If you want short-season autoflower seeds for a quick turnaround, pick proven quick finishers. If you want bigger plants, choose autos bred for size and be prepared to manage light, training, and feeding. When people debate autoflower vs photoperiod yield, the right answer is the one that fits your time, space, and skill.
My quick checklists for an autoflower run
Before you germinate
- Choose a container size that matches the plant’s expected size.
- Decide your medium and prep it in advance (including the autoflower root zone blend if you build your own).
- Plan your environment: temperature, humidity, airflow, and light intensity.
- Set expectations using an autoflower life cycle timeline.
During weeks 1–3
- Focus on root health and autoflower seedling stretch prevention.
- Ramp light gradually and stay within sensible autoflower PPFD targets.
- Keep conditions aligned using an autoflower VPD chart approach.
- Begin low stress training autoflowers only if the plant is vigorous.
During flowering
- Increase airflow and reduce humidity to prevent mold.
- Adjust feeding based on plant response and autoflower feeding EC targets.
- Support branches as buds gain weight.
At harvest and post-harvest
- Harvest when trichomes show maturity, not when a calendar says so.
- Follow a consistent autoflower drying and curing guide.
- Store buds cool and dark to preserve aroma.
If you came here asking what are autoflower seeds, I hope this answered the question in a way you can actually use in the grow room. Autoflowers can be simple, but they reward precision. When I treat them like a short, focused project—good roots, stable environment, gentle training, and patient curing—the results are consistently enjoyable cannabis that smokes clean, smells rich, and teaches me something every run.