Table of Contents
Tips for Growing Autoflowers in 3-Gallon Pots
Growing autoflowering cannabis in 3-gallon pots offers a balanced approach to plant development, allowing for portability, space efficiency, and effective nutrient control. However, maximizing your yield and plant health in this limited root zone requires specific strategies and considerations.
Understanding Autoflowers and 3-Gallon Pots
Autoflowering strains are known for their fast life cycle and photoperiod independence. Unlike regular or photoperiod cannabis, they switch to flowering based on age usually within 2–4 weeks of germination regardless of light cycles. This makes them ideal for small-scale or time-sensitive grows.
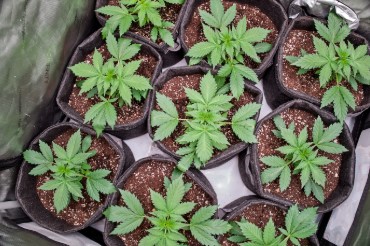
3-gallon pots provide approximately 11–12 liters of soil volume. While smaller than 5-gallon pots, they are sufficient for most autoflowering strains if managed correctly. The smaller root space limits the plant’s maximum size, but it can still yield efficiently with optimal conditions.
Tip 1: Choose Compact, Resilient Genetics
Autoflowers vary significantly in size and vigor. For 3-gallon pots, compact, bushy phenotypes with minimal stretch are ideal. Look for strains known to perform well in small containers, such as:
- Northern Lights Auto
- Critical Mass Auto
- Blueberry Auto
- Lowryder-based genetics
Indica-dominant or hybrid strains generally stay shorter and produce dense colas, making them more suited to smaller pots.
Tip 2: Use High-Quality Soil or Soilless Mix
Root space is limited in 3-gallon pots, so your medium must support vigorous early development. Look for light, aerated, and nutrient-rich mixes. Recommended characteristics include:

- pH range of 6.0–6.5 (soil) or 5.8–6.2 (soilless)
- High porosity and drainage (e.g., 20–30% perlite or coco coir)
- Pre-amended with organic nutrients (for organic growers) or buffered if using coco
For hydroponic-style autoflower cultivation, 3-gallon fabric pots filled with coco/perlite blends offer excellent oxygenation and root expansion.
Tip 3: Optimize Container Type
The pot material influences root zone conditions:
- Fabric pots (e.g., Smart Pots) encourage air pruning and better drainage, preventing root circling and overwatering. This enhances lateral root growth, critical in small volumes.
- Plastic pots retain moisture longer but can cause overwatering or poor aeration if not properly managed.
Fabric pots are generally preferred for autoflowers in 3-gallon sizes due to their oxygen permeability.
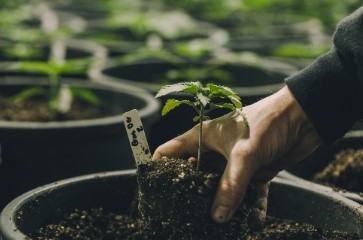
Tip 4: Germinate and Transplant Carefully (or Start Directly)
Autoflowers have a limited vegetative window, so early stress can severely affect yield. Transplant shock is a common cause of stunted growth in autoflowers.
Best practice:
- Germinate in a small starter plug (like Rapid Rooter) and transplant into the final 3-gallon container when the taproot appears.
- Or, sow seeds directly into the final pot to avoid transplanting altogether.
If you do transplant, handle the root ball delicately and move it during early seedling stage (3–7 days post-sprout).
Tip 5: Lighting Strategy
Since autoflowers don’t rely on photoperiod, they thrive under 18/6, 20/4, or even 24/0 light cycles. Each has its pros:
- 18/6: More natural cycle, saves energy, promotes root health via dark period.
- 20/4: Popular compromise, offers maximum photosynthesis with a rest phase.
- 24/0: Maximizes light intake but may stress sensitive cultivars long-term.
Choose a full-spectrum LED or high-output fluorescent light to penetrate canopy and maintain uniform growth. Autoflowers in 3-gallon pots usually remain compact, so lights should be kept close (12–24 inches) and adjusted based on DLI and PAR output.
Tip 6: Avoid Overfeeding and Overwatering
In smaller pots, nutrient and water management is crucial. Autoflowers have modest nutritional needs, especially during early growth. Overfeeding can cause nutrient lockout and stunting.
Watering tips:
- When the soil’s top inch feels dry, water it.
- Ensure runoff (10–20%) to prevent salt buildup if using bottled nutrients.
- Use pH-balanced water every time.
Feeding tips:
- Start with 25–50% of manufacturer-recommended doses for autos.
- Follow a light feed schedule: low nitrogen in early flower, more phosphorus/potassium in late flower.
- Use slow-release or organic nutrients for a low-maintenance grow.
Tip 7: Low-Stress Training (LST) Is Ideal
High-stress training (topping, fimming) can delay or damage autoflowers due to their fixed timeline. However, low-stress training (LST) techniques such as bending the main stem and securing branches early in veg are highly effective.
Benefits of LST in 3-gallon pots:
- Increases light penetration
- Promotes multiple colas
- Keeps height manageable
- Encourages horizontal growth to use space efficiently
Start LST around day 10–15 from germination, and stop by the second week of flowering to avoid stress during bloom.
Tip 8: Monitor Environment Closely
Autoflowers are sensitive to environmental fluctuations. For optimal growth in small pots:

- Temperature: 70–80°F (21–27°C)
- Humidity:
- Veg: 50–70% RH
- Flower: 40–50% RH (lower near harvest to prevent bud rot)
Air circulation is especially important in compact grows. Use clip-on fans or oscillating fans to prevent mold and maintain healthy transpiration.
If growing indoors in a tent, ensure a minimum of one complete air exchange every 1–2 minutes.
Tip 9: Timing and Life Cycle Management
Most autoflowers finish in 8–12 weeks from seed. In 3-gallon pots, aim for early flowering strains (~9–10 weeks) to avoid root-bound issues in late bloom.
Track your plant’s growth stages:
- Week 1–2: Seedling stage; minimize stress, don’t overwater.
- Week 3–5: Veg phase; introduce LST and light nutrients.
- Week 5–10+: Flowering; increase bloom nutrients, reduce nitrogen.
Use a journal or calendar to track feeding, watering, and changes. Observe trichomes near harvest for ripeness (milky/amber balance).
Tip 10: Flush Before Harvest
Autoflowers in small pots can accumulate salts quickly, especially with synthetic nutrients. To ensure clean-tasting buds:
- Flush with pH-balanced water 7–10 days before harvest.
- Watch for yellowing leaves as the plant uses up stored nutrients.
Flushing is less critical with organic feeding, but still beneficial for improving flavor and burn quality.
Bonus Tips
Companion Planting or Mulching
Adding living mulch or top-dressing with organic matter (e.g., worm castings, straw) can help retain soil moisture and support microbial life in 3-gallon pots.
Use Root Enhancers
Products like mycorrhizal fungi or beneficial bacteria (e.g., Trichoderma) can help maximize nutrient uptake in limited root space.
Elevate Pots
Keep pots off cold surfaces using risers or grids. This helps maintain consistent root temperature and prevents waterlogging.
Conclusion
Growing autoflowers in 3-gallon pots can be highly productive when approached with precision and planning. By selecting the right genetics, managing your substrate and environment carefully, and focusing on gentle training and feeding practices, you can achieve dense, high-quality buds in a small footprint. While the smaller pot size limits overall biomass, it also encourages faster turnover, perfect for controlled environments with several harvests annually.
By following these practices, even beginner growers can find great success with autoflowers in 3-gallon containers, enjoying efficient yields, flavorful buds, and a streamlined growing experience.