The Cannabis Life Cycle: A Detailed Exploration
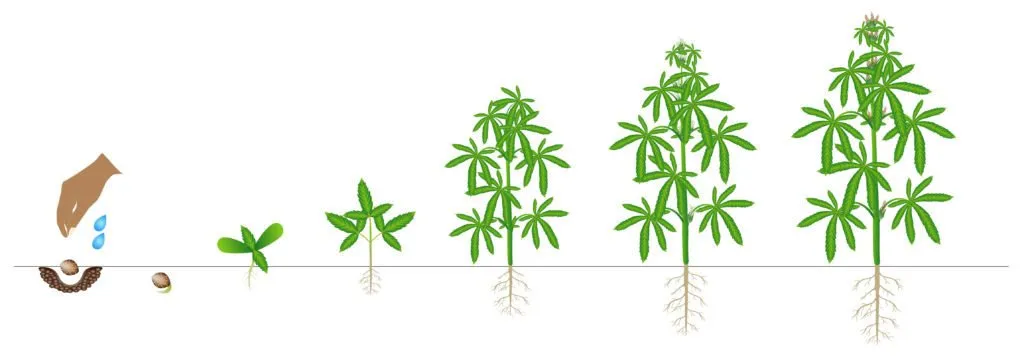
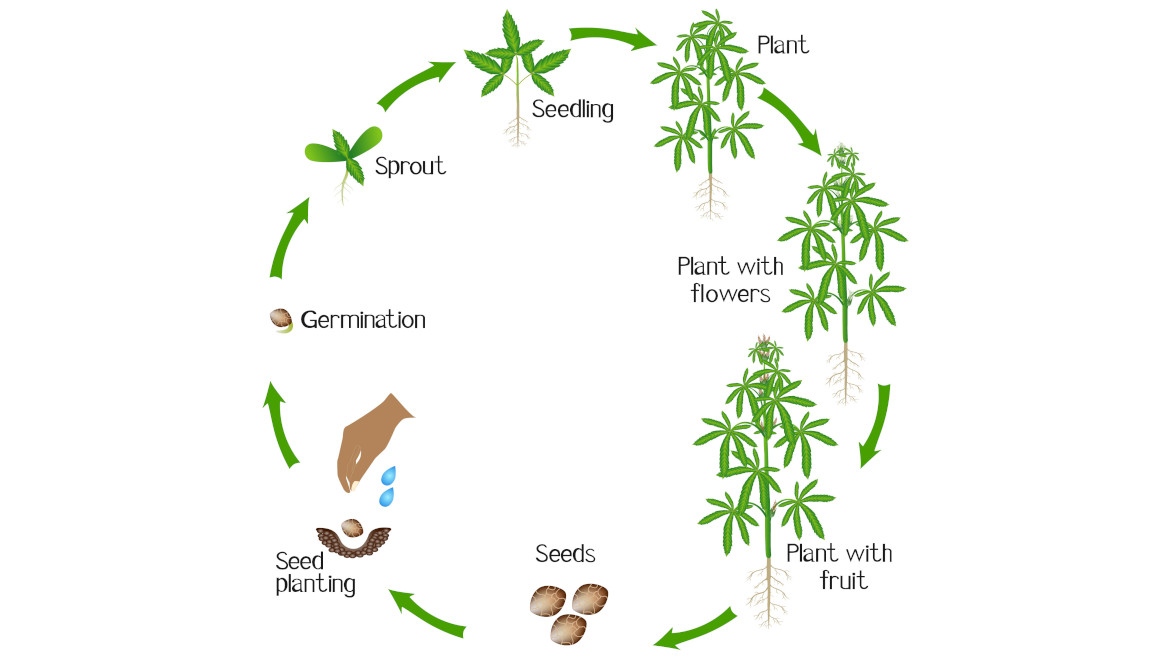
The cannabis plant, known scientifically as Cannabis sativa, has a complex and fascinating life cycle. Understanding this cycle is crucial for cultivators aiming to maximize yield and quality, whether growing for recreational, medicinal, or industrial purposes. The life cycle of cannabis can be broken down into several key stages: germination, seedling, vegetative, pre-flowering, flowering, and harvest. Each stage has distinct characteristics and requirements, and mastering these can lead to successful cultivation. Here, we will delve into each stage in detail.
Germination: The First Step in the Cannabis Life Cycle
Germination is the initial and one of the most crucial stages in the cannabis life cycle. It marks the beginning of the plant’s journey from a dormant seed to a vibrant, growing plant. Successful germination sets the stage for healthy growth and development throughout the subsequent stages. This section will explore the germination process in detail, covering the biology of germination, environmental requirements, different germination methods, common challenges, and troubleshooting tips.
The Biology of Germination
The process through which a seed emerges from dormancy and starts to develop into a seedling is known as germination. This process involves several key biological steps:
- Imbibition: Water is absorbed by the seed, which causes it to grow and split open its hard outer shell. This is the initial observable indication of germination.
- Activation of Enzymes: Water absorption activates enzymes within the seed that begin converting stored starches into sugars, providing the energy needed for growth.
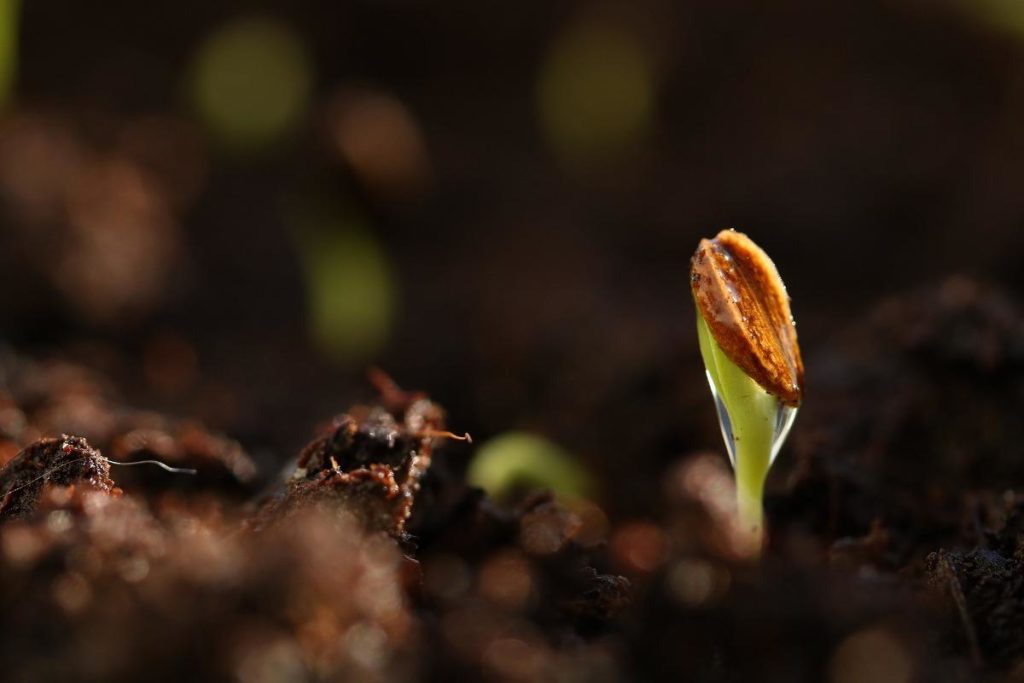
- Emergence of the Radicle: The radicle, or embryonic root, emerges from the seed. This is the first root that anchors the plant and starts absorbing nutrients and water from the growing medium.
- Development of the Hypocotyl and Cotyledons: The hypocotyl, the stem of the seedling, pushes upward, carrying the cotyledons (seed leaves) above the soil surface. The cotyledons open and start the process of photosynthesis, which provides energy for further growth.
Environmental Requirements for Germination
Several environmental factors are crucial for successful germination:
- Moisture: Seeds require a consistent supply of moisture to initiate germination. Although the growing medium should be moist, it shouldn’t be soggy because too much moisture can cause rot.
- Temperature: The ideal temperature for cannabis seed germination is between 70-90°F (21-32°C). Regular warmth facilitates faster germination.
- Oxygen: Seeds need access to oxygen for metabolic processes during germination. Ensure the growing medium is well-aerated.
- Darkness: While seeds do not require light to germinate, they should be kept in a dark or dimly lit environment until they sprout. Light exposure can sometimes inhibit the germination of some strains.
Germination Methods
There are several popular methods for germinating cannabis seeds, each with its own advantages and considerations:
- Paper Towel Method:
- Steps:
- In between two moist paper towels, scatter seeds.
- Put the paper towels in a plastic bag or between two plates to maintain moisture.
- Keep the setup in a warm, dark place.
- Check daily for signs of germination.
- Advantages: Easy to monitor, minimal cost, and commonly used.
- Considerations: Ensure paper towels remain moist but not soaked. Excess water can cause mold or rot.
- Steps:
- Direct Soil Planting:
- Steps:
- Plant seeds about 1/2 inch deep in a moist growing medium.
- Lightly cover the seeds with soil.
- Keep the soil consistently moist.
- Place the pots in a warm, dark place until seedlings emerge.
- Advantages: Less handling of seeds, reduces transplant shock.
- Considerations: Monitoring moisture levels in the soil is crucial to prevent drying out or waterlogging.
- Steps:
- Water Glass Method:
- Steps:
- Put some seeds into a glass with purified water.
- Soak seeds for 12-24 hours until they crack open.
- Transfer seeds to a growing medium or paper towel for further development.
- Advantages: Simple and effective for seeds that require more hydration to break dormancy.
- Considerations: Do not leave seeds in water for too long to avoid drowning.
- Steps:
- Rapid Rooters or Seedling Plugs:
- Steps:
- Insert seeds into pre-moistened rapid rooters or seedling plugs.
- Place plugs in a humidity dome or propagator.
- Keep the environment warm and moist.
- Advantages: Easy to use, provides a stable environment for seedlings.
- Considerations: Monitor humidity levels to prevent mold growth.
- Steps:
Common Germination Challenges and Troubleshooting
While germination is generally straightforward, several common issues can arise. Here’s how to address them:
- Seeds Not Germinating:
- Possible Causes: Old or poor-quality seeds, incorrect moisture levels, inappropriate temperature, or lack of oxygen.
- Solutions: Use fresh, high-quality seeds, maintain optimal moisture and temperature, and ensure good aeration.
- Mold or Fungus:
- Possible Causes: Excess moisture, poor ventilation, or contaminated materials.
- Solutions: Maintain appropriate moisture levels, ensure good air circulation, and use sterile equipment.
- Damping-Off Disease:
- Possible Causes: Fungal infection due to overwatering or high humidity.
- Solutions: Avoid overwatering, use well-draining soil, and ensure adequate ventilation.
- Seeds Cracking but Not Sprouting:
- Possible Causes: Insufficient moisture or temperature fluctuations.
- Solutions: Ensure consistent moisture and stable temperatures.
- Seedlings Stretching:
- Possible Causes: Insufficient light during the early seedling stage.
- Solutions: Provide adequate lighting once the seeds have sprouted to prevent stretching.
The Seedling Stage: Establishing a Strong Foundation
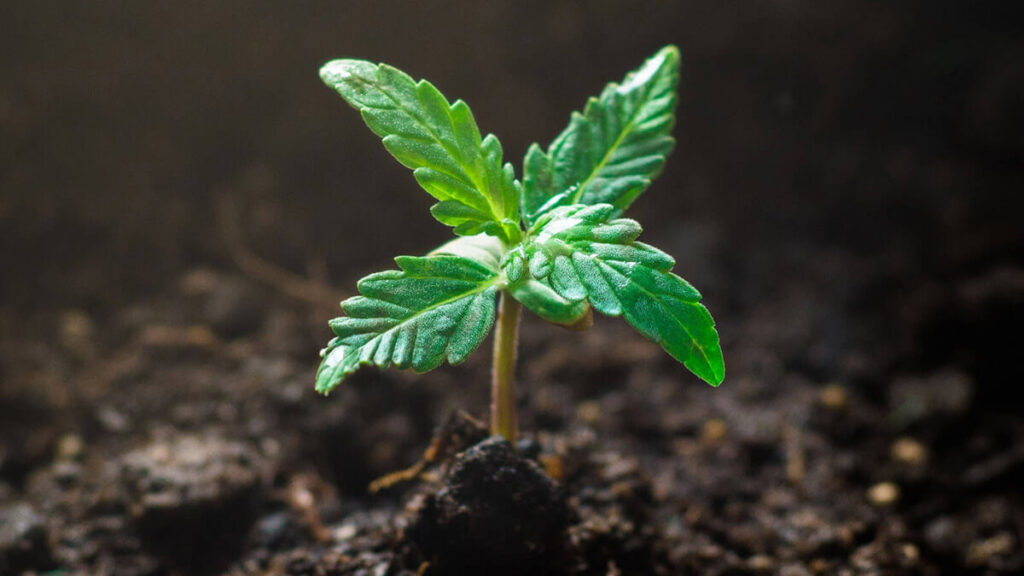
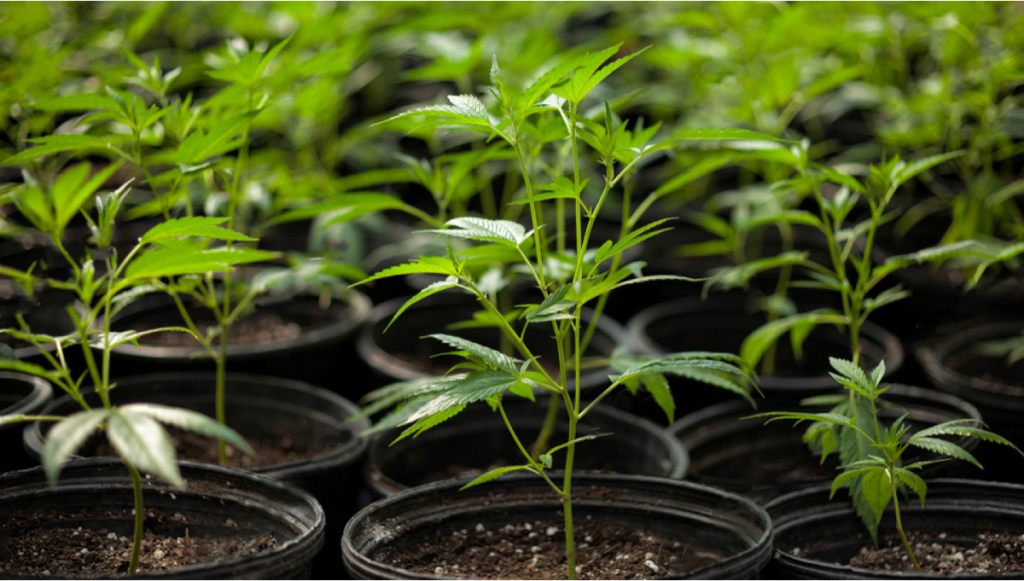
The seedling stage is a critical period in the cannabis life cycle, following successful germination. During this phase, the plant transitions from a tiny sprout to a robust seedling, setting the groundwork for vigorous vegetative growth. This stage typically lasts for 2 to 3 weeks and involves the development of the plant’s first true leaves, the establishment of a healthy root system, and the preparation for the vegetative stage. Understanding the needs and challenges of cannabis seedlings is essential for cultivators aiming to optimize plant health and productivity.
Characteristics of the Seedling Stage
- Leaf Development: The seedling starts with the cotyledons (seed leaves) which are round and smooth. Shortly after, the first set of true leaves emerges, characterized by their serrated edges and distinctive cannabis leaf shape.
- Root Development: The root system begins to develop rapidly, anchoring the plant and absorbing water and nutrients from the growing medium.
- Growth Rate: While growth is relatively slow compared to later stages, seedlings focus on establishing their foundational structure.
Environmental Requirements for Seedlings
- Light:
- Intensity: Seedlings require sufficient light to support photosynthesis but are sensitive to intense light. Fluorescent lights or LED grow lights with lower intensity are ideal.
- Duration: Provide 18-24 hours of light per day. A longer light period encourages healthy growth.
- Distance: To avoid light burn, keep the seedlings a safe distance from the light source. Typically, 2-4 inches for fluorescent lights and 12-24 inches for LED lights.
- Humidity:
- Seedlings thrive in a humid environment. Maintain humidity levels around 60-70%.
- Maintain a moist atmosphere for the seedlings by misting them frequently or using a humidity dome.
- Temperature:
- Optimal temperatures for seedlings are between 68-77°F (20-25°C).
- Avoid extreme temperature fluctuations to prevent stress on the young plants.
- Watering:
- Water seedlings carefully, ensuring the soil remains moist but not waterlogged.
- It’s typical to overwater; instead, let the top layer of soil dry out a little bit in between applications.
- Use a spray bottle or a watering can with a fine spout to avoid disturbing the delicate roots.
- Nutrients:
- Seedlings require minimal nutrients. The cotyledons provide sufficient nutrients during the early days.
- If using a nutrient solution, start with a very diluted mix (about 1/4 strength of the recommended dose) to avoid nutrient burn.
- Monitor seedlings for signs of nutrient deficiency or toxicity and adjust feeding accordingly.
Container and Growing Medium
- Containers:
- Use small containers or seedling trays to start seedlings. This makes it easier to manage water and light.
- Make sure there is sufficient drainage in the containers to avoid waterlogging.
- Growing Medium:
- A light, well-aerated growing medium is ideal for seedlings. Seed-starting mixes or a mix of peat moss, perlite, and vermiculite work well.
- Steer clear of thick soils as they might compress and impede root growth.
Common Issues and Troubleshooting
- Damping-Off Disease:
- Symptoms: Seedlings wilt and die suddenly due to fungal infection.
- Prevention: Ensure good air circulation, avoid overwatering, and use sterile growing mediums and containers.
- Stretching:
- Symptoms: Seedlings become tall and spindly with long stems.
- Causes: Insufficient light or lights placed too far from the seedlings.
- Solutions: Increase light intensity or move lights closer to the seedlings. Use reflective surfaces to maximize light exposure.
- Yellowing Leaves:
- Symptoms: Cotyledons or true leaves turn yellow.
- Causes: Overwatering, nutrient deficiency, or pH imbalance.
- Solutions: Adjust watering practices, provide a light nutrient feed if necessary, and check the pH of the growing medium.
- Slow Growth:
- Causes: Suboptimal environmental conditions, such as low temperatures, insufficient light, or poor soil quality.
- Solutions: Ensure optimal temperature, adequate light, and a well-draining growing medium.
- Leaf Burn:
- Symptoms: Brown or crispy edges on leaves.
- Causes: Excessive light intensity or nutrient burn.
- Solutions: Adjust the light distance or intensity, and dilute nutrient solutions.
The Vegetative Stage: Vigorous Growth and Development
The vegetative stage is a critical phase in the cannabis life cycle, marked by rapid growth and structural development. During this stage, the plant focuses on building a strong framework of stems, leaves, and roots, which will support the production of buds during the flowering stage. The vegetative stage can last anywhere from 3 to 16 weeks, depending on the strain and the grower’s goals. This stage is characterized by high metabolic activity, substantial nutrient uptake, and the formation of the plant’s basic structure.
Characteristics of the Vegetative Stage
- Rapid Growth: The plant’s growth rate accelerates significantly. It produces more leaves and branches, and the root system expands rapidly.
- Leaf Development: Large, fan-like leaves develop, which are crucial for photosynthesis. The increased leaf area allows the plant to absorb more light and convert it into energy.
- Stem Strengthening: Stems thicken and become sturdier to support the weight of the plant and, eventually, the buds.
- Branch Formation: Lateral branches develop, increasing the plant’s overall size and potential bud sites.
Environmental Requirements for the Vegetative Stage
- Light:
- Intensity: Strong light is essential for vigorous vegetative growth. LED grow lights, metal halide (MH) lamps, or high-output fluorescent lights are ideal.
- Duration: Provide 18-24 hours of light per day to keep the plant in the vegetative stage. The longer the light period, the faster the growth.
- Position: Maintain an appropriate distance between the light source and the plant to avoid light burn while ensuring adequate light penetration.
- Humidity:
- Maintain humidity levels between 40-70%. Higher humidity supports better transpiration and nutrient uptake.
- Use a humidifier or dehumidifier to control the humidity as needed.
- Temperature:
- Optimal temperatures for the vegetative stage are between 70-85°F (21-29°C) during the day and slightly cooler at night.
- Avoid temperature fluctuations and extremes to prevent stress.
- Watering:
- To avoid root rot, give the plants plenty of water, but let the top layer of soil dry out in between applications.
- To prevent waterlogging, make sure the growing medium has adequate drainage.
- Nutrients:
- Increase nutrient levels during the vegetative stage, focusing on nitrogen to support leafy growth.
- Use a balanced nutrient mix with an N-P-K (nitrogen-phosphorus-potassium) ratio that favors nitrogen, such as 3-1-2 or 4-2-3.
- Keep an eye out for any indications of nutrient excess or deficiency in plants and modify feeding as necessary.
Training Techniques to Enhance Vegetative Growth
- Topping:
- Cut the main stem above a node to encourage the growth of multiple colas (main flowering sites).
- Promotes a bushier plant with more bud sites.
- LST (Low-Stress Training):
- To produce a uniform canopy, bend and tie down branches.
- Maximizes light exposure to all parts of the plant and increases yields.
- FIMing:
- Similar to topping but involves removing a portion of the new growth tip.
- Results in multiple new growth tips and a bushier plant.
- Super Cropping:
- Gently crush the inner tissue of the stems without breaking the outer skin.
- Strengthens the plant and increases nutrient uptake.
- SCROG (Screen of Green):
- Use a screen or net to train plants to grow horizontally.
- Ensures even light distribution and maximizes space.
Common Issues and Troubleshooting
- Nutrient Deficiencies:
- Symptoms: Yellowing leaves, stunted growth, and other visual signs.
- Solutions: Determine the precise shortage (nitrogen, phosphorus, potassium, etc.) and modify the nutrient mix in accordance with it.
- Overwatering:
- Symptoms: Wilting, yellowing leaves, and root rot.
- Solutions: Allow the soil to dry out between waterings and improve drainage.
- Pest Infestation:
- Symptoms: Visible pests (e.g., spider mites, aphids) or signs of damage (e.g., holes in leaves, webbing).
- Solutions: Inspect plants regularly, use organic pesticides or beneficial insects, and maintain a clean growing environment.
- Light Burn:
- Symptoms: Bleached or scorched leaves, especially at the top of the plant.
- Solutions: Adjust the distance between the light source and the plant and ensure adequate ventilation.
- Heat Stress:
- Symptoms: Leaf curling, browning edges, and overall wilting.
- Solutions: Maintain optimal temperature ranges and improve airflow and cooling in the grow area.
The Pre-Flowering Stage: The Transition to Reproduction
Overview:
Pre-flowering is the transitional phase between the vegetative and flowering stages. It typically lasts 1 to 2 weeks and is characterized by the plant’s development of pre-flowers, which indicate its sex.
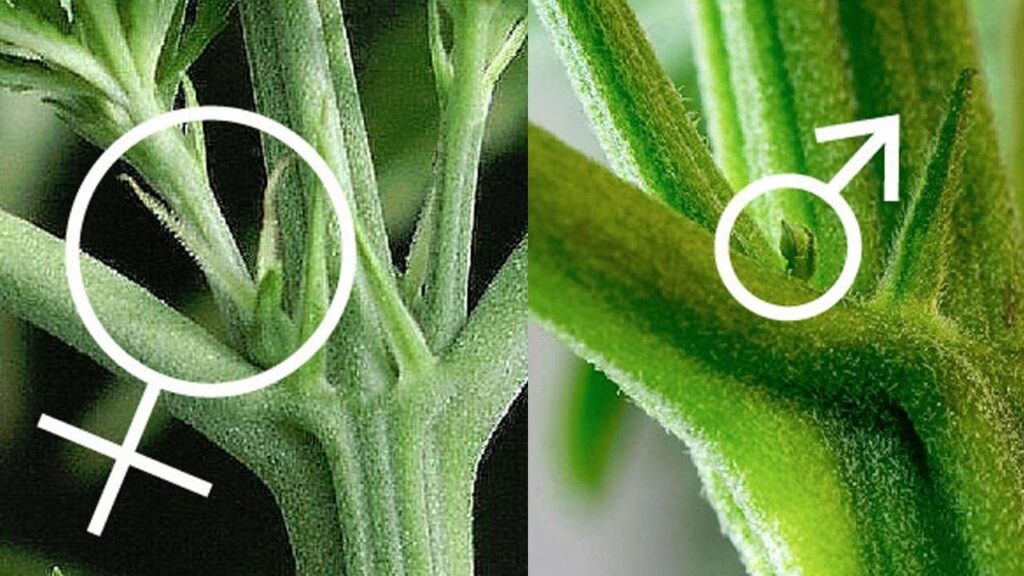
Identifying Sex:
- Male Plants: Produce small, pollen sacs (pre-flowers) that resemble tiny balls.
- Female Plants: Produce pistils, which look like tiny white hairs, emerging from pre-flowers.
- Hermaphrodites: Plants that exhibit both male and female traits. Remove hermaphrodites to prevent pollination.
Requirements:
- Light: Maintain the same light schedule as the vegetative stage (18-24 hours of light per day).
- Humidity: Reduce humidity levels slightly to around 40-60%.
- Temperature: Maintain temperatures between 70-85°F (21-29°C).
- Watering: Continue with regular watering practices, ensuring the soil remains moist but not waterlogged.
- Nutrients: Transition to a balanced nutrient mix with a focus on potassium and phosphorus to prepare for flowering.
The Flowering Stage: Producing Resinous Buds
Overview:
The development of buds on cannabis plants occurs during the blooming period. This stage can last between 6 to 10 weeks, depending on the strain. It’s divided into early, mid, and late flowering phases, each with specific requirements.
Early Flowering (Weeks 1-3):
- Characteristics: Buds begin to form, and plants may stretch significantly.
- Light: Switch to a 12/12 light schedule (12 hours of light, 12 hours of darkness) to induce flowering.
- Humidity: Maintain humidity levels around 40-50%.
- Temperature: Keep temperatures between 65-80°F (18-26°C).
- Nutrients: Increase phosphorus and potassium levels, reduce nitrogen.
Mid Flowering (Weeks 4-6):
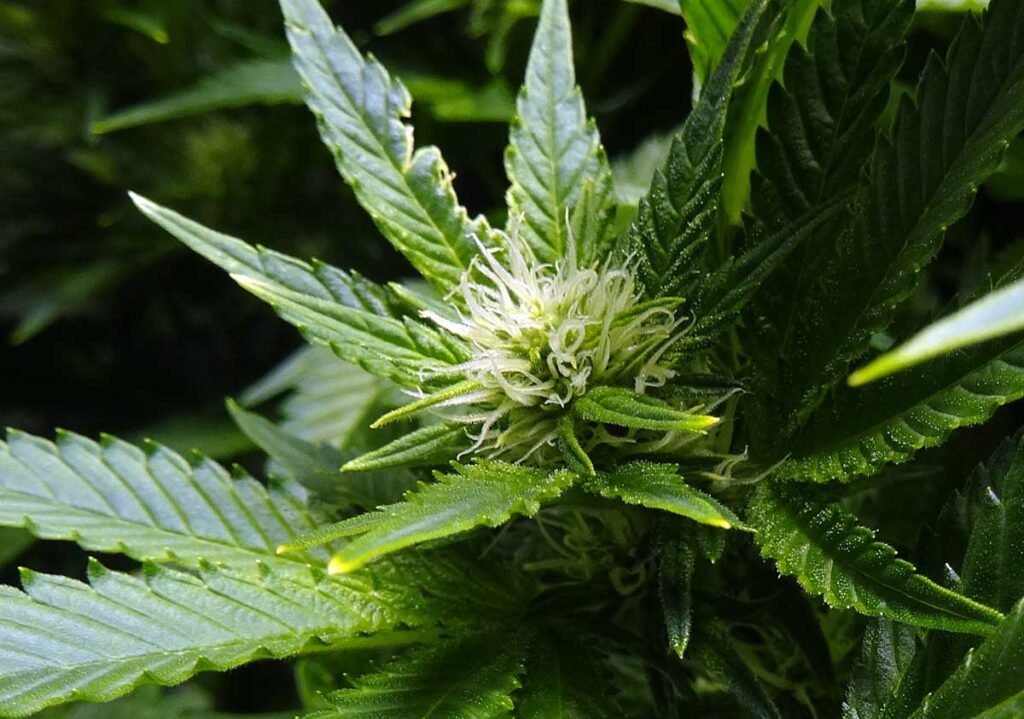
- Characteristics: Buds thicken, trichomes develop, and pistils change color.
- Light: Continue with the 12/12 light schedule.
- Humidity: Lower humidity to around 40-50% to prevent mold and mildew.
- Temperature: Maintain temperatures between 65-80°F (18-26°C).
- Nutrients: Maintain high phosphorus and potassium levels.
Late Flowering (Weeks 7-10):
- Characteristics: Buds reach their maximum size, trichomes mature, and pistils darken.
- Light: Maintain the 12/12 light schedule.
- Humidity: Reduce humidity to 30-40% to prevent bud rot.
- Temperature: Keep temperatures between 65-80°F (18-26°C).
- Nutrients: Flush the plants with pure water to remove any residual nutrients for the last 1-2 weeks before harvest.
Signs of Readiness for Harvest:
- Trichome Color: Trichomes change from clear to milky white and then to amber. A mix of milky and amber trichomes indicates peak potency.
- Pistil Color: Most pistils have darkened and curled inwards.
- Bud Density: Buds feel dense and sticky to the touch.
Harvesting Cannabis: Bringing the Growth Cycle to Fruition
Overview:
Harvesting cannabis involves cutting down the plants and preparing them for drying and curing. Timing is crucial to ensure optimal potency and flavor.
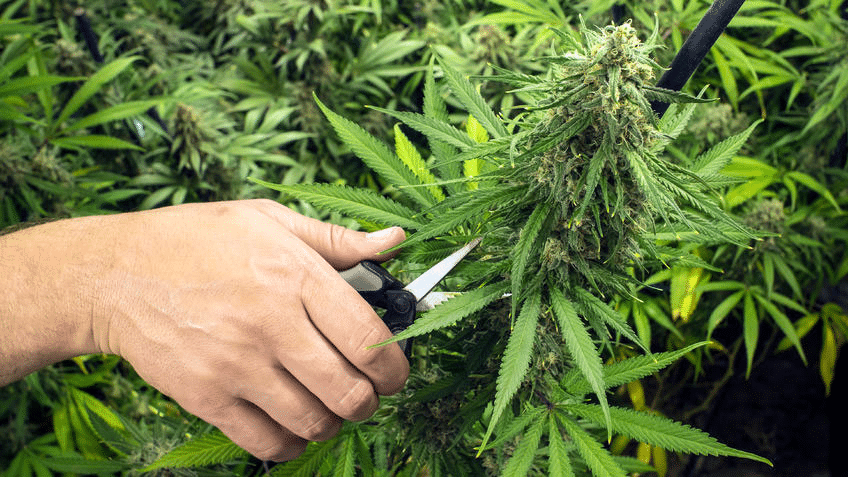
Steps:
- Determine Readiness: Check trichomes and pistils to ensure plants are ready for harvest.
- Prepare Tools: Use clean, sharp scissors or pruning shears.
- Cutting: Cut the main stalk at the base of the plant.
- Trimming: Remove large fan leaves and trim sugar leaves (the small leaves covered in trichomes).
- Drying: Hang the trimmed branches upside down in a dark, well-ventilated room with humidity around 45-55% and temperatures between 60-70°F (15-21°C). This process takes about 7-14 days.
- Curing: The dried buds should be kept in a cold, dark place and sealed in glass jars. For the first week, open the jars every day to let the moisture out, and then progressively cut back on how often you open them. Curing improves flavor, potency, and smoothness and can last several weeks to months.
Additional Considerations
Autoflowering Cannabis:
- Life Cycle: Autoflowering cannabis has a shorter life cycle, typically around 8-12 weeks from seed to harvest.
- Light Requirements: Unlike photoperiod strains, autoflowers do not require a change in light schedule to flower. They can be grown under 18-24 hours of light throughout their life cycle.
Environmental Control:
- Indoor vs. Outdoor: Indoor cultivation allows for precise control over environmental factors but can be more costly. Outdoor cultivation is more natural but dependent on the local climate and weather conditions.
- Hydroponics vs. Soil: Hydroponic systems offer faster growth and higher yields but require more maintenance and monitoring. Soil growing is more forgiving and easier for beginners.
Genetics and Strain Selection:
- Different strains have unique requirements and characteristics. Choose strains that are suited to your growing environment and goals (e.g., high yield, specific cannabinoid profile, resistance to pests).
Conclusion: Mastering the Cannabis Life Cycle
Comprehending and maneuvering through the cannabis life cycle is essential for efficacious growing. Each stage—germination, seedling, vegetative, pre-flowering, flowering, and harvest—has distinct characteristics, requirements, and challenges. By mastering the intricacies of each phase, cultivators can maximize the health, yield, and quality of their cannabis plants.
Germination sets the foundation for plant growth. Proper moisture, warmth, and careful handling are crucial for this stage, where the seed transitions into a seedling. Selecting high-quality seeds and choosing an appropriate germination method are key to success.
The seedling stage follows germination and is critical for establishing a robust root system and initial leaf development. Maintaining optimal light, humidity, and temperature, along with careful watering, ensures healthy seedlings ready for vigorous growth.
The vegetative stage is distinguished by quick structural development and growth. Providing strong light, appropriate nutrients, and employing training techniques such as topping and LST (Low-Stress Training) are essential for developing a strong plant capable of supporting heavy buds.
The pre-flowering stage marks the transition to reproductive growth. Identifying plant sex, adjusting environmental conditions, and preparing for the flowering phase are crucial. Proper care during this stage sets the stage for successful bud development.
Flowering, the most anticipated stage, is when buds form and mature. Managing light schedules, nutrients, humidity, and temperature is vital to maximize bud quality and yield. The best time to harvest is determined by keeping an eye on the trichomes and pistils.
Harvest involves cutting, trimming, drying, and curing the buds. Proper timing and technique are essential to preserve the cannabinoids and terpenes, ensuring the highest quality product.
Throughout these stages, consistent monitoring, attention to detail, and proactive problem-solving are key. Environmental control, pest management, and nutrient management play significant roles in the plant’s health and productivity.
By mastering the cannabis life cycle, cultivators can achieve their goals, whether for recreational, medicinal, or industrial purposes. The journey from seed to harvest requires knowledge, patience, and dedication, but the rewards—a bountiful yield of high-quality cannabis—make it all worthwhile.