Table of Contents
I learned the hard way that indoor results are rarely limited by “not enough space.” They’re limited by what you do with the space you have. In a small tent or a compact room, a single uneven plant can hog the best light, trap humidity, and turn the rest of the canopy into shaded filler. After enough runs like that, I stopped thinking in terms of “plants” and started thinking in terms of the canopy surface I wanted to harvest.
That shift is why I still rely on Sea of Green and Screen of Green methods. They are two canopy frameworks that solve the same problem in different ways: how to place as many productive flower sites as possible in the best-lit and best-ventilated zone. I’ve used both styles across soil and water culture systems, under LEDs, and in spaces where I had to be realistic about access, heat, and noise. This article is how I plan them today, with the trade-offs spelled out and with the kind of details you only learn after you’ve cleaned up a few mistakes and learned what my room will and won’t tolerate.
This is cultivation education, not legal advice. If you grow marijuana or weed at home, confirm what’s permitted where you live and follow electrical and fire-safety best practices.
What these canopy styles actually do for cannabis indoors
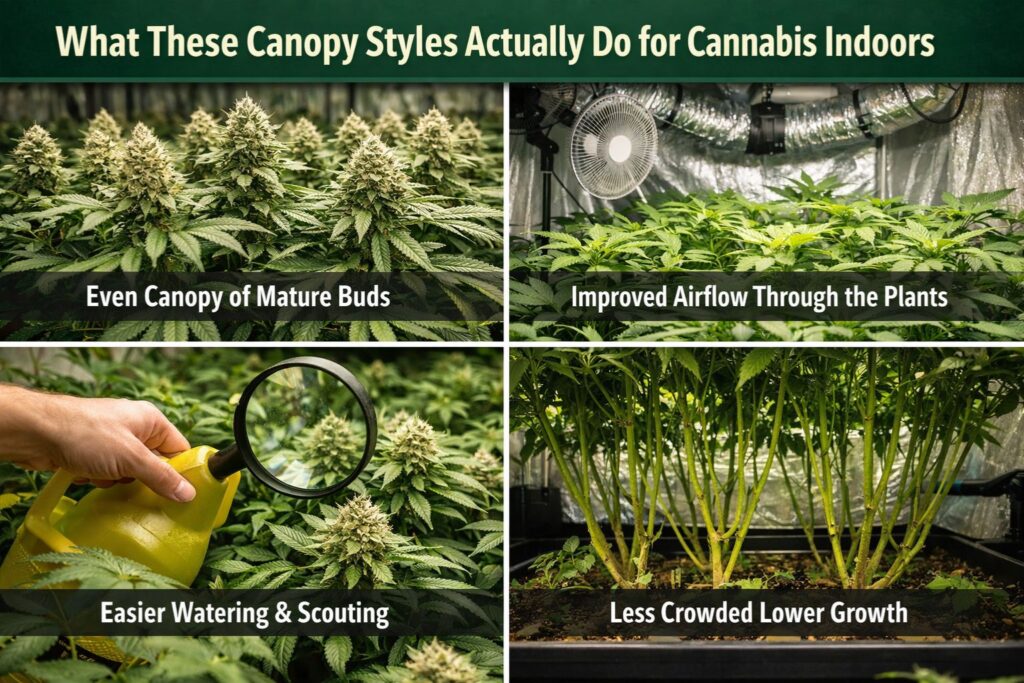
Most indoor fixtures create a “useful zone” where light intensity and temperature are ideal. Above that zone, tops can bleach or stress; below it, buds stay airy and underdeveloped. The purpose of Sea of Green and Screen of Green methods is to make the canopy match that zone.
When I execute these styles well, I get:
- More uniform ripening across the top layer
- Fewer wispy lower flowers
- Better airflow through the garden
- Easier watering and scouting because the canopy is predictable
When I execute them poorly, I get the opposite: humidity pockets, uneven maturity, and a lot of trim that never should have grown in the first place.
My indoor canopy leveling plan before I pick plant numbers
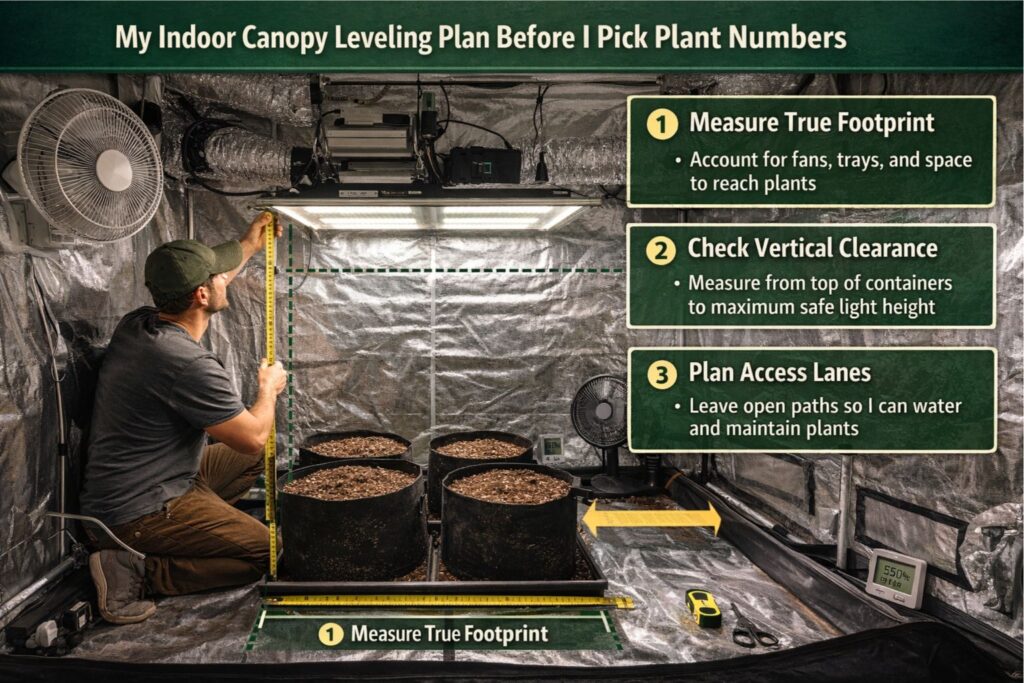
My indoor canopy leveling plan starts on paper. I measure the true footprint I can use after accounting for fans, runoff trays, and the space my arms need to reach plants. Then I measure vertical clearance from the container rim to the maximum safe light height. I subtract a safety margin so I’m not forced to “emergency bend” tops late in bloom.
In the same indoor canopy leveling plan, I decide where the canopy should sit:
- A stable height band where the light can stay fixed
- A clear under-canopy zone where air can move
- Access lanes so I can water without snapping branches
I update the indoor canopy leveling plan after every run. If I fought height all cycle, that’s feedback to shorten veg, change container height, or switch frameworks next time.
The plant count versus pot size tradeoff that decides your workload
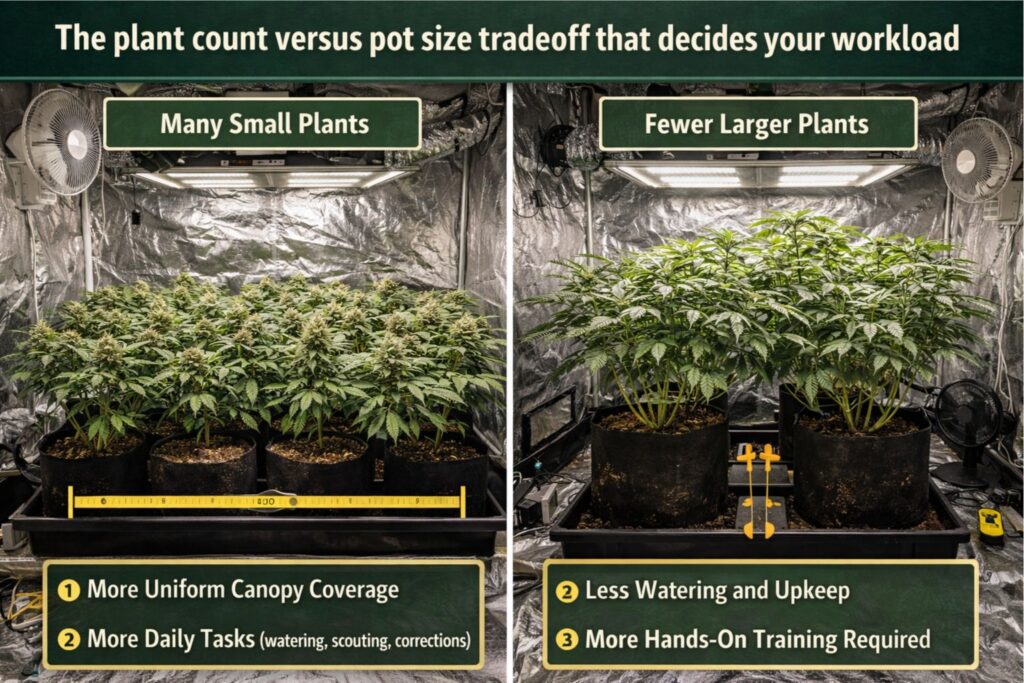
The most underestimated decision in indoor grows is the plant count versus pot size tradeoff. More plants can fill a canopy quickly, but it multiplies daily tasks: watering, scouting, and correcting small differences in vigor. Fewer plants reduce that day-to-day load, but they demand more training skill and more time in veg.
Here’s how I think about the plant count versus pot size tradeoff in real life:
- If I can only check the grow every couple of days, I lean toward fewer plants and more structure.
- If I’m home daily and want faster turnover, I can handle more plants—provided I keep the canopy airy.
The plant count versus pot size tradeoff also affects risk. One sick plant in a dense canopy can create a microclimate problem for the whole room, so prevention matters more as density increases.
Choosing between the two frameworks
I group Sea of Green and Screen of Green methods by what I want to optimize.
- Sea-style approach (many smaller plants)
- Faster canopy fill and faster turnarounds
- Less complex branch guidance
- More individual root zones to manage
- Screen-style approach (fewer plants under a net)
- Slower build-up, but more precise canopy control
- Fewer containers and fewer irrigation points
- More hands-on training during the stretch window
In both cases, the goal is the same: a flat, productive layer supported by a clean undercarriage and stable environment.
Compact grow room strategy that keeps the run manageable
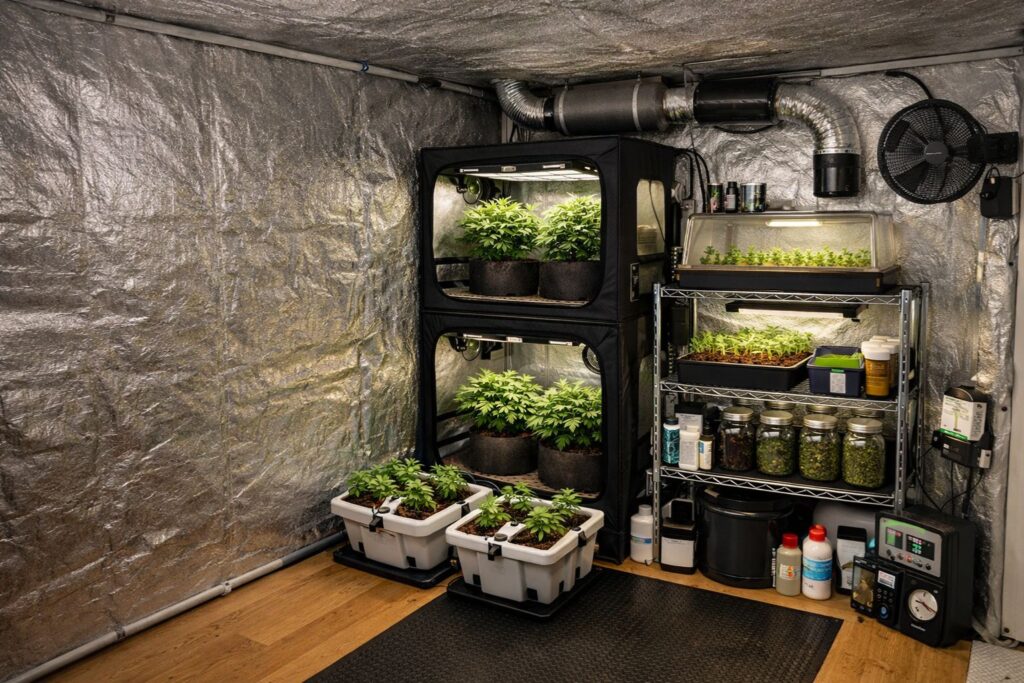
My compact grow room strategy is about repeatability. I’ve had “high potential” gardens fail because I couldn’t reach the back corner without crushing leaves. In a tight space, convenience is not a luxury; it is part of plant health.
A workable compact grow room strategy includes:
- A clear path for intake and exhaust air
- A dedicated place for runoff or drainage management
- Enough space to inspect leaf undersides and stems
- Tools stored outside the grow area so I’m not contaminating the canopy
I also build the compact grow room strategy around cleaning. Sticky traps, quick vacuuming, and wiping down surfaces are easier when the layout is simple.
Setup details I rely on, regardless of method
Medium choice and feeding ranges (soil and water culture)
I’ve run both soil and water culture successfully under these canopy frameworks. Soil gives you buffer; water culture gives faster feedback. Either can produce excellent cannabis flowers if your monitoring matches the system.
Typical starting targets I use (adjusted to cultivar and water quality):
- Soil pH usually lands best in the mid-6 range
- Water culture often performs well around pH 5.8–6.2
- Electrical conductivity (EC) in veg is often around 1.0–1.6
- Mid-bloom EC often lands around 1.6–2.1 when the canopy is stable
I watch the plant more than the chart. Tip burn, dark clawing, and stalled growth are my “too hot” signals. Pale new growth, slow leaf expansion, and weak stems can signal underfeeding, poor root oxygen, or pH drift.
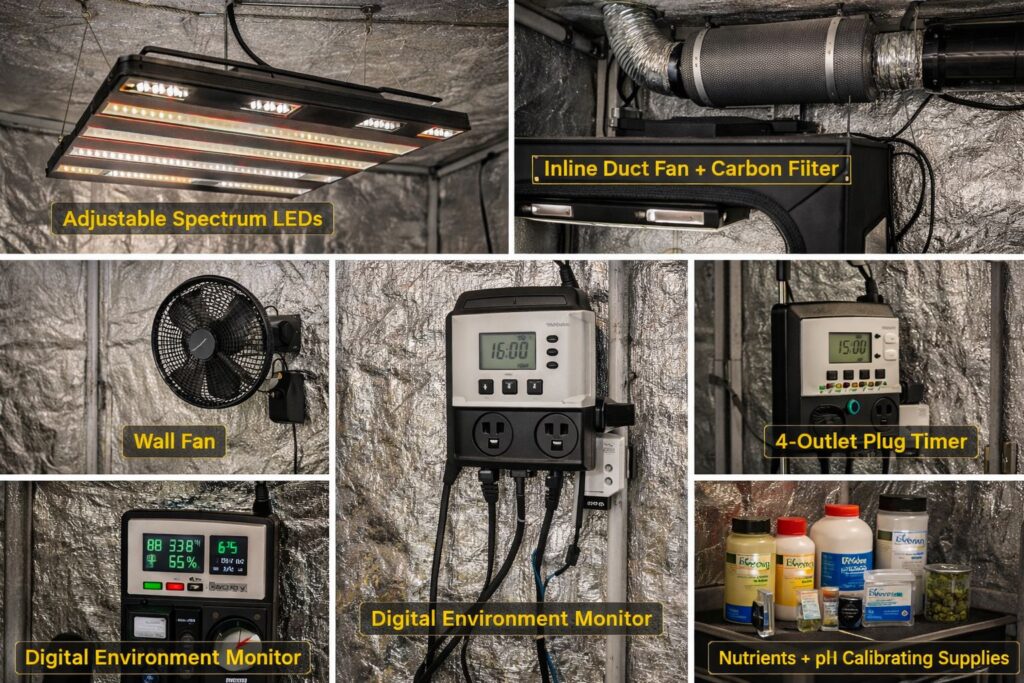
Light distribution across canopy and PPFD targets
If you only change one habit, measure light. A small sensor or a rental meter can teach you more in one afternoon than a month of guessing. My core goal is consistent light distribution across canopy so edge buds don’t lag behind center buds.
Typical PPFD ranges I aim for with LEDs (assuming good temperatures and nutrition):
- Early flower: 600–800 µmol/m²/s at canopy level
- Mid flower: 800–1000 µmol/m²/s if the plants are thriving
- Late flower: I hold steady or slightly reduce if stress signs appear
Those ranges are not a promise; they’re a practical window. If light distribution across canopy is uneven, even “correct” intensity can cause hot spots and weak corners.
Airflow management in dense canopy and humidity control
In small tents, I treat airflow management in dense canopy as a primary input, right alongside light. Dense leaves hold moisture, and moisture becomes disease risk when air stagnates.
My airflow management in dense canopy basics:
- One fan skimming across the canopy surface
- One fan moving air below the canopy
- Enough exhaust to exchange air without huge temperature swings
For temperature and humidity, I use vapor pressure deficit (VPD) as a guide:
- Veg often runs well near 0.8–1.2 kPa
- Early flower near 1.0–1.3 kPa
- Late flower near 1.2–1.5 kPa, with extra attention to keeping flowers dry
This is where airflow management in dense canopy and compact grow room strategy overlap. If the room layout blocks airflow, no amount of wishful thinking fixes it.
Integrated pest management in real life
I don’t wait for pests to “announce themselves.” My routine includes:
- Sticky traps at canopy height and near the floor
- Weekly leaf inspections with a small flashlight
- Cleaning tools and hands before touching plants
- Quarantine for any new clones or houseplants in the same home
In dense canopies, early detection matters because problems spread faster when leaves overlap.
How I run a Sea-style canopy
A sea-style run is about uniformity and timing. I want plants with similar vigor so the top layer closes evenly. When I’m building this approach, the indoor canopy leveling plan and the plant count versus pot size tradeoff do most of the work: plant numbers, container sizes, and the flip timing.
What I do in practice:
- Keep veg short and focused on healthy roots
- Encourage a primary top and a few supporting tops, not a wide bush
- Remove weak lower growth before it becomes a humidity sponge
In this framework, light distribution across canopy is easier to maintain because tops are more uniform in height. The downside is workload: with higher plant counts, the plant count versus pot size tradeoff can catch up to you if you don’t plan watering and access.
How I run a Screen-style canopy
A screen-style run is slower to build but more controllable. The entire success of this approach comes down to a consistent trellis net training workflow. If you can’t tuck and guide regularly during stretch, the canopy won’t stay even.
My trellis net training workflow looks like this:
- Install the net early so I’m not wrestling it into foliage later
- Guide the fastest shoots sideways so slower shoots catch up
- Avoid sharp bends; aim for smooth arcs that don’t pinch stems
Once stretch settles, I stop major guidance and let flower sites rise into a uniform top layer. A well-managed screen makes light distribution across canopy remarkably consistent because the canopy becomes a flat table under the light.
Pruning under the canopy line without sabotaging the run
I used to either under-prune (leaving a mess) or over-prune (stressing plants). Now I treat pruning under the canopy line as staged maintenance.
My approach to pruning under the canopy line:
- First pass: remove the weakest, most shaded shoots that will never reach the top
- Second pass: remove leaves that block airflow channels under the canopy
- Final pass: small clean-ups only, focused on preventing humidity pockets
Pruning under the canopy line improves airflow, reduces pest habitat, and prevents the lower canopy from stealing energy. But it’s still a stress event, so I avoid doing it all at once.
Stretch control after photoperiod switch: the 14-day window that decides everything
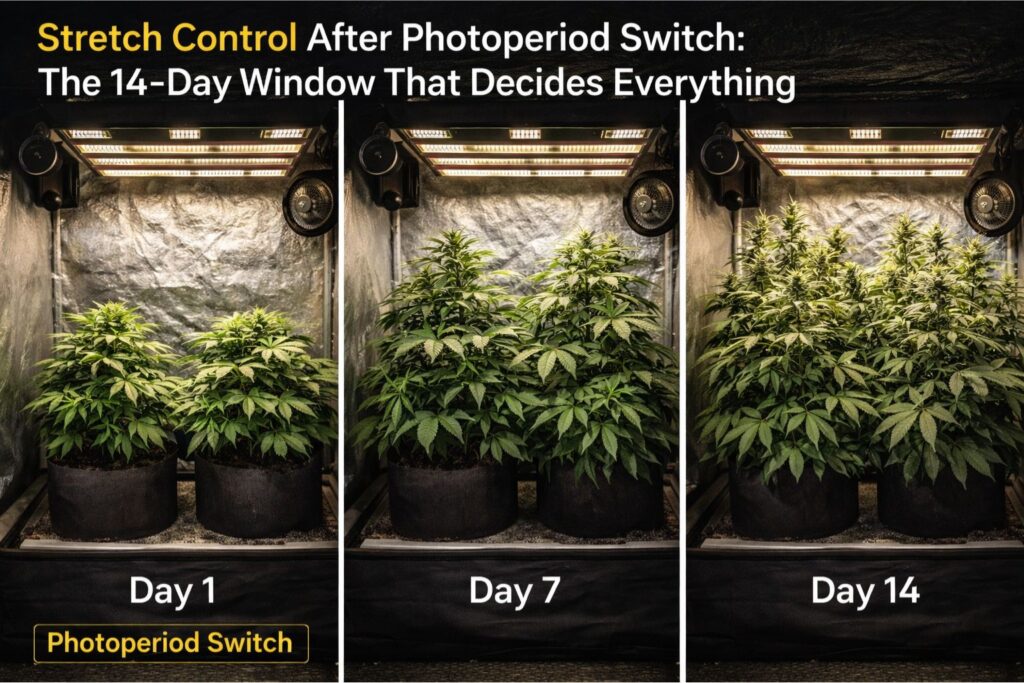
If you grow photoperiod cultivars, the change to a 12 hours on / 12 hours off schedule triggers a transition period where plants often accelerate upward. My entire canopy plan is built around stretch control after photoperiod switch.
What I monitor for stretch control after photoperiod switch:
- Daily canopy height change (I literally measure a few tops)
- Internode spacing trends (tightening or stretching)
- Leaf posture and signs of light stress at the highest tops
If the canopy rises faster than expected, I adjust: raise the light if possible, reduce intensity slightly, or increase airflow and cooling. When stretch control after photoperiod switch is managed well, the rest of flower is calmer and more predictable.
Autoflowering cultivars are different. They don’t depend on a 12/12 switch to flower, so I focus on gentle training early and stable environment instead of timing a flip.
Phenotype management for uniform tops in mixed seed runs
Even if you start from the same line, not every plant behaves the same. That’s why phenotype management for uniform tops is non-negotiable in small spaces.
My phenotype management for uniform tops habits:
- Label plants and track vigor from week two onward
- Note which plants stretch the most after the flip
- Keep the most vigorous plants in positions where I can manage them
If one plant consistently outgrows the rest, that’s information. Next run, I either give it more space, train it earlier, or choose a more uniform set. Good phenotype management for uniform tops turns frustration into a better plan.
Harvest quality drying room routine that protects flavor and burn
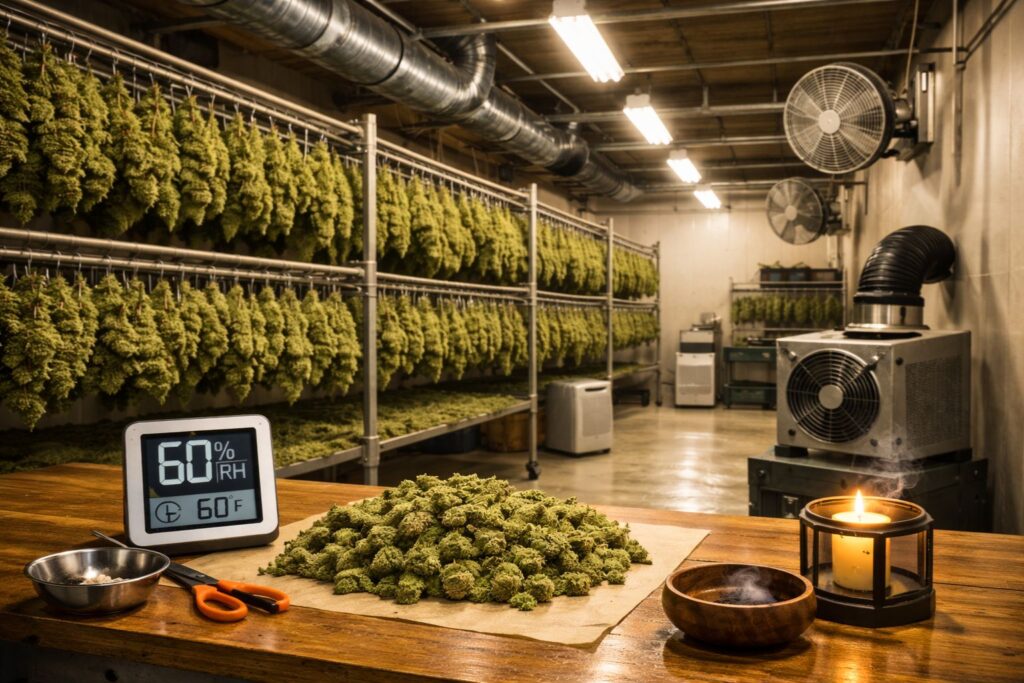
I’ve seen excellent cannabis ruined after harvest by drying too fast in warm, moving air. My harvest quality drying room routine is about slow, steady moisture loss.
My harvest quality drying room routine:
- Prepare the drying space before harvest day
- Keep it dark, clean, and gently ventilated
- Avoid direct fan blast on flowers
- Aim for cool temperatures and moderate humidity so drying isn’t rushed
Once stems start snapping instead of bending, I move into curing containers and equalize moisture gradually. That slow finish is where harshness drops and aroma stabilizes. A consistent harvest quality drying room routine is how I keep good flower from becoming “just okay.”
Seed shopping and planning queries I hear constantly
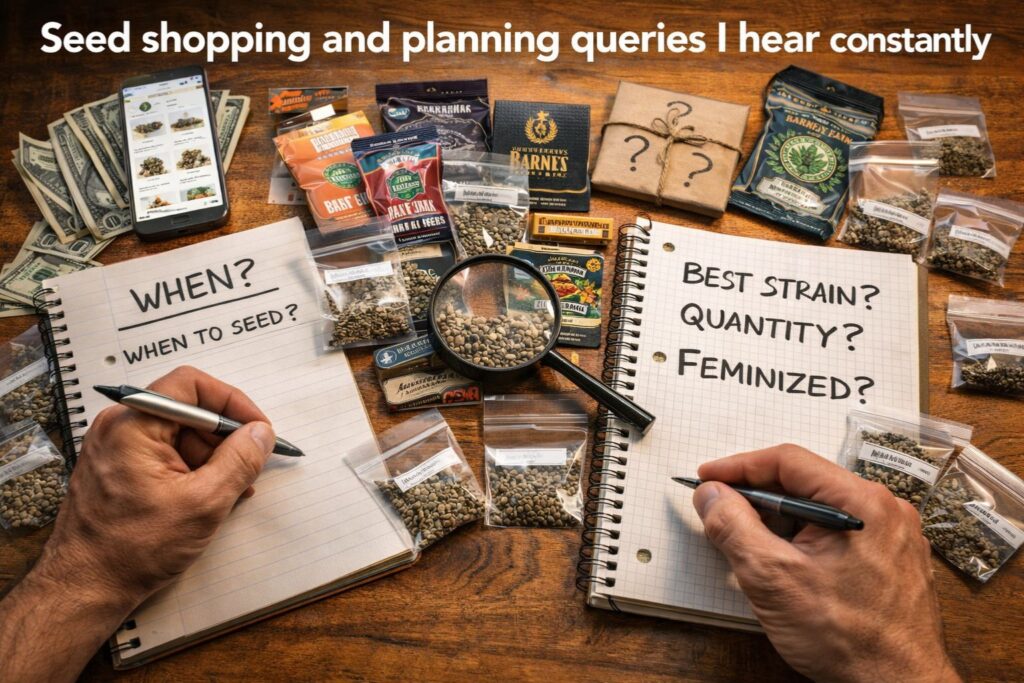
People often arrive with practical questions like:
- “How do I plan a canopy in a 60×120 tent without overcrowding?”
- “What training works best for a small closet grow?”
- “Should I start with photoperiod or autoflowering seeds?”
- “How do I avoid nutrient burn under strong LEDs?”
- “Why do my lower buds stay airy in a small tent?”
I can’t guarantee results, but I can share what has helped me choose genetics for these canopy styles:
- Look for consistent growth descriptions and similar finishing windows
- Avoid mixing very different growth behaviors in the same canopy
- Decide whether you want fewer plants with more training, or more plants with simpler structure
If you’re trying to buy cannabis seeds online, also consider shipping realities. Order when you can receive the package, store seeds cool and dry, and avoid leaving deliveries in heat or moisture.
Quick checklists I use mid-run
Weekly canopy and environment checklist
- Confirm the indoor canopy leveling plan still matches the canopy height
- Check light distribution across canopy by measuring multiple points across the canopy
- Confirm airflow management in dense canopy is moving air above and below the canopy
- Scout pests: leaf undersides, stems, and soil surface
- Look for early nutrient stress: tip burn, clawing, pale new growth
Training and pruning checklist
- Follow the trellis net training workflow consistently if you’re under a net
- Perform pruning under the canopy line in stages, not all at once
- Re-evaluate the plant count versus pot size tradeoff workload: can you keep watering consistent?
- Note differences for phenotype management for uniform tops so next run is more uniform
FAQ on Sea of Green and Screen of Green methods
Which is faster for indoor harvest cycles?
In my experience, a sea-style run can turn over faster because veg is shorter, but it depends on the plant count versus pot size tradeoff and how quickly the canopy closes. A screen-style run may veg longer, but the canopy control can make flower more consistent.
Do I need a trellis net for both approaches?
No. A trellis is central to a screen-style run, and the trellis net training workflow is the key. A sea-style canopy can work without a net, though I still use light support when flowers get heavy.
How do I reduce airy lower buds?
Start with light distribution across canopy and then address structure. Airy lowers are usually a light and airflow issue. Staged pruning under the canopy line and strong airflow management in dense canopy make a noticeable difference.
What’s the best way to handle uneven plants from seed?
That’s phenotype management for uniform tops. Label plants, track vigor, and plan positions around the outliers. If uniformity is your priority, consider running a narrower selection next time.
What matters most late in flower?
Late in flower, I double down on airflow management in dense canopy and I protect the harvest quality drying room routine. Thick colas hold moisture. Keeping them dry and then drying them slowly after harvest is what protects quality.
Final notes from my grow log
If you’re working in a limited indoor space, I recommend treating Sea of Green and Screen of Green methods as planning tools, not as magical shortcuts. A solid indoor canopy leveling plan, a realistic plant count versus pot size tradeoff, and a clean compact grow room strategy make everything easier. Then keep light distribution across canopy stable, prioritize airflow management in dense canopy, and do pruning under the canopy line with intention.
Most importantly, keep notes. The fastest way to get better at indoor cannabis cultivation is to run one variable at a time and let your own room teach you. When you do that, Sea of Green and Screen of Green methods become reliable frameworks you can repeat, refine, and trust.