Medical Cannabis Seedling and Plant Care: A Comprehensive Guide
Introduction
Medical cannabis cultivation is an intricate process that requires meticulous care and attention to detail. This guide provides a comprehensive overview of the necessary steps and considerations for nurturing medical cannabis seedlings and plants, ensuring optimal growth and medicinal potency. Excluding any discussion on recreational use, this guide focuses solely on the medicinal benefits and cultivation techniques pertinent to medical cannabis.
Choosing the Right Strain
Seed Selection
Selecting the appropriate cannabis strain is the first crucial step in cultivating medical cannabis. Different strains have varying medicinal properties, which can cater to specific health conditions. When selecting a strain, take into account the following factors:
- Medical Purpose: Identify the specific ailment or symptoms you intend to treat (e.g., chronic pain, anxiety, epilepsy).
- Cannabinoid Profile: Select strains with desired levels of THC, CBD, and other cannabinoids.
- Growth Characteristics: Consider the strain’s growth requirements, yield potential, and resistance to pests and diseases.
Purchasing Quality Seeds
Obtain seeds from reputable sources to ensure genetic purity and quality. When selecting seeds, keep the following in mind:
- Viability: Fresh, mature seeds are typically darker in color and firm to the touch.
- Germination Rate: Choose seeds with a high germination rate, preferably above 80%.
- Reputation: Buy from established seed banks with positive reviews and transparent breeding practices.
Germination
Germination Methods
Germination is the process of sprouting seeds to initiate growth. Common germination methods include:
- Paper Towel Method:
- Place seeds between damp paper towels.
- Keep the paper towels moist and warm (70-85°F or 21-29°C).
- Check daily for sprouting, which typically occurs within 1-7 days.
- Direct Soil Planting:
- Plant seeds directly into moist soil, about 1/4 inch deep.
- Maintain soil moisture and warmth.
- Sprouts should appear within a week.
- Water Soaking:
- Soak seeds in water for 12-24 hours.
- Transfer to soil or paper towels for continued germination.
Germination Environment
Ensure optimal conditions for germination:
- Temperature: Maintain a consistent temperature of 70-85°F (21-29°C).
- Humidity: Keep humidity levels around 70%.
- Light: Seeds require minimal light during germination, but indirect light can be beneficial.
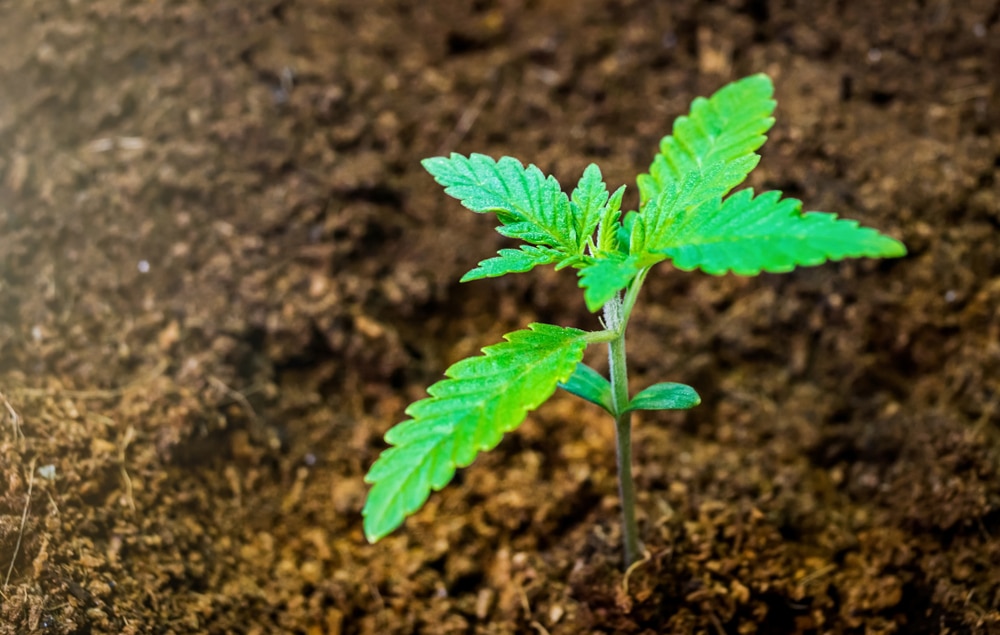
Seedling Stage
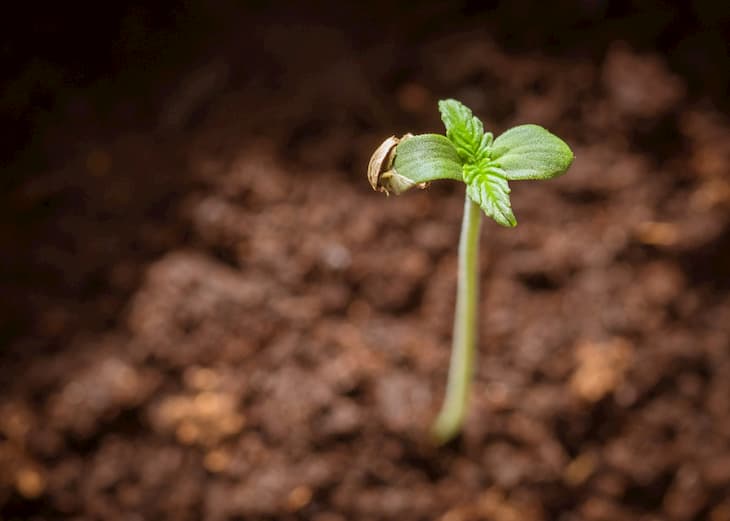
Transplanting Germinated Seeds
Once seeds have sprouted, they enter the seedling stage. Take great care when transplanting seedlings to prevent breaking the fragile roots. Use the following steps:
- Prepare the Growing Medium:
- Use a light, well-draining soil mix or coco coir.
- Add the growing medium to tiny pots or seedling trays.
- Transplant Seedlings:
- Create a small hole in the medium.
- Gently place the seedling into the hole, covering the roots with soil.
- Water lightly to settle the soil.
Seedling Care
Taking good care of seedlings lays the groundwork for a plant’s healthy growth.
Light
- Intensity: Provide 16-18 hours of light daily using fluorescent or LED grow lights.
- Distance: Keep lights 4-6 inches above the seedlings to prevent stretching.
- Spectrum: Use full-spectrum lights for balanced growth.
Watering
- Frequency: Make sure the soil is constantly damp but not soggy.
- Method: Use a spray bottle or gentle watering can to avoid disturbing the seedlings.
- pH: Maintain water pH between 6.0 and 7.0 for optimal nutrient uptake.
Temperature and Humidity
- Temperature: Maintain 70-78°F (21-25°C) during the day and slightly cooler at night.
- Humidity: Keep humidity levels around 60-70%.
Nutrients
Seedlings require minimal nutrients. If using a nutrient solution, apply at 1/4 to 1/2 strength to avoid nutrient burn.
Vegetative Stage
Transplanting to Larger Containers
As seedlings grow, they will need more space. Transplant to larger containers when roots outgrow the current pot.
- Select Containers:
- Choose containers with good drainage, such as fabric pots or plastic containers with drainage holes.
- Transplant:
- Water the plant to ease removal.
- With extreme caution to avoid damaging the roots, carefully take the plant out of its container.
- Place the plant in a larger container, filling in with soil around the roots.
Vegetative Growth Care
The formation of leaves and branches as well as quick growth characterize the vegetative stage.
Light
- Intensity: Provide 18-24 hours of light daily.
- Distance: Adjust lights to maintain a distance of 12-24 inches from the plant canopy.
- Spectrum: Use lights with a higher blue spectrum to promote vegetative growth.
Watering
- Frequency: Water thoroughly when the top inch of soil is dry.
- Method: Water until excess drains from the bottom.
- pH: Maintain water pH between 6.0 and 7.0.
Temperature and Humidity
- Temperature: Keep daytime temperatures between 70-85°F (21-29°C) and nighttime temperatures slightly cooler.
- Humidity: Maintain humidity levels around 50-70%.
Nutrients
- Nutrient Solution: Use a balanced nutrient solution with higher nitrogen levels.
- Frequency: Apply nutrients every other watering, gradually increasing strength as the plant grows.
Pruning and Training
Pruning
Pruning helps manage plant size and encourages bushier growth.
- Technique: Remove lower branches and leaves that receive little light.
- Timing: Begin pruning once the plant has at least 5-6 sets of leaves.
Training
Training techniques shape plant growth and maximize light exposure.
- Low-Stress Training (LST):
- Bend and tie down branches to create a flat canopy.
- Use soft ties or plant tape to avoid damaging stems.
- Topping:
- Cut the main stem above the fifth node to encourage multiple main colas.
- Allow the plant to recover for a week before further training.
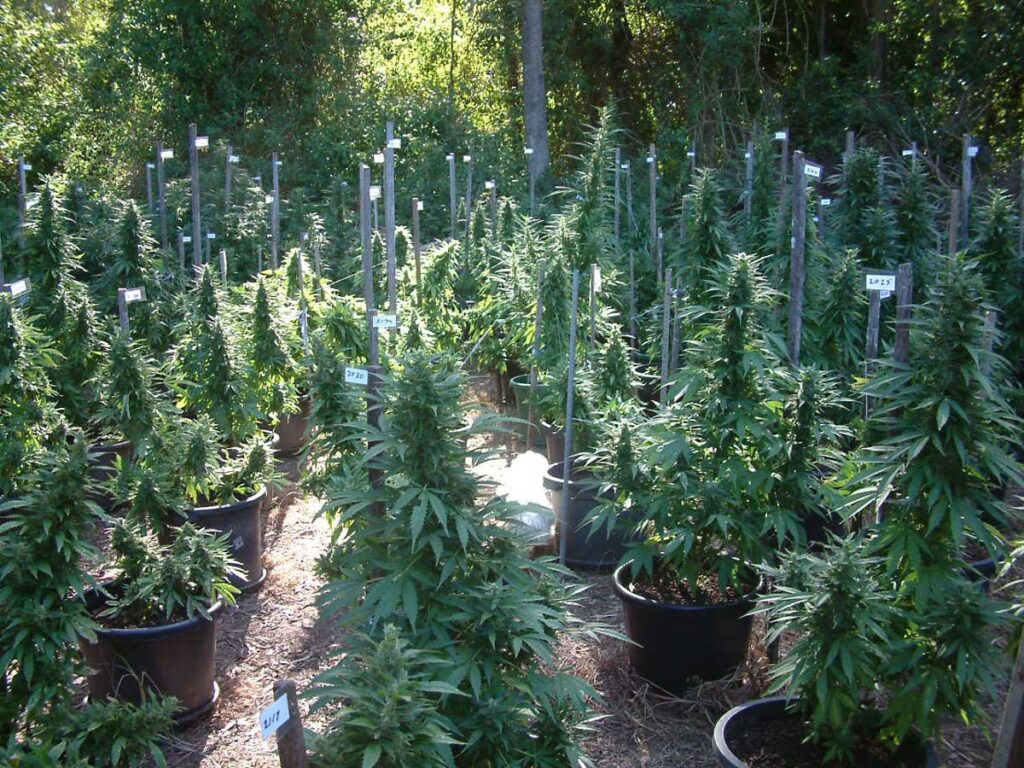
Flowering Stage
Transition to Flowering
When the light cycle is reversed to 12 hours of light and 12 hours of darkness, the blossoming stage begins.
- Light Cycle:
- Switch to a 12/12 light cycle.
- Ensure complete darkness during the dark period to prevent stress.
Flowering Care
Light
- Intensity: Maintain strong light for bud development.
- Distance: Keep lights 12-24 inches from the canopy.
- Spectrum: Use lights with a higher red spectrum to promote flowering.
Watering
- Frequency: Water thoroughly when the top inch of soil is dry.
- Method: Water until excess drains from the bottom.
- pH: Maintain water pH between 6.0 and 7.0.
Temperature and Humidity
- Temperature: Maintain daytime temperatures between 65-80°F (18-26°C) and slightly cooler at night.
- Humidity: Reduce humidity levels to 40-50% to prevent mold and mildew.
Nutrients
- Nutrient Solution: Use a nutrient solution with higher phosphorus and potassium levels.
- Frequency: Apply nutrients every other watering, gradually increasing strength as the plant flowers.
Pruning and Training
Pruning and training during flowering focus on enhancing light penetration and airflow.
Defoliation
- Technique: Remove large fan leaves that block light to lower bud sites.
- Timing: Defoliate lightly throughout flowering to avoid stressing the plant.
Support
- Stakes and Trellises: Use stakes or trellises to support heavy branches and prevent breaking.
- Netting: Employ netting to evenly distribute the canopy and support buds.
Harvesting
Determining Harvest Time
Harvesting at the right time is crucial for maximizing potency and yield.
- Trichome Color:
- Inspect trichomes with a magnifying glass or microscope.
- When the trichomes are predominantly milky with a hint of amber, harvest.
- Pistil Color:
- Examine the pistils’ (the buds’) hair color.
- Harvest when 70-90% of pistils have darkened and curled in.
Harvesting Process
- Preparation:
- Clean and sterilize all tools.
- Choose a cool, dark, and well-ventilated area for drying.
- Cutting:
- Cut branches from the main stem.
- Remove large fan leaves.
- Drying:
- Hang branches upside down in a dark, cool room with good airflow.
- Maintain temperature at 60-70°F (15-21°C) and humidity at 45-55%.
- Dry for 7-14 days until branches snap instead of bend.
- Trimming:
- Trim the buds of any extra leaves or stems.
- Use sharp, sterilized scissors for precision.
Curing
Curing enhances the flavor, potency, and smoothness of the final product.
- Jar Method:
- Place dried buds in airtight glass jars.
- Fill jars about 3/4 full to allow airflow.
- Burping:
- Open jars daily for 15-30 minutes to release moisture.
- Continue for 2-4 weeks until buds are dry to the touch but not brittle.
Pest and Disease Management in Medical Cannabis Cultivation
High-quality yields and the maintenance of healthy cannabis plants depend on efficient pest and disease control. This section provides a detailed overview of common pests and diseases that affect cannabis plants, as well as integrated pest management (IPM) strategies to prevent and control these issues.
Common Pests
1. Spider Mites
Symptoms:
- Little patches of yellow or white on leaves.
- Leaves have fine webbing on their undersides.
- Leaf discoloration and eventual leaf drop.
Control:
- Insecticidal Soap: Apply insecticidal soap to infested areas.
- Neem Oil: Spray neem oil to disrupt the mites’ life cycle.
- Predatory Mites: Introduce predatory mites (Phytoseiulus persimilis) that feed on spider mites.
2. Aphids
Symptoms:
- Clusters of small, pear-shaped insects on new growth and undersides of leaves.
- Sticky residue (honeydew) and sooty mold development.
- Distorted and curled leaves.
Control:
- Insecticidal Soap: Directly spray insecticidal soap on aphids.
- Neem Oil: Apply neem oil to affected areas.
- Ladybugs: Let ladybugs loose; they are aphids’ natural predators.
3. Fungus Gnats
Symptoms:
- Small black flies around the soil surface.
- Wilting and poor growth in seedlings and young plants.
- Root damage caused by larvae feeding on root hairs.
Control:
- Sticky Traps: Put sticky yellow traps close to the soil’s surface to capture adult gnats.
- Beneficial Nematodes: Introduce beneficial nematodes (Steinernema feltiae) to control larvae in the soil.
- Soil Drying: To lessen the circumstances that attract gnats, let the soil dry out in between waterings.
4. Thrips
Symptoms:
- Silvery or bronze streaks on leaves.
- Black fecal spots on leaves.
- Stunted and deformed growth.
Control:
- Insecticidal Soap: Apply insecticidal soap to affected plants.
- Neem Oil: Use neem oil as a preventive measure.
- Blue Sticky Traps: Place blue sticky traps to catch adult thrips.
5. Whiteflies
Symptoms:
- Little white insects that resemble moths on the undersides of plants.
- Yellowing and wilting of leaves.
- Honeydew and sooty mold development.
Control:
- Insecticidal Soap: Spray insecticidal soap on infested areas.
- Neem Oil: Apply neem oil to disrupt the life cycle of whiteflies.
- Yellow Sticky Traps: Use yellow sticky traps to capture adult whiteflies.
Common Diseases
1. Powdery Mildew
Symptoms:
- Spots on leaves, stems, and buds that are powdery white.
- Stunted growth and reduced yields.
- Premature leaf drop.
Control:
- Increase Airflow: Improve ventilation and reduce humidity.
- Sulfur Sprays: Apply sulfur-based fungicides.
- Baking Soda Solution: Spray a solution of baking soda (1 tablespoon) and water (1 gallon) to affected areas.
2. Botrytis (Bud Rot)
Symptoms:
- Gray mold on buds and flowers.
- Brown, mushy spots on buds.
- Foul odor and rapid bud decay.
Control:
- Remove Affected Areas: Prune and dispose of infected buds and leaves.
- Improve Ventilation: Increase airflow and reduce humidity in the grow room.
- Fungicides: Apply fungicides specifically labeled for botrytis control.
3. Root Rot
Symptoms:
- Brown, mushy roots with a foul smell.
- Wilting and yellowing of leaves.
- Stunted growth and eventual plant death.
Control:
- Avoid Overwatering: Allow the soil to dry out between waterings.
- Well-Draining Soil: Use a well-draining soil mix to prevent waterlogging.
- Beneficial Microbes: Introduce beneficial microbes to promote healthy root growth.
4. Leaf Septoria
Symptoms:
- Yellow or brown spots on leaves, often with a yellow halo.
- Premature leaf drop.
- Reduced plant vigor and yields.
Control:
- Remove Infected Leaves: Prune and dispose of affected leaves.
- Improve Airflow: Increase ventilation to reduce humidity.
- Fungicides: Apply copper-based fungicides to control the spread.
5. Fusarium Wilt
Symptoms:
- Yellowing and wilting of leaves, often starting on one side of the plant.
- Brown streaks in the stem.
- Plant death.
Control:
- Resistant Strains: Use cannabis strains resistant to fusarium wilt.
- Crop Rotation: Rotate crops to reduce soil-borne pathogens.
- Fungicides: Apply fungicides labeled for fusarium control.
Integrated Pest Management (IPM)
IPM is a holistic approach to pest and disease management that combines preventive and control measures to minimize the use of chemical treatments. Key components of IPM include:
1. Prevention
- Sanitation: Maintain a clean growing environment to reduce the risk of pests and diseases. Clear away plant debris and periodically sanitize tools.
- Quarantine: Isolate new plants before introducing them to the grow area to prevent the spread of pests and diseases.
- Healthy Plants: Grow healthy plants through proper nutrition, watering, and environmental control to enhance their natural resistance to pests and diseases.
2. Monitoring
- Regular Inspections: Conduct regular inspections of plants to detect early signs of pests and diseases.
- Traps: Use sticky traps to monitor pest populations.
- Record Keeping: Keep detailed records of pest and disease occurrences, treatments, and outcomes to improve future management strategies.
3. Cultural Controls
- Crop Rotation: Rotate crops to reduce the buildup of soil-borne pests and diseases.
- Companion Planting: Use companion plants that repel pests or attract beneficial insects.
- Pruning: Prune plants to improve airflow and reduce humidity.
4. Biological Controls
- Beneficial Insects: To manage pest populations, introduce beneficial insects like parasitic wasps, predatory mites, and ladybugs.
- Microbial Agents: Use microbial agents such as Bacillus thuringiensis (Bt) and beneficial nematodes to target specific pests.
5. Chemical Controls
- Organic Pesticides: Use organic pesticides such as neem oil, insecticidal soap, and horticultural oils as a first line of defense.
- Targeted Application: Apply chemical pesticides only as a last resort and target specific pests to minimize impact on beneficial insects.
- Resistance Management: To stop pest resistance, alternate between insecticides with various mechanisms of action.
Environmental Control
Indoor Growing
- Grow Room Setup:
- Ensure adequate space, ventilation, and light.
- If you want to optimize light efficiency, choose reflecting materials.
- Temperature and Humidity Control:
- Use heaters, air conditioners, and humidifiers/dehumidifiers to maintain optimal conditions.
- Air Circulation:
- Install fans for consistent airflow and to strengthen stems.
Outdoor Growing
- Site Selection:
- Pick a spot that receives plenty of sunlight and has good drainage.
- Avoid areas prone to strong winds or heavy rainfall.
- Soil Preparation:
- Test soil pH and nutrient levels.
- Amend soil with organic matter for improved fertility and structure.
- Protection:
- Use netting or fencing to protect plants from animals and pests.
- Consider using greenhouses or hoop houses for climate control.
Advanced Techniques
Cloning
Cloning produces genetically identical plants from a mother plant.
- Selection:
- Choose a healthy, disease-free mother plant.
- Select strong branches with 4-6 nodes.
- Cutting:
- Make a clean cut just below a node.
- Dip the cut end in the rooting hormone.
- Rooting:
- Place cuttings in a cloning medium or aeroponic system.
- Until roots form, keep the light and humidity levels high.
Hydroponics
A soilless growth technique that makes use of nutrient-rich water is hydroponics.
- System Types:
- Deep Water Culture (DWC), Nutrient Film Technique (NFT), and Aeroponics are popular systems.
- Setup:
- Use sterile containers and equipment.
- Ensure proper aeration and nutrient delivery.
- Maintenance:
- Regularly check pH and nutrient levels.
- Change nutrient solution periodically to prevent buildup.
Ethical and Responsible Growing
1.Ensure the cultivation is strictly for medical purposes and adheres to ethical guidelines.
2.Avoid contributing to illegal or recreational markets.
3.If growing cannabis for medical purposes provides significant health benefits without causing harm or leading to addiction and misuse, it may be permissible under certain conditions.
Conclusion
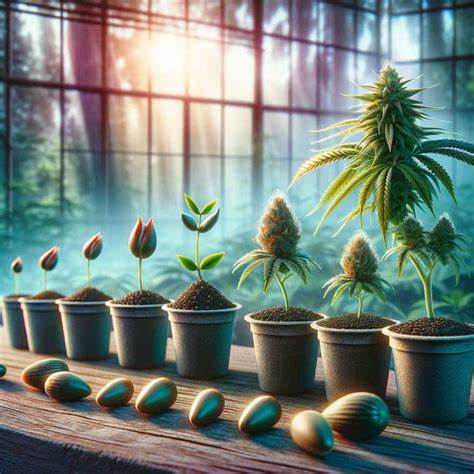
Cultivating medical cannabis requires a detailed understanding of various stages and practices, from seed selection to pest and disease management. Ensuring the health and potency of the plants throughout their lifecycle is essential for producing high-quality medicinal products. Here are the key takeaways from each section covered:
Seed Selection
Selecting the right strain and purchasing quality seeds from reputable sources is the foundation of successful cannabis cultivation. This choice directly impacts the plant’s medicinal properties, growth characteristics, and resistance to pests and diseases.
Germination
Employing effective germination methods and creating an optimal environment for seeds to sprout are crucial first steps. Ensuring proper temperature, humidity, and minimal light exposure will result in healthy seedlings.
Seedling Stage
Transplanting seedlings with care and providing the right light, water, temperature, and nutrients set the stage for robust growth. This phase requires meticulous attention to detail to avoid common pitfalls like overwatering or nutrient deficiencies.
Vegetative Stage
Transplanting to larger containers, adjusting light cycles, and maintaining appropriate environmental conditions are key during the vegetative stage. Higher yields can be achieved by controlling plant size and encouraging bushier growth through pruning and training methods.
Flowering Stage
The transition to the flowering stage requires changes in light cycles and careful monitoring of environmental conditions. Proper pruning, training, and nutrient management are essential to maximize bud development and potency.
Harvesting
Determining the right time to harvest by inspecting trichomes and pistils ensures the highest quality of cannabis. Following proper cutting, drying, trimming, and curing techniques preserves the medicinal properties and enhances the overall quality of the product.
Pest and Disease Management
Implementing integrated pest management (IPM) strategies helps prevent and control common pests and diseases. Combining preventive measures, regular monitoring, cultural practices, biological controls, and targeted chemical treatments ensures healthy plants and minimizes the use of harmful pesticides.
Ethical and Legal Considerations
Growing medical cannabis should be done responsibly, ethically, and in compliance with local laws. Ensuring the cultivation is strictly for medical purposes and adhering to ethical guidelines helps maintain the integrity of the medical cannabis industry.
Overall Best Practices
- Organize and keep your expanding space tidy.
- Regularly monitor plant health and growth.
- Adjust environmental conditions to suit each growth stage.
- Use high-quality tools and materials.
- Continuously educate yourself on best practices and emerging techniques.
By following these comprehensive guidelines, growers can successfully cultivate medical cannabis that meets the highest standards of quality and efficacy. This not only ensures the therapeutic benefits for patients but also supports the sustainable and responsible growth of the medical cannabis industry.