How and When to Move Indoor Cannabis Plants Outside: A Detailed Guide
Introduction
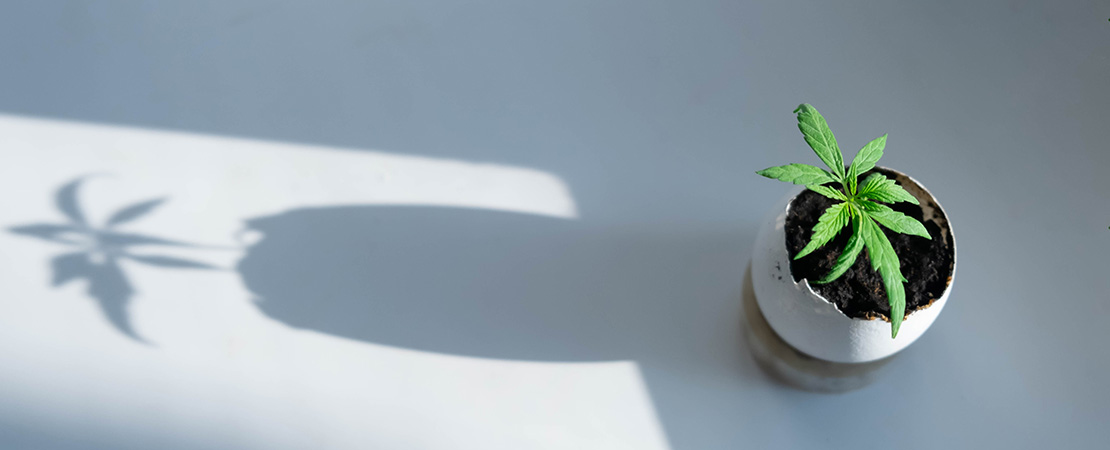
Moving cannabis plants from an indoor environment to an outdoor setting can be a highly effective strategy for maximizing yield and potency. This practice, known as “hardening off,” involves acclimating plants to outdoor conditions to prevent shock and ensure a smooth transition. This comprehensive guide will explore the nuances of this process, including timing, techniques, and best practices to ensure your cannabis plants thrive outdoors.
Understanding the Transition
Moving cannabis plants from an indoor environment to an outdoor setting is a critical process that can significantly impact the growth and health of your plants. Understanding the transition involves recognizing the benefits and challenges associated with this move and preparing accordingly to ensure a successful adaptation.
Benefits of Moving Plants Outdoors
Increased Yield
One of the primary benefits of moving cannabis plants outdoors is the potential for increased yield. Outdoor environments provide plants with more space to grow and access to natural sunlight, which can result in larger and more robust plants. The unlimited space allows roots to expand, leading to stronger plants capable of producing more substantial buds.
Cost-Effective
Growing cannabis indoors requires a considerable investment in equipment such as grow lights, ventilation systems, and climate control. By moving plants outdoors, you can take advantage of natural resources like sunlight and rain, reducing the need for artificial lighting and irrigation systems. This shift can significantly lower the overall cost of cultivation.
Natural Growth Cycles
Outdoor environments offer natural growth cues that can enhance the development of cannabis plants. The changing position of the sun, variations in daylight hours, and seasonal temperature fluctuations all contribute to the natural life cycle of the plant. These environmental factors can promote healthier growth and more potent yields compared to a controlled indoor setting.
Challenges of Transitioning
Environmental Stress
One of the biggest challenges when transitioning plants from indoors to outdoors is the potential for environmental stress. Indoor plants are accustomed to a controlled environment with stable temperatures, humidity levels, and consistent lighting. Sudden exposure to outdoor elements such as wind, rain, and varying temperatures can shock the plants, leading to stunted growth or even death if not managed properly.
Pests and Diseases
Indoor growing environments are relatively sterile, and plants are less exposed to pests and diseases. Moving plants outdoors introduces them to a wide range of pests, including insects, rodents, and larger animals, as well as diseases such as mold and mildew. Using efficient pest and disease control techniques is essential to keeping your plants safe in their new surroundings.
Climate Variability
Outdoor growing conditions can be unpredictable, with sudden changes in weather that can affect plant health. Extreme temperatures, unexpected frost, heavy rainfall, and prolonged droughts are all factors that need to be considered and mitigated to ensure the plants thrive. Growers must be prepared to protect their plants from these adverse conditions through various means, such as using protective coverings or relocating plants during severe weather.
Timing the Transition
Timing is a critical factor when moving cannabis plants from an indoor environment to an outdoor setting. Proper timing ensures that the plants can acclimate to their new surroundings without being subjected to undue stress or adverse conditions. This section will discuss the optimal time of year for making the transition, growth stage considerations, and how to interpret and respond to local climate conditions to ensure a successful move.
Optimal Time of Year
General Guidelines
The best time to move cannabis plants outdoors is when the risk of frost has passed, and temperatures are consistently warm. This period varies depending on your geographical location and climate zone. Generally, late spring to early summer is the ideal time for most regions.
- Temperate Climates: In regions with temperate climates, such as the northern United States and parts of Europe, late May to early June is typically the safest time to move plants outdoors. By this time, the danger of frost has usually passed, and temperatures are consistently warm.
- Mediterranean Climates: Areas with Mediterranean climates, like California and Southern Europe, can transition plants earlier, around early to mid-May. These regions experience mild winters and early springs, allowing for an earlier move outdoors.
- Tropical Climates: In tropical climates, such as Central America and Southeast Asia, almost any time of year can be suitable for moving plants outdoors. However, it is crucial to avoid the rainy season, as excessive moisture can lead to mold and mildew issues.
- Continental Climates: In regions with continental climates, like Central Europe and parts of Canada, the optimal time is typically early June, after the last frost date. These areas can experience late frosts, so waiting until early summer is advisable.
Local Climate Considerations
Understanding your local climate is essential for determining the best time to move your plants outdoors. Utilize local agricultural resources, such as university extension services or online gardening forums, to obtain information on the last frost dates and average temperatures in your area. Observing local weather patterns and forecasts can also provide valuable insights.
Growth Stage Considerations
The growth stage of your cannabis plants plays a significant role in determining the right time to move them outdoors. Ensuring that your plants are at an appropriate stage of development can help mitigate stress and promote healthy growth.
Seedlings
Seedlings are particularly vulnerable to environmental stress, so they require careful timing when being moved outdoors. Wait until seedlings have at least three sets of true leaves before considering the transition. The plants are stronger and more adapted to the external environment at this point.
Vegetative Stage
Plants in the vegetative stage are generally more resilient and adaptable to changes in their environment. It is advisable to move plants outdoors when they are well-established, typically around 4-6 weeks old. These plants have developed a more extensive root system and can better withstand the transition.
Flowering Stage
Moving plants during the early flowering stage can be risky, as they are more sensitive to stress. Ideally, it is best to move cannabis plants outdoors before the flowering stage begins. If the plants are already flowering, ensure that the transition is as gentle as possible to avoid disrupting the flowering process and affecting bud development.
Preparing for the Transition
Preparing to move cannabis plants from an indoor environment to an outdoor setting is a crucial phase that requires careful planning and attention to detail. This section will cover the essential steps involved in preparing for the transition, including gradual acclimation, soil and container preparation, and pest and disease management.
Gradual Acclimation (Hardening Off)
Gradual acclimation, also known as hardening off, is a critical process that involves slowly exposing indoor plants to outdoor conditions. This helps plants adjust to changes in light, temperature, and humidity, reducing the risk of transplant shock.
Step-by-Step Hardening Off Process
- Day 1-3: Place the plants outside in a shaded area for 2-3 hours each day. This initial exposure helps the plants get used to outdoor temperatures and air movement without the stress of direct sunlight.
- Day 4-6: Increase outdoor exposure to 4-6 hours each day, still keeping the plants in partial shade. Gradually increasing the duration helps build the plants’ tolerance to outdoor conditions.
- Day 7-10: Extend outdoor time to 6-8 hours each day, and start introducing the plants to direct sunlight for short periods. This helps the plants adapt to the intensity of natural light.
- Day 11-14: Leave the plants outdoors for most of the day, including several hours of direct sunlight. If nighttime temperatures are mild, consider leaving the plants outside overnight to further acclimate them to the outdoor environment.
Tips for Successful Hardening Off
- Monitor Weather: Choose days with mild, stable weather for the hardening-off process. Avoid extreme temperatures, high winds, and heavy rain.
- Gradual Exposure: Increase the duration and intensity of outdoor exposure gradually to prevent shock.
- Shading: Use a shade cloth or place plants in naturally shaded areas to protect them from intense sunlight during the initial stages.
- Watering: Ensure plants are well-watered throughout the hardening-off process. Outdoor conditions can cause the soil to dry out more quickly.
Soil and Container Preparation
Proper soil and container preparation is essential to support the healthy growth of cannabis plants once they are moved outdoors. Whether you plan to transplant directly into the ground or use containers, the growing medium must be conducive to robust root development and provide adequate nutrients.
Soil Quality
- Well-Draining Soil: Outdoor soil should be well-draining to prevent waterlogging, which can lead to root rot. Sandy loam soil is often ideal for cannabis plants.
- Nutrient-Rich: Enrich the soil with organic matter such as compost or aged manure to provide essential nutrients. A balanced fertilizer with equal parts nitrogen, phosphorus, and potassium (N-P-K) can also be beneficial.
- Soil pH: A pH of between 6.0 and 7.0 is the ideal range for cannabis, so make sure that’s where it is. Assess the soil’s pH and use lime (to raise) or sulfur (to lower) as needed to make any necessary adjustments.
Container Size and Preparation
If you plan to grow cannabis in containers, choosing the right size and preparing the containers properly is crucial.
- Container Size: To allow for optimum growth and room for the plant’s root system, use sizable containers—at least ten to fifteen gallons.
- Drainage: Make sure there are enough drainage holes in containers to avoid waterlogging. You can add a layer of gravel or perlite at the bottom to improve drainage.
- Soil Mix: Make use of a premium potting mix that has a high organic matter content and drains properly. For cannabis plants, a mixture of compost, perlite, and peat moss works well.
- Transplanting: Gently remove the plants from their current pots, being careful not to damage the roots. Place the plants in the prepared containers, backfill with soil, and water thoroughly to help settle the soil around the roots.
Preventing Transplant Shock
Transplant shock can occur when plants are moved to a new environment. Taking steps to minimize this stress is essential for a smooth transition.
- Watering: Water the plants thoroughly before and after transplanting to ensure they are well-hydrated. This helps reduce stress on the root system.
- Handling: Handle plants gently during the transplanting process to avoid damaging the roots and stems.
- Root Stimulants: Consider using a root stimulant or transplant solution to encourage root growth and reduce transplant shock. Products containing mycorrhizal fungi or other beneficial microbes can be especially helpful.
Pest and Disease Management
Moving plants outdoors exposes them to a wider range of pests and diseases. Protecting your plants from pests and diseases requires the application of efficient management techniques.
Inspection and Prevention
- Inspect Plants: Before moving plants outdoors, carefully inspect them for any signs of pests or diseases. Handle any problems right away to stop them from getting worse.
- Preventative Treatments: Apply organic insecticides or fungicides if necessary. Neem oil, insecticidal soap, and copper-based fungicides are effective options for managing common pests and diseases.
- Companion Planting: Plant companion plants that deter pests by nature. For instance, basil can ward off flies and mosquitoes, while marigolds can discourage aphids and worms.
Ongoing Pest and Disease Management
- Regular Inspections: Once plants are outdoors, conduct regular inspections to detect and address any pest or disease issues early.
- Natural Predators: Encourage beneficial insects, such as ladybugs and predatory wasps, which can help control pest populations.
- Organic Treatments: Use organic pest and disease treatments as needed. Avoid synthetic chemicals that can harm beneficial insects and the environment.
Executing the Transition
Successfully moving cannabis plants from an indoor to an outdoor environment involves careful execution to ensure the plants acclimate smoothly without undue stress. This section will cover the steps and considerations for the day of transition, including handling plants, planting in the ground or containers, and initial post-transition care.
Day of Transition
Choosing the Right Day
Selecting the right day to move your plants outdoors is crucial for minimizing stress and ensuring a smooth transition.
- Weather Conditions: Choose a calm, cloudy day with mild temperatures (60-75°F or 15-24°C) to reduce stress from sudden temperature changes and intense sunlight. Avoid moving plants on extremely hot, cold, or windy days.
- Wind: A day with minimal wind is preferable, as strong winds can cause physical damage to plants and increase water loss through evaporation.
- Precipitation: Avoid moving plants on days with heavy rain or storms. Excessive moisture can lead to root rot and other fungal issues.
Watering
Ensure plants are well-watered before and after the move to maintain hydration and reduce transplant shock.
- Pre-Transition Watering: Water the plants thoroughly a few hours before moving them. This ensures the roots are hydrated and helps the soil adhere to the root ball during the move.
- Post-Transition Watering: After planting, water the plants again to help settle the soil around the roots and reduce transplant shock.
Handling Plants
Handle the plants gently during the move to avoid damaging the roots and stems.
- Careful Removal: Gently remove the plants from their indoor pots or growing medium. If the plants are root-bound, carefully loosen the roots before transplanting.
- Minimize Root Disturbance: Try to keep the root ball intact to minimize root disturbance. This helps the plants adapt more quickly to their new environment.
Planting in Ground or Containers
In-Ground Planting
- Preparing the Site: Choose a well-draining location with access to ample sunlight. Dig holes twice the width and the same depth as the root ball.
- Soil Amendment: Mix in compost or organic matter to enrich the soil and improve its structure. A balanced fertilizer can also be added to support initial growth.
- Planting: Make sure the root ball of the plant is level with the surrounding dirt before inserting it into the hole. Backfill the plant’s base with dirt, carefully compacting it.
- Watering: After planting, give the area plenty of water to help the soil settle and remove any air pockets around the roots.
Container Planting
- Container Selection: Use large containers (at least 10-15 gallons) with adequate drainage holes to accommodate the plant’s root system and promote healthy growth.
- Soil Mix: A premium, well-draining potting mix that is high in organic matter should be added to the container. For cannabis plants, a mixture of compost, perlite, and peat moss works best.
- Planting: Gently place the plant in the container, filling in with soil around the root ball. Firm the soil gently and water thoroughly to help settle the soil and reduce transplant shock.
Post-Transition Care
Monitoring and Adjustments
- Daily Monitoring: Check plants daily for signs of stress, pests, or diseases.
- Watering: Maintain consistent moisture, but avoid overwatering. It might be necessary to water more often outside.
- Nutrient Management: Continue a regular feeding schedule, adjusting for outdoor growth demands.
Pest and Disease Control
- Regular Inspections: Inspect plants regularly for pests and diseases.
- Natural Predators: Encourage beneficial insects, like ladybugs and predatory wasps, to control pests.
- Organic Treatments: Use organic insecticides and fungicides as needed.
Pruning and Training
- Pruning: Remove dead or damaged leaves to improve airflow and reduce disease risk.
- Training: Use techniques like topping, FIMing, or LST (low-stress training) to shape the plant and maximize light exposure.
Environmental Protection
- Weather Protection: Use row covers, shade cloths, or temporary shelters to protect plants from extreme weather.
- Wind Protection: Stake plants or use windbreaks to protect against strong winds.
Advanced Techniques
Light Deprivation
- Purpose: Control flowering times by manipulating light exposure.
- Method: Use blackout tarps or light deprivation greenhouses to simulate shorter days and induce flowering.
Greenhouse Transition
- Benefits: Provides a controlled environment with natural light.
- Implementation: Move plants to a greenhouse for added protection and extended growing seasons.
Hydroponic to Soil Transition
- Challenges: Hydroponic plants need careful acclimation to soil conditions.
- Steps: Gradually introduce soil by mixing a small amount into the hydroponic medium, increasing over time.
Common Issues and Solutions
Transitioning cannabis plants from an indoor to an outdoor environment can present several challenges. However, with careful monitoring and proactive measures, you can address and mitigate these issues effectively. This section will discuss some common problems you may encounter during and after the transition and provide practical solutions to ensure your plants thrive in their new outdoor setting.
Transplant Shock
Symptoms
- Wilting: Leaves may droop and lose turgor.
- Yellowing Leaves: Older leaves, in particular, may turn yellow.
- Stunted Growth: Plants may show little to no growth after the move.
Prevention
- Gradual Acclimation: Follow the hardening-off process to gradually introduce plants to outdoor conditions.
- Proper Watering: Ensure plants are well-hydrated before and after transplanting.
- Root Care: Handle roots gently during transplanting to minimize disturbance.
Treatment
- Watering: Keep the soil consistently moist but not waterlogged.
- Shading: Provide temporary shade to protect plants from intense sunlight.
- Anti-Transpirants: Consider using anti-transpirant sprays to reduce water loss through leaves.
Pests and Diseases
Common Pests
- Aphids: Insects that feed on sap and cause plant weakness are little.
- Spider Mites: Tiny arachnids that cause stippling on leaves.
- Caterpillars: Larvae that can chew large holes in leaves.
Common Diseases
- Powdery Mildew: A fungal disease that causes a white, powdery coating on leaves.
- Botrytis (Bud Rot): A fungal disease that affects buds and can cause them to rot.
- Root Rot: Caused by overwatering and poor drainage, leading to decaying roots.
Prevention
- Regular Inspections: Check plants regularly for early signs of pests and diseases.
- Companion Planting: Plant herbs and flowers that repel pests, such as marigolds and basil.
- Good Garden Hygiene: Remove plant debris and weeds that can harbor pests and diseases.
Treatment
- Organic Insecticides: Use neem oil, insecticidal soap, or diatomaceous earth to control pests.
- Fungicides: Apply sulfur or copper-based fungicides to manage fungal diseases.
- Beneficial Insects: Introduce ladybugs, lacewings, and predatory wasps to naturally control pest populations.
Environmental Stress
Heat Stress
- Symptoms: Leaves may curl or develop brown edges.
- Prevention: Provide shade during peak sunlight hours and ensure adequate watering.
- Treatment: Move plants to a shaded area temporarily and increase watering.
Cold Stress
- Symptoms: Leaves may turn purple or develop necrotic spots.
- Prevention: Avoid moving plants outdoors until after the last frost date. Use row covers for protection.
- Treatment: Use frost blankets or move plants to a sheltered location during cold snaps.
Wind Stress
- Symptoms: Leaves may show signs of physical damage, such as tearing or bending.
- Prevention: Use windbreaks or stake plants to provide support.
- Treatment: Prune damaged leaves and provide additional support to prevent further damage.
Nutrient Deficiencies
Symptoms
- Nitrogen Deficiency: Yellowing of older leaves and stunted growth.
- Phosphorus Deficiency: Dark green or purplish leaves and poor root development.
- Potassium Deficiency: Yellowing leaf edges and necrotic spots on older leaves.
Prevention
- Soil Testing: Test soil before planting to determine nutrient levels and amend accordingly.
- Balanced Fertilization: Use a balanced fertilizer with appropriate N-P-K ratios for cannabis.
Treatment
- Nitrogen: Apply a nitrogen-rich fertilizer or organic amendments like blood meal or fish emulsion.
- Phosphorus: Use bone meal, rock phosphate, or a phosphorus-rich fertilizer.
- Potassium: Apply potassium sulfate or kelp meal to address deficiencies.
Watering Issues
Overwatering
- Symptoms: Even with damp soil, there is wilting, yellowing leaves, and root rot.
- Prevention: Ensure well-draining soil and avoid watering too frequently.
- Treatment: Allow the soil to dry out between waterings and improve drainage.
Underwatering
- Symptoms: Wilting, dry, and crispy leaves.
- Prevention: Water plants consistently, especially during hot and dry conditions.
- Treatment: Increase watering frequency and ensure the soil remains evenly moist.
Light Issues
Insufficient Light
- Symptoms: Stretching (elongated stems) and sparse foliage.
- Prevention: Ensure plants receive at least 6-8 hours of direct sunlight daily.
- Treatment: Move plants to a sunnier location or use supplemental lighting if necessary.
Excessive Light
- Symptoms: Leaf burn, yellowing, and crispy edges.
- Prevention: Provide shade during the hottest part of the day.
- Treatment: Move plants to a slightly shaded area and ensure they are well-watered.
Pruning and Training Challenges
Over-Pruning
- Symptoms: Stunted growth and reduced yield.
- Prevention: Prune conservatively, removing only dead or damaged leaves.
- Treatment: Allow the plant time to recover and minimize additional stress.
Improper Training
- Symptoms: Broken branches and uneven growth.
- Prevention: Use gentle training techniques like low-stress training (LST) and support branches with ties or stakes.
- Treatment: Prune damaged areas and support weak branches to promote recovery.
Conclusion
Moving cannabis plants from an indoor to an outdoor environment can be a highly rewarding endeavor that maximizes the potential for increased yield and quality. However, this transition involves careful planning, execution, and ongoing care to ensure success. By understanding the benefits and challenges associated with this move, you can better prepare your plants for a smooth and stress-free adaptation.
Key Takeaways
- Understanding the Transition: Recognize the benefits of increased yield, cost-effectiveness, and natural growth cycles, as well as the challenges of environmental stress, pests, diseases, and climate variability.
- Timing the Transition: Determine the optimal time of year based on your local climate and ensure plants are at the appropriate growth stage for moving outdoors. Gradual acclimation through the hardening-off process is crucial for minimizing transplant shock.
- Preparing for the Transition: Proper preparation involves ensuring high-quality soil, adequately sized containers, and effective pest and disease management. Gradually acclimate plants to outdoor conditions to build their resilience.
- Executing the Transition: Choose the right day with favorable weather conditions, handle plants gently, and ensure proper planting techniques. Provide initial post-transition care, including consistent watering, monitoring, and pest control.
- Common Issues and Solutions: Be prepared to address common problems such as transplant shock, pest infestations, diseases, environmental stress, nutrient deficiencies, watering issues, and light management. Preventive actions and consistent observation are essential for preserving plant health.
Overall Strategy
By following the outlined steps and guidelines, you can ensure a successful transition for your cannabis plants from an indoor to an outdoor environment. Gradual acclimation, careful handling, and consistent post-transition care are fundamental to helping your plants thrive. Monitoring and addressing common issues promptly will further enhance their growth and yield potential.
Final Thoughts
Transitioning cannabis plants outdoors requires dedication and attention to detail, but the rewards of increased yield and quality make it well worth the effort. By understanding the intricacies of this process and being prepared for potential challenges, you can create an optimal outdoor growing environment that promotes robust and healthy cannabis plants. With patience, care, and proactive management, your cannabis plants can flourish in their new outdoor setting, providing you with bountiful harvests and high-quality buds.
8bitmonstr
Another highly informative and educational article from Royal King Seeds! All the things I do and more. Reading this article was like taking a refresher course and learning new things. I really liked the hardening off “timeline” (I usually just wing it). The watering “after” the transplant, the size of the final containers, and the Nutrient Deficiencies and Watering Issues were very helpful as well. Myself personally when I do the actual transplanting, I fill all the new containers first and then line everything up in rows (transplants and new containers) and then do a production line method when transplanting them so I don’t have to stop and fill more new containers in the middle of transplanting. Remember to relax and breathe during the process, and talk to your transplants during the process, they seem to like it lol.
Thanks Again Royal King for the great information!