Why Harvest And Cure Matter More Than You Think
When I ruined my first big grow, it was not because of bad lights or cheap nutrients. The plants actually looked great on the stalk. I lost that crop because I rushed cannabis harvesting and curing. I chopped too early, dried the buds too fast, and stuffed them into jars before they were ready. The result was harsh smoke, muted aroma, and a lot of wasted time.
Since then, I have learned that cannabis harvesting and curing can make or break months of work. Today, when people ask why one jar from my garden tastes incredible and another is just okay, the answer almost always lives in cannabis harvest timing and post-harvest handling, not in the brand of nutrients I used.
In this guide, I will walk you through exactly how I approach cannabis harvesting and curing: how I read trichome maturity, how I use flushing before harvest, how I handle drying cannabis buds, and why I rely on a slow cure for marijuana in tightly controlled conditions.
Reading The Plant: Cannabis Harvest Timing
Getting cannabis harvest timing right is the first pillar of cannabis harvesting and curing. No drying method can fix buds that were chopped way too early or far too late.
I start thinking about cannabis harvest timing as soon as pistils begin to darken and curl. From that point on, I watch plants every day. My approach combines three signals.
- Trichomes under magnification
- Overall trichome maturity across the plant
- The look of pistils and fan leaves
When I do cannabis harvest timing correctly, the buds finish with the cannabinoid and terpene levels I want, and the rest of the cannabis harvesting and curing process becomes much easier.
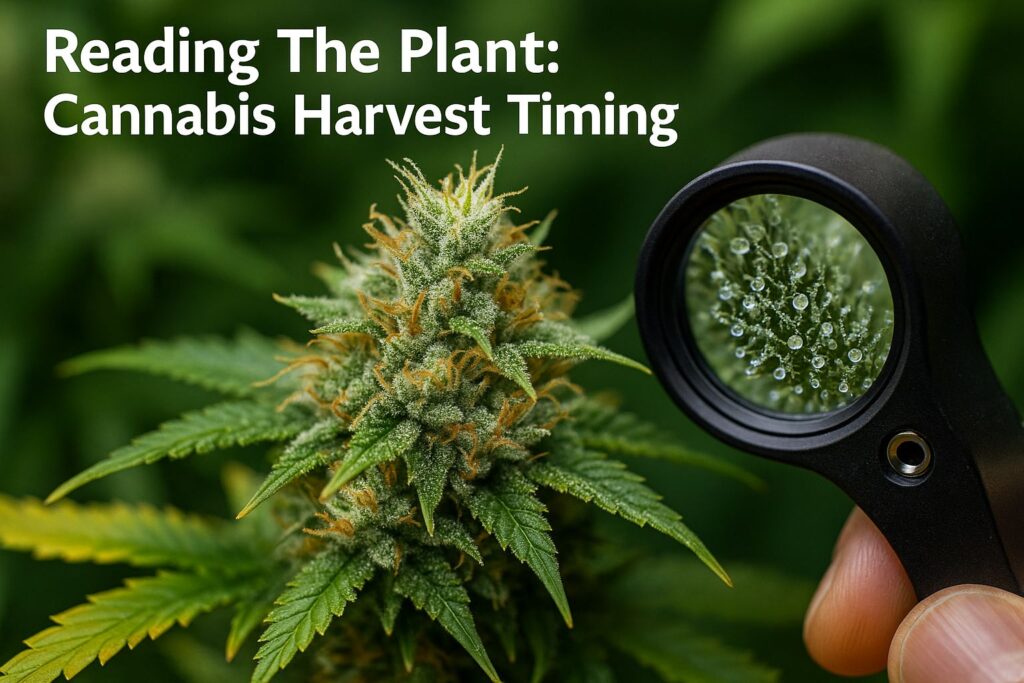
Using trichome maturity as the main signal
The most reliable sign for cannabis harvest timing is trichome maturity. I use a 60–100x loupe or a small digital microscope and check several sites on each plant:
- Top colas directly under the light
- Mid-level buds on side branches
- Lower shaded buds
I am looking for trichome maturity in terms of color and shape:
- Clear: not ready yet
- Cloudy/milky: peak potency forming
- Amber: oxidizing, heavier effect
For most strains, my ideal trichome maturity is around 5–15 percent amber, with the rest cloudy and almost no clear trichomes left. I repeat this check every day or two during the final two weeks. When trichome maturity reaches that sweet spot on most of the plant, cannabis harvest timing is locked in and I set the actual chop day.
Supporting signals: pistils and plant posture
Trichomes lead, but pistils and leaves still matter. As cannabis harvest timing approaches:
- Most pistils have darkened and curled against the buds
- The plant’s drinking rate slows
- Fan leaves show gentle fade, especially on heavy feeders
If pistils are still mostly white and sticking straight out but trichome maturity looks close, I double-check several buds. I have avoided many early chop mistakes by cross-checking cannabis harvest timing this way.
Preparing For Harvest: Environment, Flush, And Tools
Good cannabis harvesting and curing starts a week or two before you actually cut anything.
Flushing before harvest: when and how
I use flushing before harvest to remove excess salts from the medium and encourage a controlled fade. In coco and hydro, I usually start flushing before harvest about 7–10 days before chop. In soil, it may stretch to 10–14 days, depending on how heavy I fed in late flower.
My basic method for flushing before harvest:
- Switch to plain, pH-balanced water or very light nutrients
- Water to 10–20 percent runoff to wash out built-up salts
- Keep checking runoff EC/PPM every few days
Flushing before harvest is not about starving the plant; it is about giving roots a clean environment for the final push. Done right, it supports natural senescence without causing a crash in trichome maturity or aroma.
Dialing in the dry space ahead of time
I learned the hard way that you cannot scramble to set up a dry room on chop day. A big part of cannabis harvesting and curing is stabilizing the dry area beforehand.
My targets:
- Temperature: 18–21°C (64–70°F)
- Ideal drying room humidity: 55–60 percent
- Gentle, indirect airflow
- Complete darkness
I run the dehumidifier and fans for several days before harvest and confirm that my ideal drying room humidity is stable. If I cannot keep ideal drying room humidity in that range, I postpone chopping until I can. When ideal drying room humidity is ignored, drying cannabis buds either happens too fast (harsh smoke) or too slow (mold risk).
Cutting And Handling Plants On Chop Day
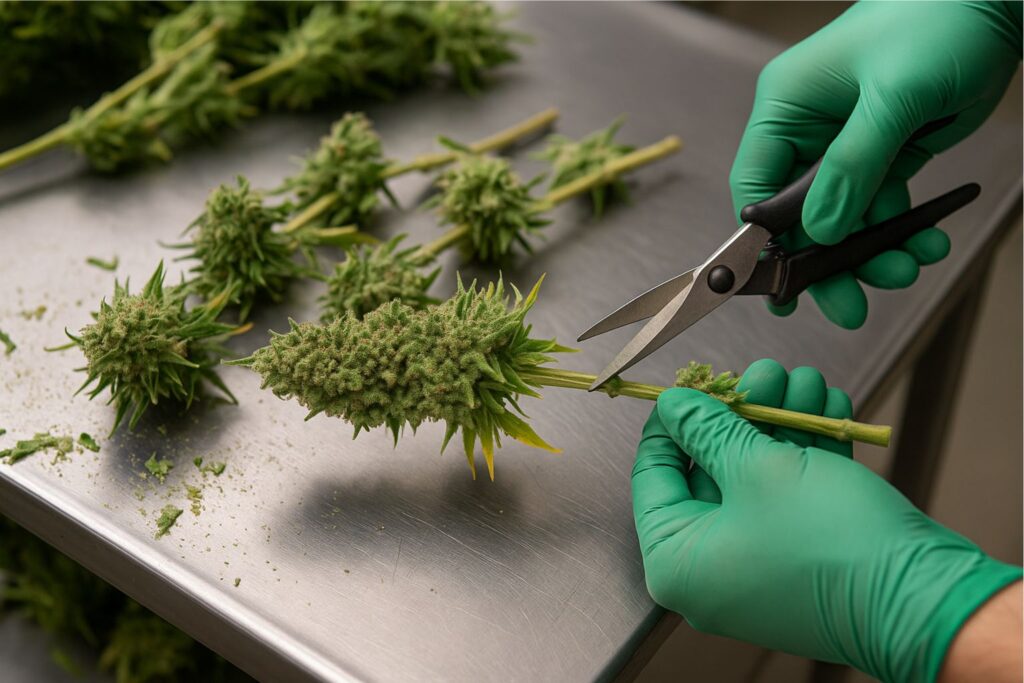
On harvest day, I think of myself more like a food handler than a gardener. Cleanliness and gentle handling are the priorities.
I always:
- Turn off lights 10–12 hours before cutting to let leaf surface moisture drop
- Wash my hands and clean trimming scissors with alcohol
- Avoid squeezing buds when moving branches
Some growers harvest individual branches; others cut whole plants at the base. I do both, depending on space and strain. For dense indica-leaning hybrids, whole plants hung upside down slow down drying cannabis buds and preserve more terpenes. For airy sativa-leaning cultivars, I often remove larger fan leaves and hang branches to keep the canopy manageable in the dry room.
Regardless of style, keeping trichomes intact is crucial for cannabis harvesting and curing. Rough handling at this stage knocks off resin heads and damages the terpene layer we spent weeks building.
Drying Cannabis Buds The Right Way
Drying cannabis buds is where most growers lose quality. The goal is to remove water slowly and evenly while protecting terpenes and cannabinoids.
Ideal drying room humidity and temperature
I stick to that ideal drying room humidity of 55–60 percent and temperatures between 18–21°C. This combination gives me a 10–14 day dry in most climates, which is just about perfect.
Why I love that range:
- At lower humidity, drying cannabis buds can finish in four or five days, often leading to brittle exteriors and wet centers.
- At higher humidity, stems stay wet too long and mold risk increases dramatically.
If my ideal drying room humidity drifts outside target, I adjust:
- Dehumidifier and intake fan speed when humidity creeps up
- Humidifier and reduced airflow when buds feel crispy too early
I check hanging branches daily by feel, sight, and smell. Good drying cannabis buds will shrink slightly, soften on the outside, and keep a strong, natural aroma without smelling like hay.
Airflow, spacing, and preserving terpenes in weed
To help with preserving terpenes in weed, I:
- Hang branches so that they do not touch or overlap heavily
- Aim small fans at the walls or ceiling, never directly at buds
- Avoid strong odors or contaminants in the same room
Preserving terpenes in weed also means watching temperature near the ceiling. With strong lights turned off, rooms can still get warm. If I see 24–25°C above the hanging colas, I increase exhaust.
When drying cannabis buds slowly in this controlled environment, preserving terpenes in weed becomes much easier. The buds finish spongy, not rock-hard or crumbly, and the smell opens up instead of disappearing.
Curing Cannabis In Jars: Turning Good Into Great

Once stems on medium branches snap instead of bend, I move to curing cannabis in jars. This is where cannabis harvesting and curing pays off.
Jar selection and initial fill
For curing cannabis in jars, I use glass containers with airtight lids. Wide-mouth quart jars work for small batches; larger growers might prefer food-grade buckets with gasket lids.
My process:
- Gently remove buds from branches, avoiding over-trimming at this stage
- Fill each jar about 70–80 percent full, leaving headspace
- Label jars with strain, date, and any notes from the grow
The first few days of curing cannabis in jars are the most active. Internal moisture equalizes, and if drying cannabis buds was on the fast side, this step helps rehydrate the exterior.
Burping schedule and slow cure for marijuana
The slow cure for marijuana is simple: release built-up moisture and gases while keeping enough humidity to keep buds supple.
My slow cure for marijuana schedule:
- Days 1–3: Open jars 2–3 times per day for 10–15 minutes, gently rolling buds to expose surfaces
- Days 4–7: Open once daily
- Weeks 2–4: Open every few days, then once a week
During this slow cure for marijuana, I use small hygrometers in a few sample jars. I aim for 58–62 percent internal humidity. If a jar climbs above 68 percent, it stays open longer or buds go back onto a rack briefly. If a jar sits below 55 percent, I know drying cannabis buds went a little too far and may add a humidity control pack.
Done right, the slow cure for marijuana deepens aroma, smooths the smoke, and stabilizes buds for long-term storage. For some strains, the full character of terpenes only appears after three to six weeks of curing cannabis in jars.
Strain Differences And Autoflower Harvest Window
Genetics and phenotypes
Not all plants behave the same at harvest. Some phenotypes show trichome maturity early; others keep stacking calyxes long after you expect them to finish.
I see clear patterns:
- My gas-heavy hybrids from feminized cannabis seeds often show fast trichome maturity and respond well to a 10-day flush.
- Fruit-forward sativas from feminized cannabis seeds may need extra days beyond breeder recommendations and benefit from slightly cooler nights before chop.
- CBD-leaning cultivars from feminized cannabis seeds sometimes finish with less obvious amber, so I lean more heavily on overall trichome cloudiness and aroma.
Because of this variation, cannabis harvest timing should be guided by each plant, not just the seed pack date.
Managing the autoflower harvest window
With autos, everything is compressed. The autoflower harvest window can be as short as a week, so I watch trichome maturity closely once pistils start to turn.
For the autoflower harvest window, I:
- Start checking trichomes daily around day 60–70 from sprout
- Plan flushing before harvest only 5–7 days ahead in coco or soil-less mixes
- Keep ideal drying room humidity ready before plants are ready, since the switch can come quickly
Because I often run multiple autoflower harvest window stages in the same tent, I stagger seeds. That way, not every plant demands cannabis harvesting and curing attention on the same weekend.
Lighting, Nutrients, And Medium: Setting Up A Better Harvest

Even though this article focuses on cannabis harvesting and curing, the quality of the final jar is heavily influenced by choices made earlier in the cycle.
- Lighting: I aim for 700–900 µmol/m²/s PPFD across the canopy in flower. Even lighting means trichome maturity happens more uniformly, making cannabis harvest timing easier.
- Nutrients: I keep EC in a moderate range, ramping up slowly and tapering down ahead of flushing before harvest. Overfed plants often dry with a harsh edge, no matter how well I manage curing cannabis in jars.
- Medium: In coco and hydro, I pay close attention to root oxygen and drainage to avoid salt buildup that complicates the clean-up phase of cannabis harvesting and curing. In soil, I lean on organic amendments for slow, steady nutrition that supports natural fade.
Healthy plants are far more forgiving when it comes time for drying cannabis buds and executing a slow cure for marijuana.
Frequently Asked Questions About Cannabis Harvesting And Curing
How do I know when to harvest my plants?
Use a combination of cannabis harvest timing cues. Check trichome maturity first, aiming for mostly cloudy with a small percentage of amber heads. Confirm that pistils have mostly darkened and curled and that the plant is starting to fade naturally. When all three line up, cannabis harvesting and curing is ready to begin.
How long should I dry and cure?
In my room, drying cannabis buds takes about 10–14 days at ideal drying room humidity and moderate temps. After that, I spend at least three to four weeks curing cannabis in jars using a slow cure for marijuana approach. Some strains continue to improve for two months or more if stored correctly.
Do autoflowers need different harvest treatment?
The main difference is the shorter autoflower harvest window. Trichome maturity can change quickly, so monitor daily once plants look close to ready. Otherwise, principles of cannabis harvesting and curing, flushing before harvest, drying cannabis buds, and curing cannabis in jars apply to autos just like photos.
Final Thoughts
It took me years to accept that cannabis harvesting and curing is its own craft, separate from veg and flower. Once I started treating cannabis harvest timing, ideal drying room humidity, drying cannabis buds, and curing cannabis in jars as a single connected process, the quality of my marijuana jumped.
Today, whether I am working with a tent full of feminized cannabis seeds or timing an autoflower harvest window outdoors, I know that everything leads up to this final month. If I respect trichome maturity, use flushing before harvest wisely, protect and preserve terpenes in weed while they dry, and stay patient with a slow cure for marijuana, the jars take care of themselves.
That is the real reward of cannabis harvesting and curing done right: opening a container months later, taking a breath, and recognizing every decision you made from seed to storage in that first incredible smell.