Table of Contents
I’ve built indoor spaces for cannabis, marijuana, and weed in more than one “not-a-grow-room” room: a closet that ran too hot, a spare room with a door that leaked light, and a basement corner that taught me what high humidity can do in late flower. Every rebuild has made the next harvest easier.
When I say “best grow room for your cannabis seeds,” I’m not talking about an Instagram setup or a shopping list of the newest gadgets. I mean a space that lets you repeat results: stable temperature, predictable humidity, safe electrical load, clean airflow, and lighting you can actually dial in. That consistency matters whether you’re running feminized seeds, experimenting with autoflowering genetics, or trying to keep a small personal canopy healthy from germination to cure.
This post is the build guide I follow today. It’s experience-driven, with the same numbers I use in my own room: PPFD ranges, VPD targets, and the real trade-offs that show up once plants get big and the room starts producing heat and moisture. I’ll also share the indoor cannabis grow room checklist I use before I hang a single light, plus a practical FAQ that covers common seed-shopping and cultivation questions in a non-legal-advice tone.
If you take one thing away, let it be this: your room is part of your grow technique. The plant only performs as well as the environment you can maintain.
What “best” means for an indoor cannabis grow room
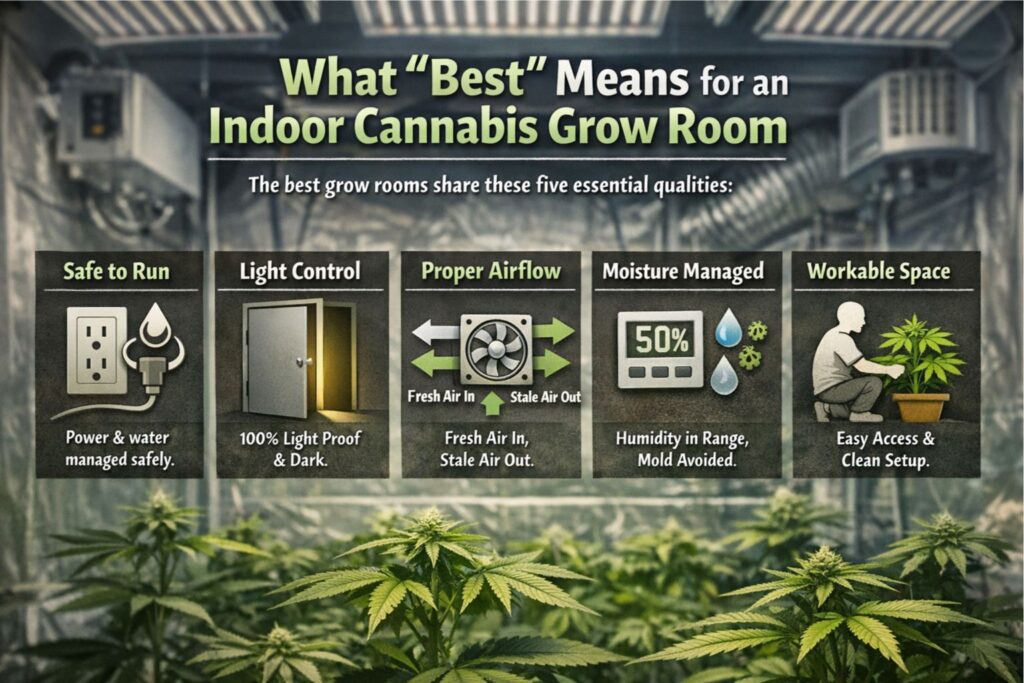
The best grow room for your cannabis seeds is the one that matches your constraints and keeps the basics stable. In my experience, the best rooms share five qualities:
- They are safe to run (power and water are managed like a system).
- They control light completely (especially for photoperiod flowering).
- They move air correctly (fresh air in, stale air out, odor under control).
- They manage moisture (humidity stays in range, runoff doesn’t sit, mold risk stays low).
- They are workable (you can reach plants, clean surfaces, and reset between cycles).
If you build around those points, you can grow great weed in a tent, a closet, or a dedicated room. If you ignore them, even expensive gear won’t save the run.
The indoor cannabis grow room checklist I use before building
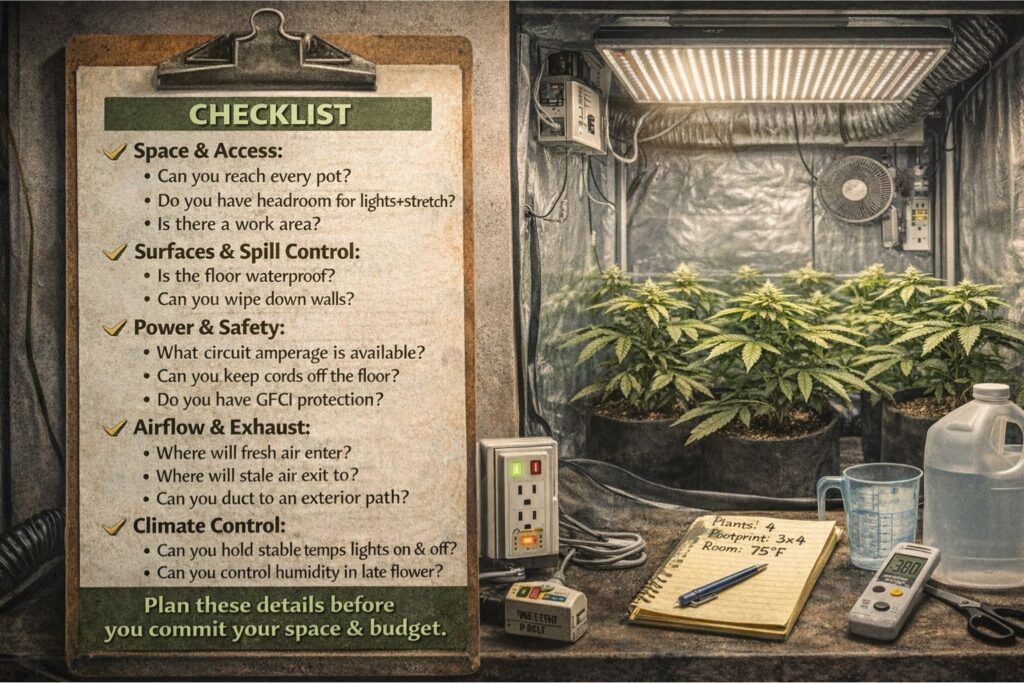
This indoor cannabis grow room checklist is the first thing I write down. It keeps me from forgetting the unglamorous details that create the biggest problems later. I use the same indoor cannabis grow room checklist whether I’m setting up a new tent or converting a room.
- Space and access
- Can you reach every pot without stepping over cords or hoses?
- Do you have vertical room for lights, hangers, and plant stretch?
- Is there space for a small work area outside the canopy?
- Surfaces and spill control
- Is the floor waterproof or can you add a tray/liner?
- Are walls washable or can you cover them with a wipeable surface?
- Power and safety
- Is there a dedicated circuit available?
- Can you keep all electrical connections off the floor?
- Do you have GFCI protection or a safe way to add it?
- Airflow and exhaust
- Where will the intake come from?
- Where will the exhaust go?
- Can you duct to an exterior path or an isolated exhaust area?
- Climate control
- Can you hold stable temps in lights-on and lights-off?
- Can you manage humidity in late flower?
- Light control
- Can you do a proper light leak test for flowering room conditions?
- Can you eliminate indicator LEDs and window glow?
- Maintenance workflow
- Can you remove runoff easily?
- Can you clean between cycles without moving heavy furniture?
I keep this indoor cannabis grow room checklist on paper, not in my head. When plants are in week six of flower and you’re tired, systems matter more than willpower.
Layout and sizing: plan for the plant you’ll have, not the seedling
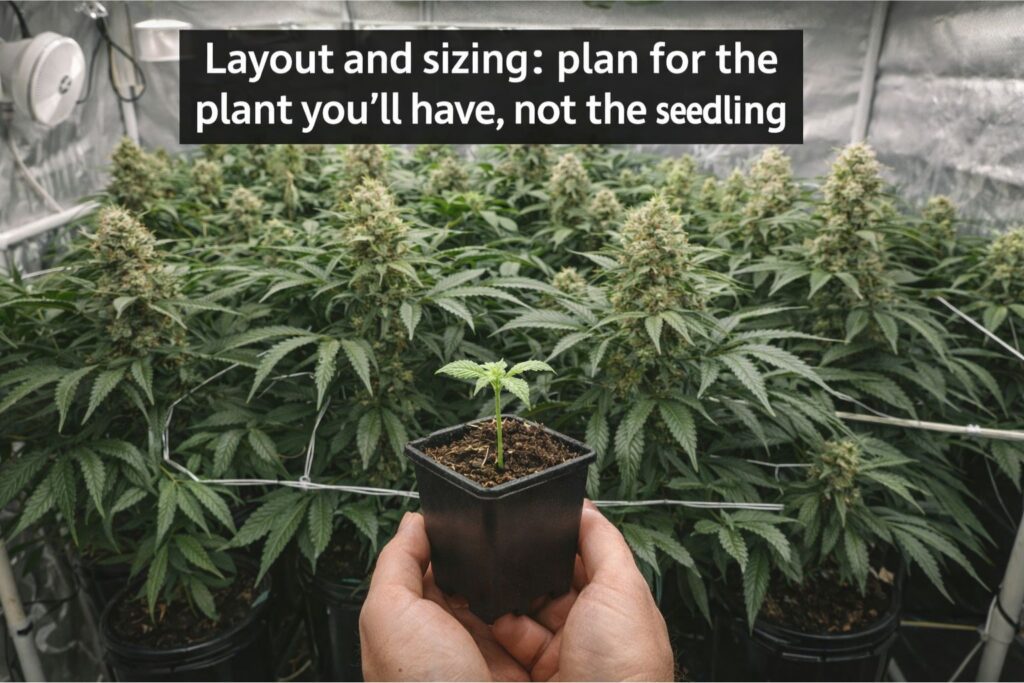
A seedling looks tiny, but a healthy cannabis plant fills a footprint fast. Before you decide on a tent size or a closet conversion, plan the canopy and the walkway. Crowding is the easiest way to create humidity pockets, leaf overlap, and disease pressure.
Here’s how I estimate space:
- Count your intended plants and your intended pot size.
- Plan for at least 30–45 cm of working space somewhere in the room.
- Assume plants will stretch in early flower, especially sativa-leaning phenotypes.
- Assume you’ll add at least one extra device later (dehumidifier, heater, second fan).
If you’re unsure, read a grow tent vs closet conversion guide and decide what you can truly control. A tent gives structure and ports; a closet can be stealthier but often needs more sealing and airflow work.
DIY sealed grow space setup: build the envelope first
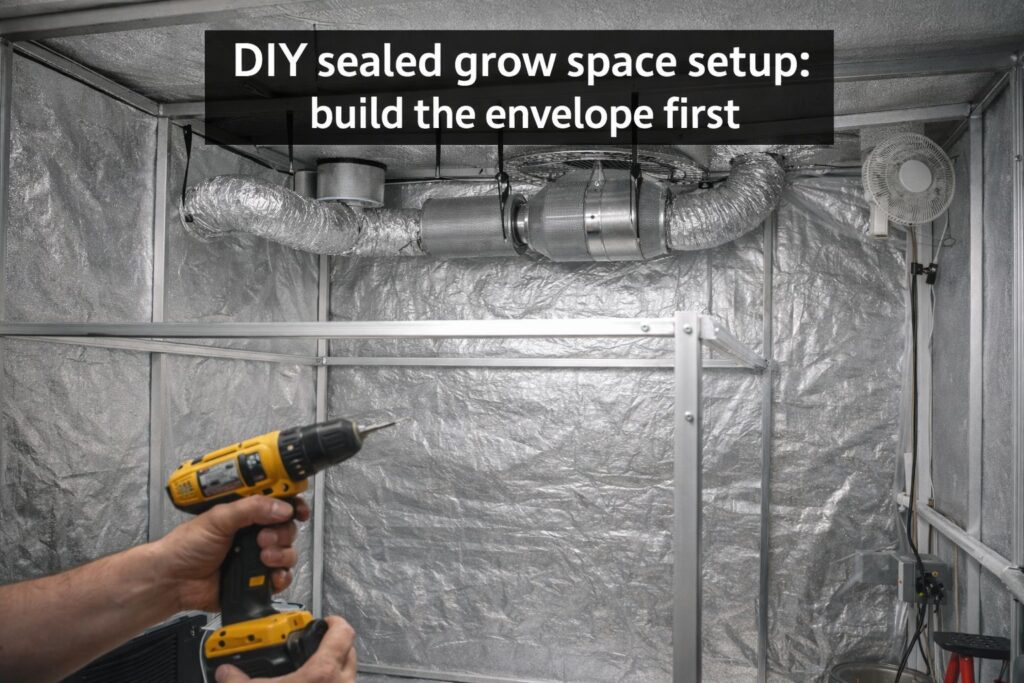
The biggest performance jump I ever saw came from treating the grow area as a controlled box. A proper DIY sealed grow space setup improves climate stability, odor control, and cleanliness.
My DIY sealed grow space setup priorities:
- Waterproof the floor
- I use a heavy-duty tray or pond liner that runs a few centimeters up the wall. Spills happen. Runoff happens. Plan for it.
- Make surfaces wipeable
- Clean white walls work. Reflective film works. What matters is that you can clean it and it stays flat.
- Seal the gaps
- Weather stripping on doors, sealed cable pass-throughs, and light-trap baffles on vents reduce leaks and make negative pressure easier.
- Keep equipment out of the splash zone
- Controllers, power strips, and timers live above waist height for me, never on the floor.
- Plan cable paths
- I route cables high, then down with drip loops.
I consider this DIY sealed grow space setup step non-negotiable because it prevents small problems from turning into chronic ones. A sloppy build makes humidity control during cannabis flowering much harder later.
Electrical load planning for grow lights: safer, quieter, more reliable
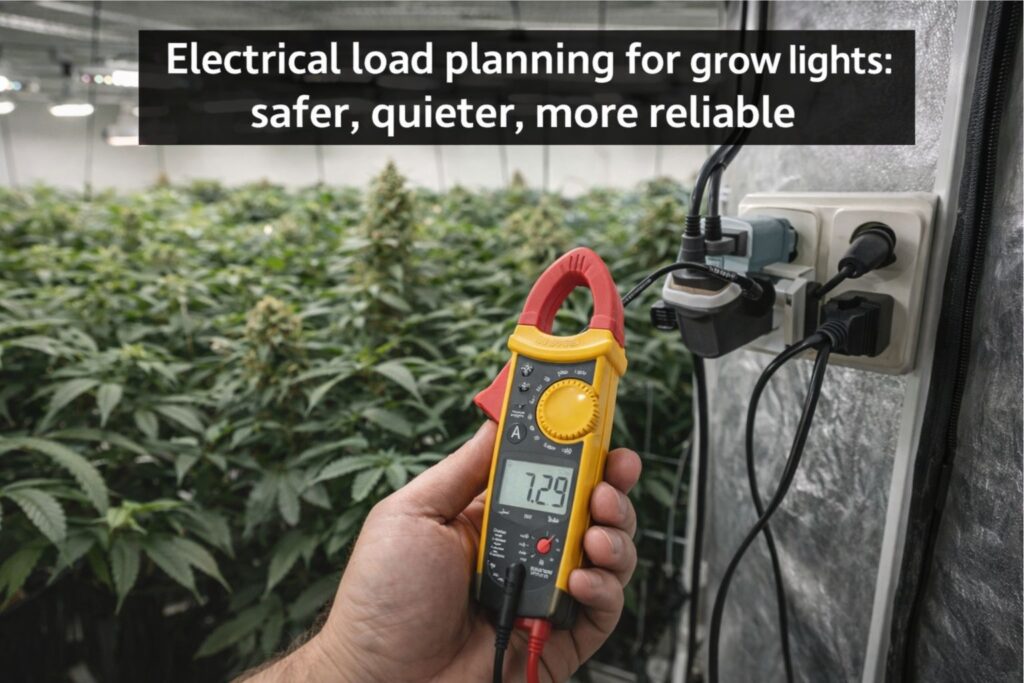
I’m strict about electrical load planning for grow lights because indoor grows pull real power for long hours. A circuit that runs “fine” in veg can trip in late flower when your dehumidifier cycles and your exhaust fan ramps up.
My electrical load planning for grow lights process:
- List every device and its wattage
- Light fixture(s)
- Inline fan and controller
- Oscillating fans
- Dehumidifier or humidifier
- Air conditioner or heater
- Pumps if you automate irrigation
- Sensors and controllers
- Convert watts to amps
- Amps = Watts / Voltage (120V or 230V depending on your region)
- Add headroom
- Devices with compressors (AC, dehumidifiers) spike on startup.
- Build for off-floor wiring
- Drip loops, cable clips, and a clean “power board” reduce risk.
Practical rules I follow for electrical load planning for grow lights:
- Avoid cheap extension cords as a permanent solution.
- Use rated cords and keep connections off the floor.
- Keep water mixing outside the grow area if possible.
- If you don’t understand your household wiring limits, consult a qualified electrician. That’s safety, not luxury.
If you want the best grow room for your cannabis seeds, this is one of the least exciting upgrades and one of the most important.
Air exchange and odor: quiet inline fan carbon filter sizing that actually works
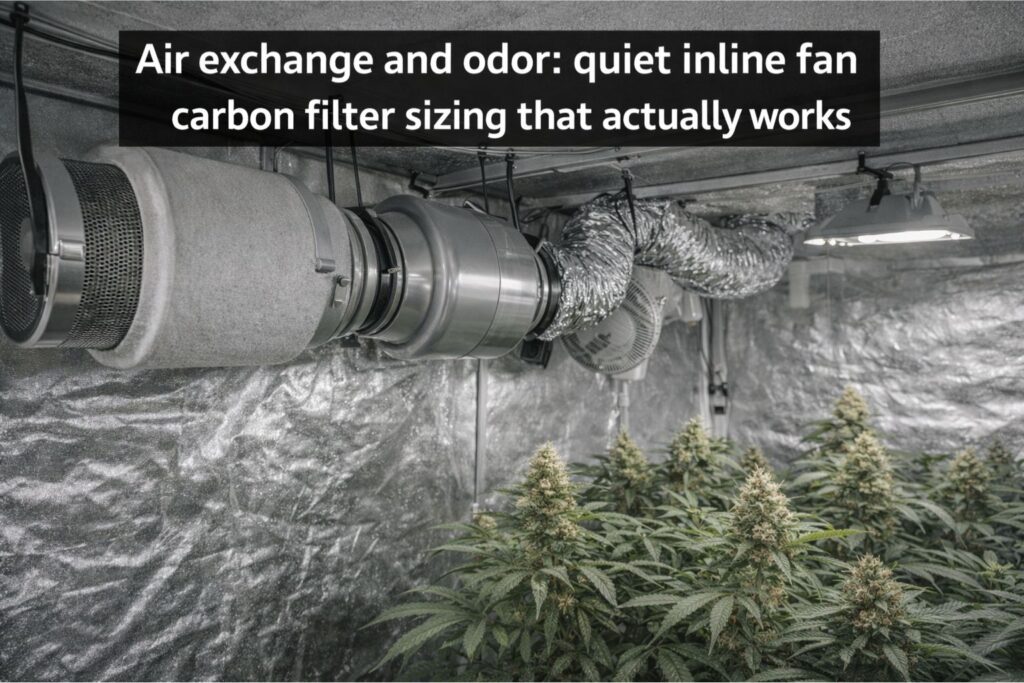
Air exchange does two jobs: it supplies fresh CO2-rich air and it removes heat and moisture. Odor control is a bonus, but for most indoor growers it’s a necessary one.
I approach ventilation as a system, which is why quiet inline fan carbon filter sizing matters. If the fan is undersized for the filter, airflow collapses. If the fan is oversized and run full blast, it can get loud and turbulent.
My quiet inline fan carbon filter sizing steps:
- Calculate room volume (length x width x height).
- Start with a baseline of one room-volume air change per minute.
- Add capacity for resistance:
- Carbon filters add restriction.
- Long duct runs and sharp bends add restriction.
- Silencers add restriction but reduce noise.
- Choose a fan that can deliver the needed airflow under load, not just a “free air” rating.
Noise-control tips that fit quiet inline fan carbon filter sizing:
- Hang the fan with straps to reduce vibration.
- Use insulated ducting for the first section after the fan.
- Keep duct runs short with gentle curves.
- Use a compatible speed controller to run the fan only as hard as needed.
I like to test negative pressure: with the exhaust running, the door should gently pull inward. That tells me the room is sealed enough and the exhaust is doing its job.
This matters for the best grow room for your cannabis seeds because stable negative pressure improves odor control and helps you manage humidity control during cannabis flowering.
Climate targets: temperature, humidity, and VPD
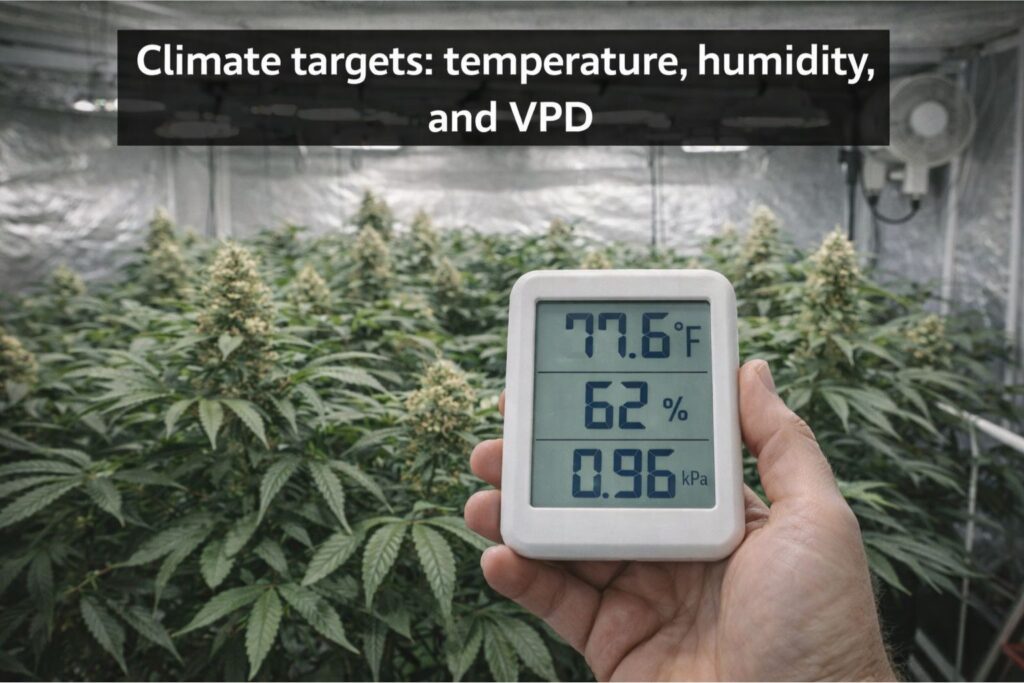
A cannabis plant is mostly water moving through tissue. If your air is too dry, transpiration can spike and stress the plant. If your air is too wet, leaves stay damp, and flower structure becomes a mold risk. That’s why I use VPD targets for indoor weed as my guide.
VPD targets for indoor weed I actually use
I treat VPD targets for indoor weed as a tuning tool, not a religion. Different cultivars and phenotypes handle stress differently, and airflow changes everything. Still, ranges help you stay out of trouble.
My working VPD targets for indoor weed (kPa):
- Seedlings and early veg: 0.8–1.0
- Veg: 1.0–1.2
- Early flower: 1.1–1.3
- Mid to late flower: 1.2–1.5
If you’re pushing higher PPFD, transpiration demand increases, so VPD targets for indoor weed become more important. With strong light, plants can drink fast and show deficiencies that are really “environment mismatches.”
Humidity control during cannabis flowering: my non-negotiables
Humidity control during cannabis flowering is where many indoor growers lose quality. Tight flowers trap moisture. If you combine high humidity with poor airflow, you increase the odds of bud rot.
My typical humidity targets:
- Seedlings: 65–75% RH
- Veg: 55–65% RH
- Flower weeks 1–4: 45–55% RH
- Flower weeks 5+: 40–50% RH (sometimes 35–45% if buds are tight)
My humidity control during cannabis flowering habits:
- I monitor lights-off humidity. That’s where spikes happen.
- I keep airflow moving through and under the canopy, not just above it.
- I avoid letting runoff sit. Standing water raises RH and invites pests.
- I keep the dehumidifier plan realistic: dehumidifiers add heat, so you must budget for it.
If you want the best grow room for your cannabis seeds, plan humidity control during cannabis flowering before you plant, not after you smell trouble.
Lighting done right: PPFD, canopy height, and scheduling
Lighting is where many people overspend and under-measure. You don’t need magic. You need coverage, stability, and enough intensity for the stage of growth.
PPFD map for LED grow room: how I use it
A PPFD map for LED grow room is the fastest way I know to remove guesswork. Even a borrowed meter session is worth it.
Ranges that work for me at ambient CO2:
- Seedlings: 100–250 PPFD
- Veg: 300–600 PPFD
- Flower: 600–900 PPFD, sometimes up to about 1000 if the environment and nutrition are stable
How I create a PPFD map for LED grow room:
- Measure at canopy height.
- Take readings in a grid, including corners and edges.
- Adjust hanging height and dimming before rearranging plants.
- Re-map after heavy training, because a flatter canopy changes the light field.
I reference the PPFD map for LED grow room whenever a plant looks “too dark green” (possible overfeeding under low light) or “too pale” (possible underfeeding for the light level). Light and nutrition are married.
Photoperiods and light schedules
For photoperiod plants, my baseline schedules are:
- Veg: 18/6
- Flower: 12/12
For autoflowering plants, I often use 18/6 or 20/4, but I choose based on heat and electricity. More hours can help, but only if your room can stay stable and your electrical load planning for grow lights supports it.
Light discipline: the light leak test for flowering room
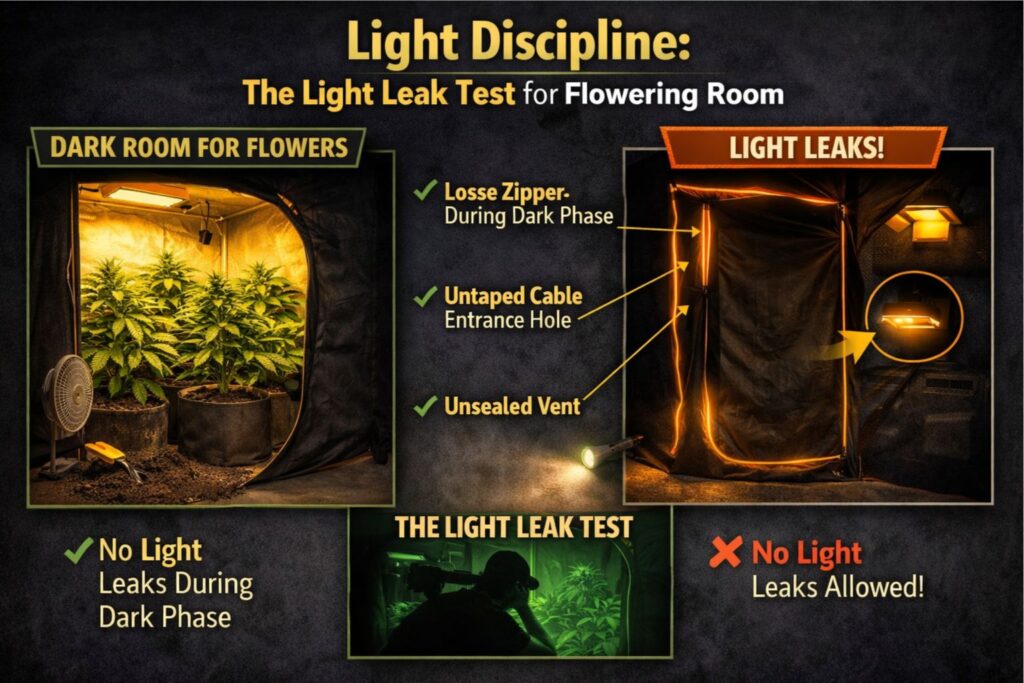
This is where many otherwise solid rooms fail. A few small light sources can cause flowering stress, delayed ripening, and in some genetics, instability.
I do a light leak test for flowering room conditions every time I change the room.
My light leak test for flowering room routine:
- Stand outside with the room lit and look for glow around doors, vents, and cable ports.
- Stand inside in complete darkness for 5–10 minutes so your eyes adjust.
- Look for indicator LEDs, window glow, and pinholes around ducting.
- Fix leaks with weather stripping, tape, or light-trap baffles.
I repeat the light leak test for flowering room after installing new equipment because new cords and ports create new gaps.
Medium choice and feeding: soil vs coco in small grow rooms
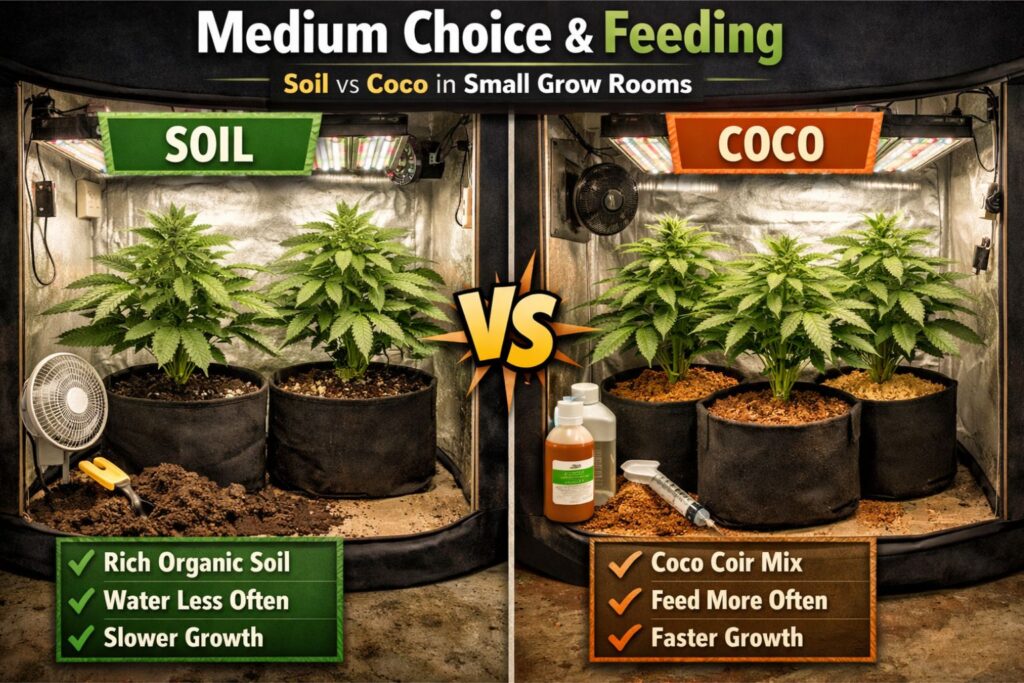
The medium you choose changes your daily routine. Soil is slower and more buffered. Coco is faster and more responsive but less forgiving of neglect. In a tight footprint, soil vs coco in small grow rooms becomes a decision about workflow and cleanup.
Soil vs coco in small grow rooms: my honest take
Soil vs coco in small grow rooms, based on my runs:
- Soil is beginner-friendly if you water correctly, but overwatering can linger and invite gnats.
- Coco grows fast and makes deficiencies easier to correct, but it expects consistent feeding and good runoff handling.
- If you cannot manage runoff, soil is often easier.
If you want to push higher PPFD, coco can be a smoother match because you can feed more precisely. If you want a simpler schedule with fewer inputs, soil can work well.
I keep basic targets and adjust to cultivar response:
- Early veg: EC around 0.8–1.2
- Late veg: EC around 1.2–1.6
- Flower: EC around 1.6–2.2 (some cultivars like less)
Nutrient burn often shows as leaf tip burn and clawing when EC is too high or the root zone dries out too much between feeds. Nutrient deficiency often shows when pH drifts or when you underfeed for your light level.
I mention soil vs coco in small grow rooms again because runoff management is the hidden variable in small spaces. If runoff sits, humidity rises and your humidity control during cannabis flowering becomes harder.
Training for the room you have: canopy control and airflow
Even light and clean airflow are easier when the canopy is flat. I use training to fit the room, not to follow trends.
My common training approach:
- Veg: top once or twice, then low-stress training to widen the plant.
- Transition: clean up lower growth that will never get strong light.
- Early flower: use a net or soft ties to keep tops level.
- Mid flower: remove leaves that block airflow in the interior, but avoid stripping the plant bare.
The training goal is simple: a canopy that matches the PPFD map for LED grow room and allows air to pass through. That supports VPD targets for indoor weed and reduces microclimates that cause mold.
Integrated pest management: prevent, don’t chase
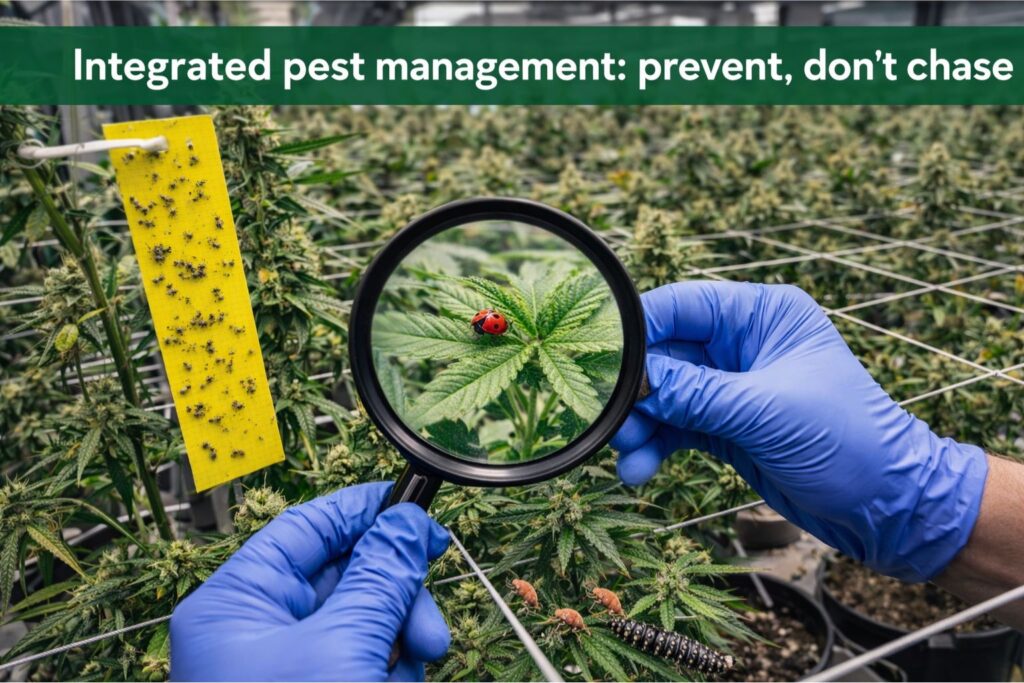
Indoor spaces reduce outdoor pest pressure, but they don’t eliminate it. Fungus gnats, mites, and powdery mildew can still show up.
My IPM habits:
- Sticky traps as early warning.
- Clean floors and avoid standing runoff.
- Keep humidity in range, especially in late flower.
- Quarantine new plants or clones away from the main space.
- Reset between cycles:
- Remove plant debris.
- Wipe surfaces.
- Clean fan blades and pre-filters.
- Replace carbon filter pre-socks if dusty.
A good DIY sealed grow space setup supports IPM because fewer gaps mean fewer entry points.
Drying and curing: plan it as part of your room design
I’ve seen excellent weed lose aroma and smoothness because drying was rushed or too hot. Drying is part of building the best grow room for your cannabis seeds because it’s the last environmental step before your jar.
My drying targets:
- Temperature: roughly 18–20°C (65–68°F) if possible
- Humidity: 55–60% RH
- Gentle air movement, never blasting directly on buds
- Darkness
If you plan to dry in the same space you flower in, you still need humidity control during cannabis flowering gear to work during the dry, or you need a separate drying corner with its own airflow. Many people forget this until harvest day.
Grow tent vs closet conversion guide: how I decide today
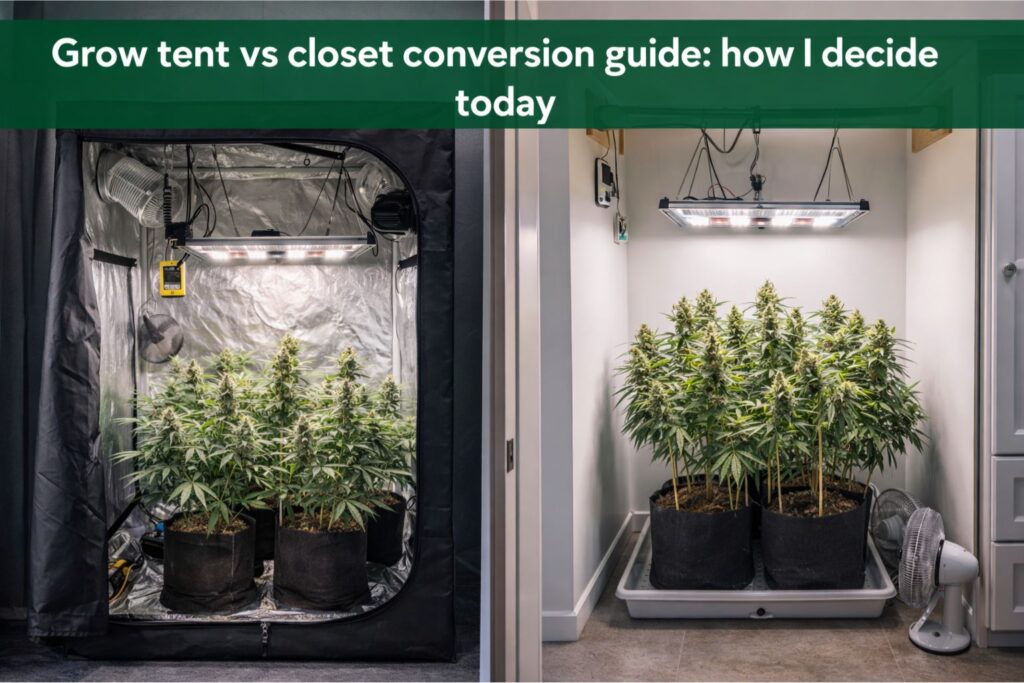
This grow tent vs closet conversion guide comes from running both.
I choose a tent when:
- I want a fast setup with predictable light sealing.
- I need built-in duct ports.
- I want a modular system I can relocate.
I choose a closet conversion when:
- I want stealth and quiet.
- I can properly seal and line surfaces.
- I have a workable layout that doesn’t force crowding.
Either way, I still do the same steps: DIY sealed grow space setup, electrical load planning for grow lights, quiet inline fan carbon filter sizing, and a light leak test for flowering room before flower.
Step-by-step build sequence: the order that keeps me out of trouble
This is the order I follow when building the best grow room for your cannabis seeds:
- Decide footprint and plant count.
- Run the indoor cannabis grow room checklist on the chosen location.
- Complete the DIY sealed grow space setup (floor, walls, sealing, cable routes).
- Finish electrical load planning for grow lights and mount power safely.
- Install ventilation using quiet inline fan carbon filter sizing.
- Run the room empty for 24–48 hours and dial VPD targets for indoor weed.
- Hang lights and create a PPFD map for LED grow room.
- Perform the light leak test for flowering room conditions.
- Choose medium and confirm soil vs coco in small grow rooms workflow.
- Start seeds, then log your numbers and observations.
If you do it in this order, you’ll feel the room “settle” before plants depend on it. That’s how I keep runs consistent across cannabis cultivars and across seasons.
Troubleshooting: what I check first when something looks off
When plants show stress, I start with environment, not bottles.
- Leaves canoeing or praying aggressively
- Check leaf-surface temperature and PPFD; confirm your PPFD map for LED grow room.
- Check VPD targets for indoor weed; too high VPD can drive fast transpiration.
- Tips burning early in flower
- Check EC and watering frequency; confirm root zone isn’t drying too hard.
- Confirm you’re not pushing too much PPFD too soon.
- Musty smell, wet leaves, or heavy condensation
- Revisit humidity control during cannabis flowering targets.
- Increase airflow inside the canopy and confirm exhaust performance.
- Odor outside the space
- Check for leaks and negative pressure.
- Reassess quiet inline fan carbon filter sizing and duct connections.
- Random reveg-like growth or stalled flower
- Perform a new light leak test for flowering room and eliminate any stray light sources.
This troubleshooting approach has saved me more runs than any single nutrient product ever did.
FAQ: long-tail questions I hear from indoor growers
What size space do I need for one or two plants?
A small tent or a closet can work for one or two plants if you can manage heat and humidity. Plan for the final canopy and keep at least one clear access path. Use the indoor cannabis grow room checklist to confirm you can mount equipment off the floor and still move safely.
What PPFD should I run for seedlings and early veg?
Seedlings do well in low intensity. I start around 100–250 PPFD and increase gradually. If you’re unsure, build a PPFD map for LED grow room and ramp up over a week instead of blasting day one.
How do I prevent mold during late flowering?
Humidity control during cannabis flowering is the key. Keep RH lower in late flower, move air through the canopy, and avoid letting runoff sit. Tight flowers plus stagnant air is the classic mold recipe.
Do I need a carbon filter?
If odor matters, yes. Even one flowering plant can smell strong. Quiet inline fan carbon filter sizing helps you match airflow to your footprint without running the fan so hard it becomes noisy.
Is coco better than soil for indoor grows?
Soil vs coco in small grow rooms comes down to how often you want to feed and how you handle runoff. Coco can be very consistent if you like routine feeding. Soil can be easier if you want fewer daily tasks and you water carefully.
How can I make sure my flowering room is truly dark?
Do a light leak test for flowering room conditions at night when the rest of the house is quiet and dark. Cover indicator LEDs, seal door cracks, and use light traps on vents.
Can I run my grow off one outlet?
Sometimes, but I don’t recommend planning that way. Electrical load planning for grow lights tells you the real draw, and adding a dehumidifier later can push you over the edge. Safer power is part of the best grow room for your cannabis seeds.
Can I order seeds and have them shipped?
Rules vary by region, and I can’t give legal advice. From a practical shopping perspective, look for clear shipping terms, discreet packaging policies, and customer support. If you’re deciding between feminized seeds and autoflowering genetics, choose based on your room’s height limits and your schedule for daily care.
Final notes from my grow room
Building the best grow room for your cannabis seeds is a series of small, practical decisions that add up: a real DIY sealed grow space setup, disciplined electrical load planning for grow lights, ventilation based on quiet inline fan carbon filter sizing, and environmental targets you can maintain with VPD targets for indoor weed and humidity control during cannabis flowering.
Once those fundamentals are stable, the rest becomes enjoyable: dial the PPFD map for LED grow room, keep the canopy even, run the light leak test for flowering room before flipping, and learn how each cultivar responds. That’s the difference between a stressful indoor marijuana grow and a repeatable indoor weed harvest you can be proud of.