Table of Contents
I like cannabis that feels like it came from somewhere real, not just a name and a marketing story. This Alien Technology Strain Review is written from the grower’s side: what I did, what I measured, what surprised me, and what I’d repeat if I popped the seeds again.
Before we get into the details, a quick reality check. Every marijuana grow is shaped by your environment, your medium, and your harvest timing. Even with consistent inputs, you can see differences between plants. That’s why I keep an Alien Technology grow journal for every run, and why I treat older genetics like something you learn, not something you “solve” in one attempt.
In this Alien Technology Strain Review, I’ll cover:
- Effects and day-to-day expectations (no medical claims)
- Flavor and aroma, including what changed the outcome
- Genetics background and what it means in practice
- A full grow plan: lighting, VPD, feeding, training, IPM, drying, and cure
Genetics and what I look for in the plants
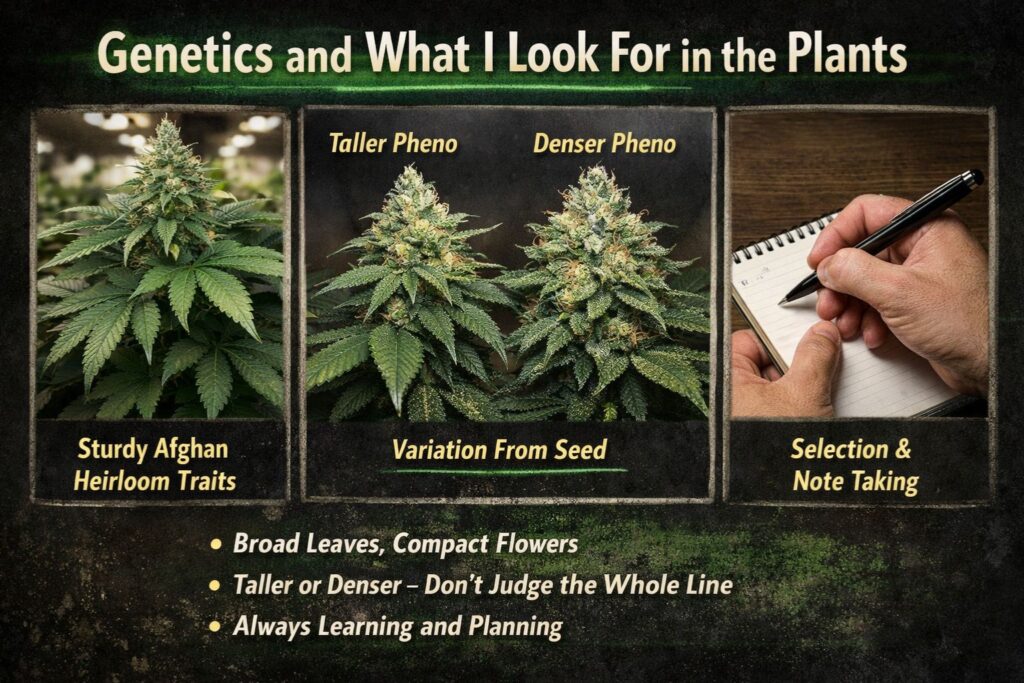
People often connect this cultivar to old Afghan roots. In my room, it behaves like an Afghan heirloom cannabis line in the ways that matter to a grower: sturdy frame, broad leaves, and a tendency to build compact flowers when the environment stays stable.
That “heirloom” vibe also shows up as variation from seed. Two plants can finish with different stretch, different density, and slightly different aroma. That’s normal, and it’s the reason I don’t judge the whole line from one plant. When I’m running something that feels like an Afghan heirloom cannabis line, I plan for selection and note-taking.
What I watched closely during veg:
- Branching pattern and internode spacing
- How quickly it recovers after topping or bending
- Leaf posture under LED intensity (a quiet sign of stress)
That last one matters because weed can look healthy while still being pushed too hard by light, heat, or feed.
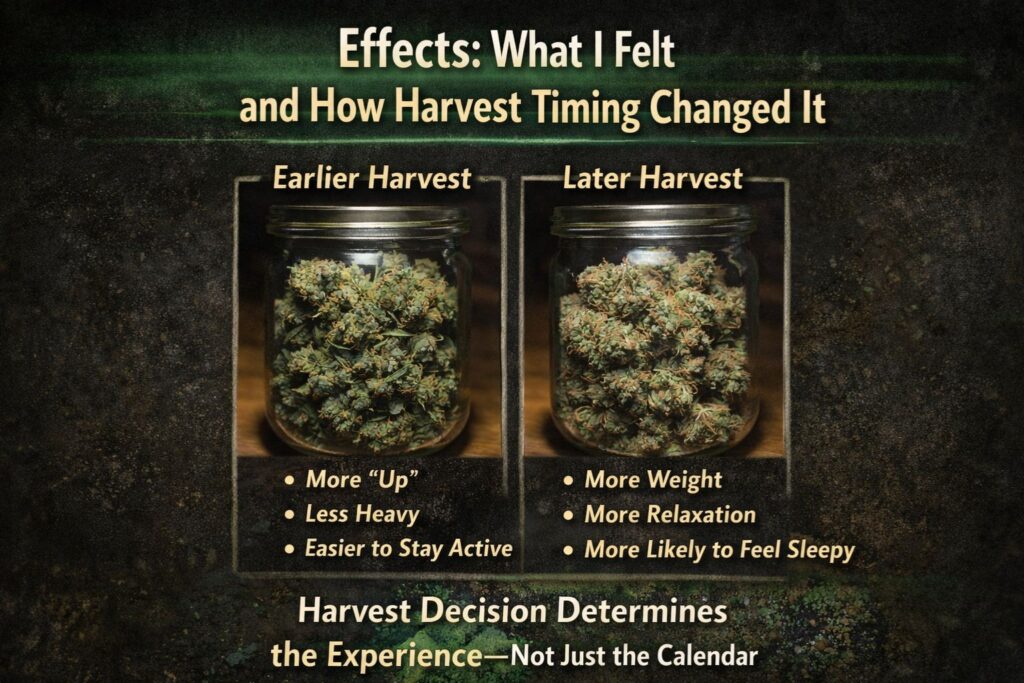
Effects: what I felt and how harvest timing changed it
Let’s keep this responsible and accurate: effects vary by person, tolerance, dose, and the specific plant you end up with. I’m not giving medical advice, and I’m not claiming outcomes for everyone.
With that said, the consistent theme for me was a heavier body feel with a calmer headspace. When I cut a little earlier, the experience felt more functional and clear. When I let it go longer, it leaned more sedating and “end-of-day.”
Here’s how I think about it in practical terms:
- Earlier harvest: more “up,” less heavy, easier to stay active
- Later harvest: more weight, more relaxation, more likely to feel sleepy
If you’re reading this Alien Technology Strain Review to decide whether it fits your style, the best tip I can give is to plan your harvest around the kind of experience you want, not just the calendar.
Flavor and aroma: what stood out in my jars
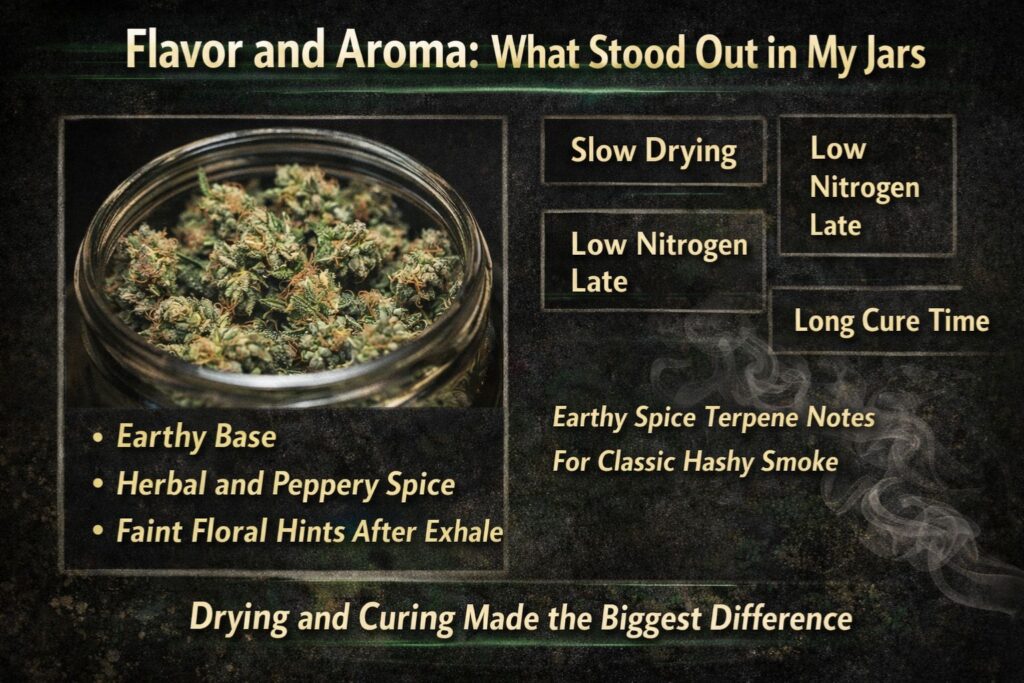
For flavor, my best batches were not sweet or candy-like. They were deeper and more classic, with earthy spice terpene notes that reminded me of older-school hashy profiles. I’ll describe it as:
- Earthy base
- Herbal and peppery edges
- Occasional faint floral lift on the exhale
The earthy spice terpene notes were strongest when I kept late-flower nitrogen under control and didn’t rush drying. When I overfed late or dried too fast, the top end disappeared and the smoke felt flatter.
Three factors that changed the final taste the most:
1) Dry speed (too fast muted aroma)
2) Late nitrogen (too much made the smoke harsher)
3) Cure time (it improved noticeably after week 3)
I’ll repeat it because it matters: earthy spice terpene notes are earned during drying and curing, not “created” at the end with tricks.
My indoor grow setup
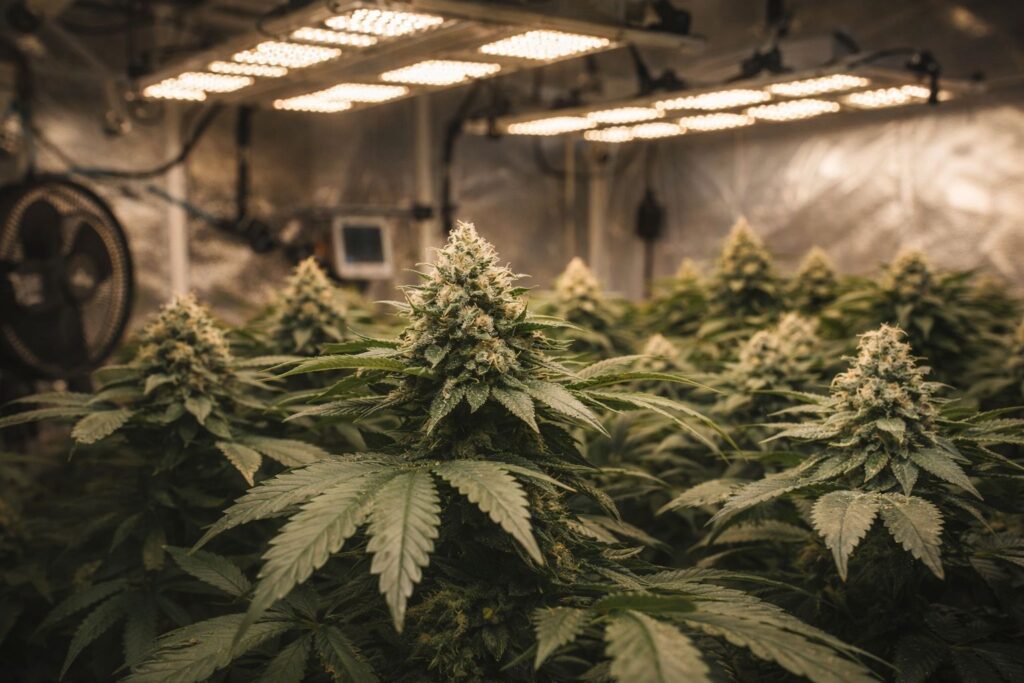
I’ve run this as a photoperiod under LEDs. If you’re growing weed indoors, the plant rewards steady conditions more than aggressive pushing.
Environment targets (the ranges I actually use)
I follow a vapor pressure deficit guide mindset instead of chasing one perfect number. Small swings are normal, but big swings show up as stress, slower growth, or weaker aroma.
Vegetative stage targets:
- Lights: 18/6
- Temperature: 24–27°C lights on, 20–22°C lights off
- Relative humidity: 60–70%
- VPD: roughly 0.9–1.2 kPa (depending on leaf temperature)
- Airflow: enough to keep leaves gently moving
Flowering stage targets:
- Lights: 12/12
- Temperature: 24–26°C lights on, 19–21°C lights off
- Relative humidity: 45–55% (lower late flower if buds are very dense)
- VPD: roughly 1.2–1.5 kPa
I use a vapor pressure deficit guide approach because it ties temperature and humidity together. If your room is cooler, the same humidity can be too “wet.” If your room is hotter, the same humidity can be too “dry.” When you dial VPD, the plant drinks and feeds more predictably.
I keep a vapor pressure deficit guide chart on hand, but I also watch the plant. Leaf edges, posture, and transpiration tell you a lot.
Lighting (and how I prevent light stress)
A common mistake with cannabis LEDs is pushing intensity before your environment and feeding are ready. I like to ramp up slowly and verify the plant is asking for more.
This is the basic structure I follow:
- Seedling: 150–250 PPFD
- Early veg: 300–450 PPFD
- Late veg: 450–600 PPFD
- Early flower: 650–800 PPFD
- Mid to late flower: 800–950 PPFD if the room can support it
I’m careful to keep an LED PPFD map for flowering because hotspots matter. You can set the fixture to “900 PPFD” at canopy height, but if the center is 1100 and the edges are 650, your results won’t be even. With an LED PPFD map for flowering, I can place the strongest tops where the light is most consistent.
I also mention LED PPFD map for flowering here because it helps with training. If I know where the intensity peaks, I can shape the canopy around that zone.
Feeding: targets that keep growth steady without burning tips
Feeding is medium-dependent. I grow in coco and soilless mixes most often. For those setups, I rely on EC targets in coco coir and adjust based on growth rate, leaf color, and runoff.
My typical EC targets in coco coir look like this:
- Early veg: EC 1.0–1.4
- Late veg: EC 1.4–1.8
- Early flower: EC 1.6–2.0
- Mid flower: EC 1.8–2.2 (only if everything is stable)
- Late flower: taper down based on plant fade and runoff
If you’re new, treat those as a starting point, not a rule. EC targets in coco coir are only useful if your irrigation, environment, and light intensity are consistent.
Common problems and how I troubleshoot:
- Tip burn spreading fast: reduce EC, check VPD, verify root zone moisture
- Dark glossy leaves late flower: likely too much nitrogen
- Pale tops under strong LED: could be underfeeding or too much PPFD
When I keep EC targets in coco coir reasonable and the VPD stable, the plant stays predictable.
Training and canopy: how I build an even top
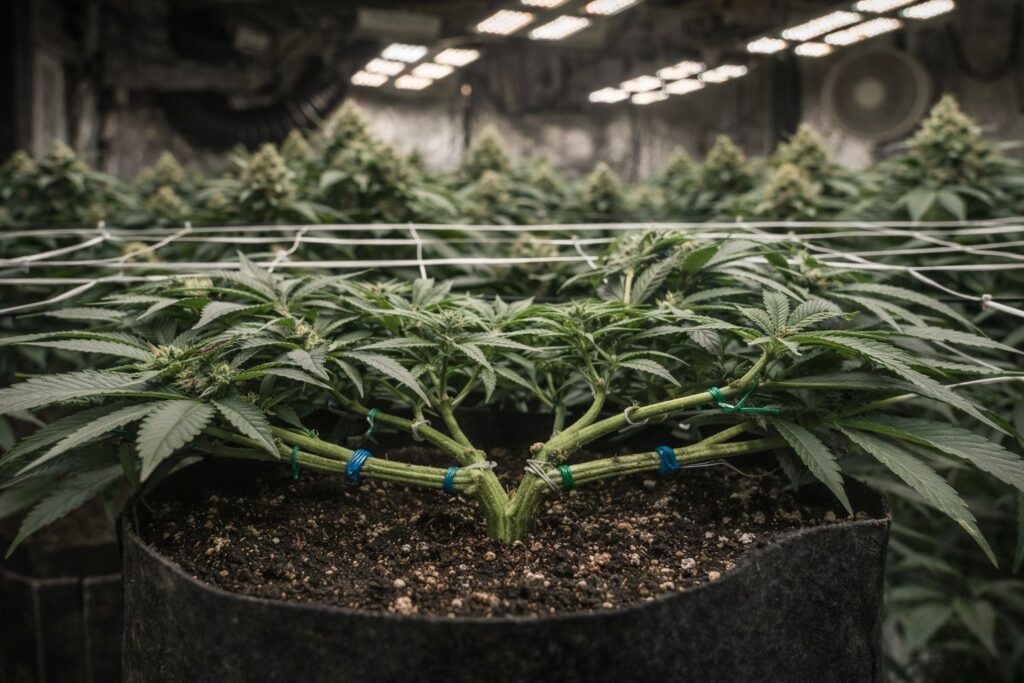
This plant responds well to simple training. My goal is not to torture it. My goal is to get a flat canopy, good airflow, and equal light to top sites.
Indoor canopy control methods I use:
- Top once above node 5–6
- Bend and tie branches outward early
- Light defoliation to open airflow, especially mid flower
- Remove weak lower growth before it wastes energy
The key is timing. Indoor canopy control methods work best when done gradually. If you strip too much leaf in one day, you can stall growth for a week.
I also use indoor canopy control methods with light in mind. With an LED PPFD map for flowering, I keep the best tops in the most even zone.
Pest prevention: my routine (before problems show up)

A lot of new growers wait until they see damage. I prefer prevention. I keep an integrated pest management routine that’s simple and repeatable.
My integrated pest management routine includes:
- Clean starts (sterile trays, clean tools, no old soil indoors)
- Sticky traps to monitor flying pests
- Leaf inspections twice a week (undersides matter)
- Controlled humidity (gnats and mildew love consistently wet conditions)
- Quarantine for any new plant material
If you do get issues, respond early and rotate strategies. But even without problems, the integrated pest management routine keeps surprises rare.
I’ll say it again because it saves harvests: an integrated pest management routine is easier than trying to fix an infestation in week 6 of flower.
Flower structure and resin: what I saw when it was dialed
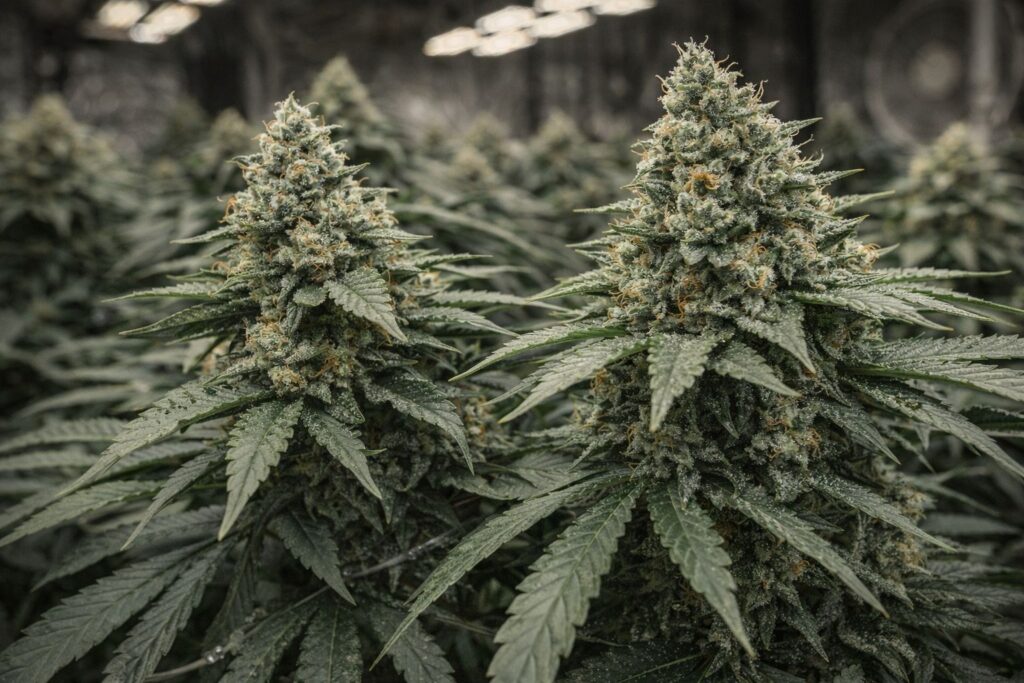
When everything was stable, flowers built tight and resinous. That looks great, but it also raises risk: dense buds hold moisture. That’s why environment control and airflow matter more as you approach harvest.
What helped me keep quality high:
- Good airflow through the canopy
- Humidity control late flower
- Not overfeeding nitrogen at the end
This is where a vapor pressure deficit guide approach shines again. When humidity is too high for the temperature, dense flowers are a mold risk. When humidity is too low, the plant can stall and aroma can fade.
Harvest, dry, and cure: the part that makes or breaks it
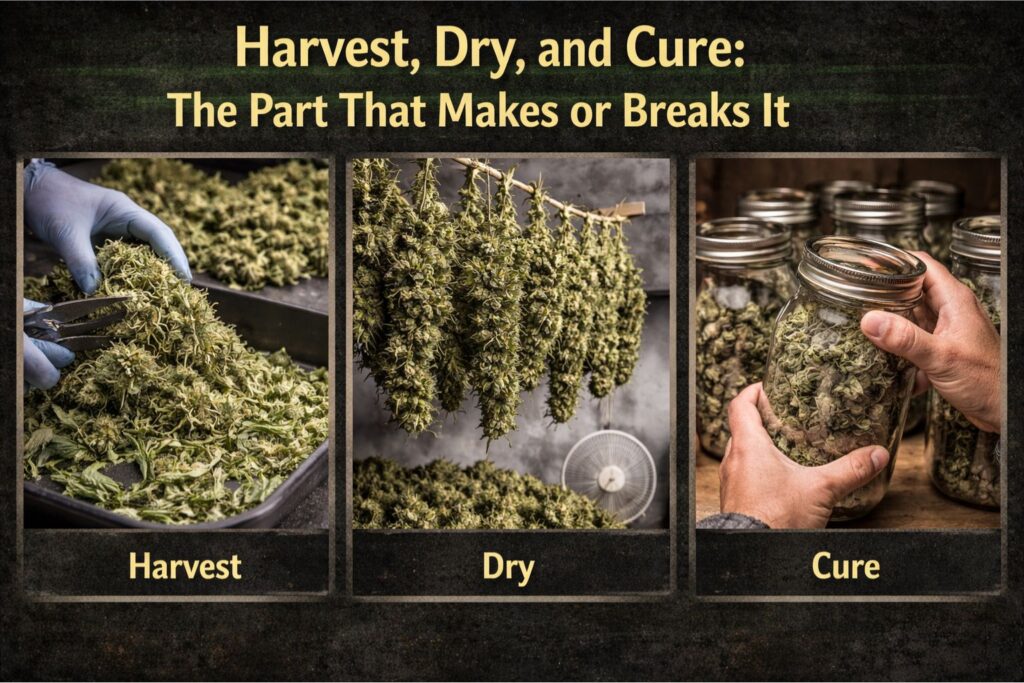
If you want the best taste, treat drying and curing as part of cultivation, not an afterthought.
Drying (my slow approach)
I use a slow hang-dry technique because it protects aroma and smoothness.
My slow hang-dry technique targets:
- Temperature: 18–20°C
- Humidity: 55–60% RH
- Darkness: yes
- Air movement: indirect, not blasting the buds
- Time: usually 10–14 days
If you dry too warm or too fast, you can lose the delicate parts of the profile. The slow hang-dry technique is boring, but it’s reliable.
I also avoid over-trimming before dry. Leaving more leaf can slow the process a bit, which supports the slow hang-dry technique goal.
Curing (how I lock in flavor)
I follow a jar cure schedule because it gives repeatable results.
My jar cure schedule:
- Jar target humidity: 58–62% RH
- First week: open briefly once or twice daily
- Weeks 2–3: open less often as humidity stabilizes
- Minimum cure: 21 days
- Better cure: 30–45 days
The jar cure schedule matters because harshness often comes from moisture moving out too quickly or from chlorophyll breakdown happening unevenly. With a steady jar cure schedule, the smoke improves and the aroma becomes clearer.
If I had to choose one “quality lever,” it’s this: slow hang-dry technique plus a consistent jar cure schedule.
Seed buying and grow questions people actually ask
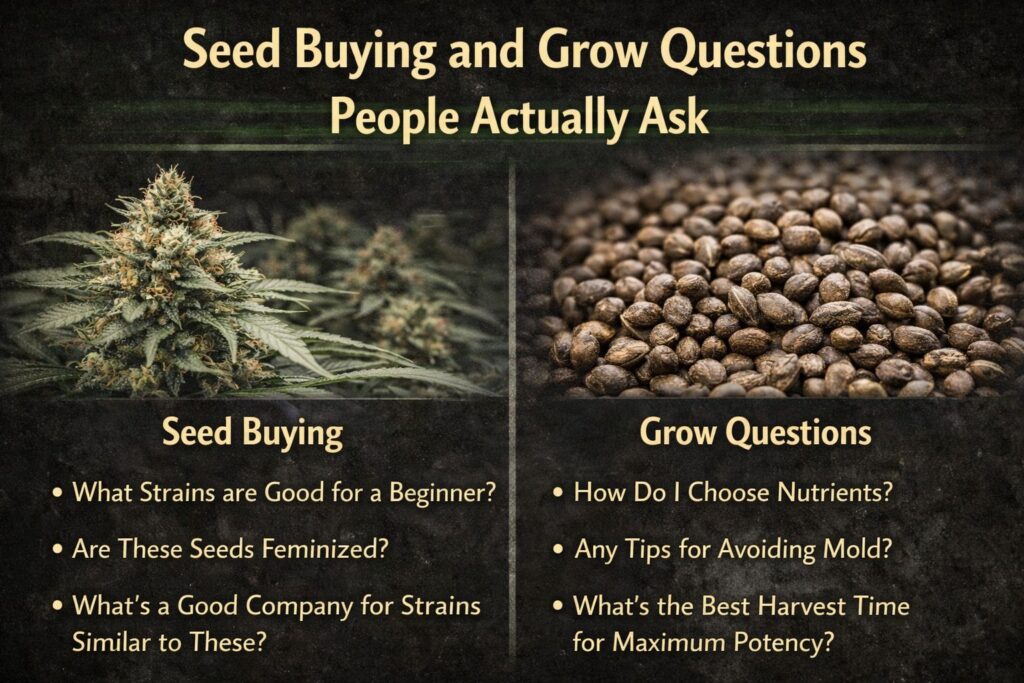
People shop for cannabis seeds in different ways. Some want feminized seeds to reduce surprises. Some want autoflowering varieties for speed. Some want to compare indica, sativa, and hybrid types. Whatever you choose, match the plant to your setup.
Questions I hear often:
- Should I start in soil or a coco/hydro setup?
- What light schedule should I use for photoperiod plants?
- How do I avoid nutrient burn or deficiency?
- How do I pick a trustworthy seed bank?
My take in plain English:
- Soil can be forgiving. Coco can be fast, but it demands consistency.
- For photoperiod marijuana, 18/6 for veg and 12/12 for flower is standard.
- Learn the difference between too much feed (burn) and too little (deficiency).
- Pick seed sellers with clear storage practices and realistic descriptions.
Also, laws around cannabis and marijuana cultivation vary by region. Always check your local rules and regulations. This isn’t legal advice.
Quick checklist (what I’d do again)
- Keep an Alien Technology grow journal from day one
- Use a vapor pressure deficit guide approach for stable growth
- Make an LED PPFD map for flowering so canopy and light match
- Apply indoor canopy control methods early, not late
- Follow EC targets in coco coir as a starting point, not a fixed rule
- Maintain an integrated pest management routine before you see problems
- Use a slow hang-dry technique to protect aroma
- Stick to a jar cure schedule for smoother smoke and better flavor
This Alien Technology Strain Review is basically the checklist I wish I had the first time I grew it.
FAQ
Is this Alien Technology Strain Review describing a sweet or fruity profile?
Not in my runs. The best batches leaned toward earthy spice terpene notes, with a deeper, more classic profile. If you rush the dry, the earthy spice terpene notes can get muted.
How do I keep quality consistent from seed?
Keep records. An Alien Technology grow journal helps you connect cause and effect. If this behaves like an Afghan heirloom cannabis line in your room, expect some variation and plan for selection.
What’s the simplest way to improve results under LEDs?
Measure and map. An LED PPFD map for flowering lets you train the canopy into the even zone. Combine that with indoor canopy control methods and you’ll see more consistent top buds.
What environmental mistake ruins dense buds fastest?
High humidity late flower. Use a vapor pressure deficit guide mindset so humidity and temperature make sense together. Dense weed can trap moisture even when the room seems “close enough.”
What feeding target should I start with in coco?
Start moderate and adjust. Use EC targets in coco coir as a baseline, then watch leaf color, growth rate, and runoff. EC targets in coco coir only work when irrigation is consistent.
How do I prevent pests without spraying all the time?
A simple integrated pest management routine works. Sticky traps, inspections, clean starts, and stable humidity go a long way. An integrated pest management routine beats emergency fixes.
What’s your biggest post-harvest tip?
Don’t rush. Use a slow hang-dry technique, then follow a jar cure schedule. The slow hang-dry technique protects aroma, and the jar cure schedule improves smoothness and consistency.
If you read one line twice, make it this: this Alien Technology Strain Review is about repeatable fundamentals. Get the environment stable, train the canopy with intention, feed within your limits, and finish with a careful dry and cure.
For a complete directory of cultivars, visit our Cannabis Strain Reviews.