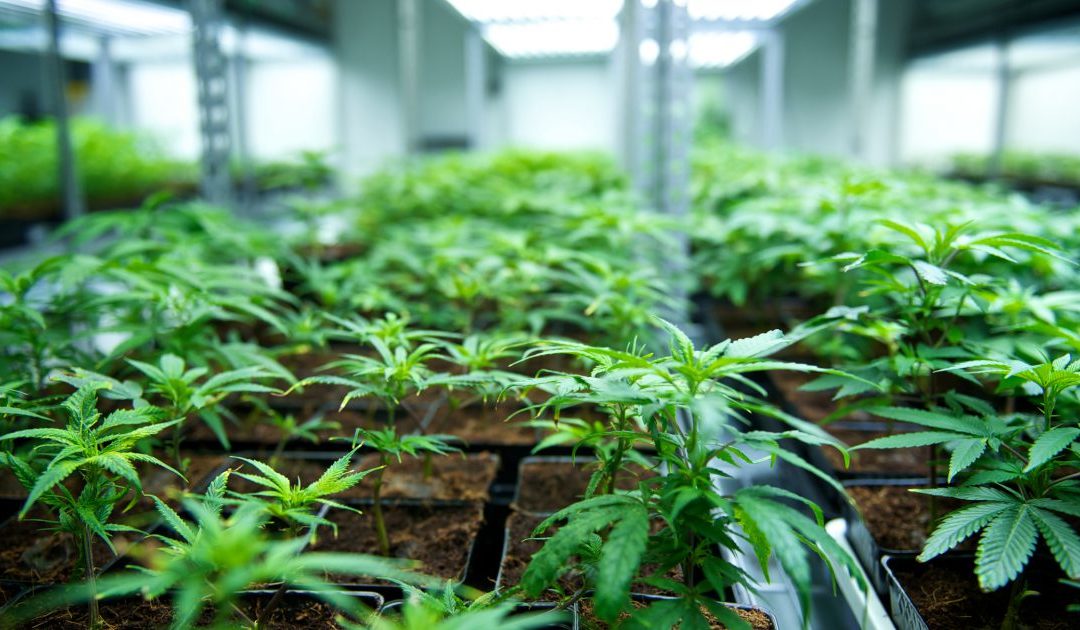
Increasing cannabis yield involves a combination of optimizing growing conditions, employing effective techniques, and ensuring proper plant care. Here are five ways to increase cannabis yield:
- Optimize Light Exposure:
- Ensure your plants receive adequate light, which is crucial for photosynthesis and growth.
- Use high-quality grow lights (LED, HPS, or MH) and maintain the correct light schedule (18/6 during vegetative growth and 12/12 during flowering).
- Adjust the height and intensity of lights to prevent light burn and ensure even light distribution.
- Use High-Quality Nutrients:
- At various phases of growth, give your plants the proper ratio of nutrients.
- Use a complete nutrient solution that includes nitrogen (N), phosphorus (P), and potassium (K), along with secondary nutrients and micronutrients.
- Adjust nutrient levels according to the plant’s needs and avoid over-fertilization.
- Implement Advanced Growing Techniques:
- Topping: Cut off the main stem to encourage the growth of multiple colas.
- Low-Stress Training (LST): Bend and tie down stems to create a flat canopy and improve light penetration.
- Screen of Green (ScrOG): Use a screen to spread out the branches, maximizing light exposure and increasing bud sites.
- Sea of Green (SOG): Grow many small plants in a limited space to achieve quick harvest cycles.
- Control the Environment:
- Maintain optimal temperature (70-85°F during the day and slightly cooler at night) and humidity levels (40-60%).
- Ensure proper ventilation and air circulation to prevent mold and pest infestations.
- Use fans, dehumidifiers, or humidifiers to regulate the growing environment.
- Proper Pruning and Defoliation:
- Remove yellowing or dead leaves to improve airflow and light penetration.
- Reduce the amount of light reaching lower branches so that the plant concentrates its energy on the main colas.
- Defoliate selectively during the flowering stage to expose bud sites to more light, enhancing bud development.
Implementing these strategies can help maximize the yield and quality of your cannabis plants.
Optimizing light exposure is critical for maximizing cannabis yield. Here’s a detailed breakdown of how to achieve optimal light exposure for your cannabis plants:
Choosing the Right Grow Lights
- Types of Grow Lights:
- LED (Light Emitting Diodes): Energy-efficient, long-lasting, and produce less heat. They can be customized to emit specific wavelengths suitable for different growth stages.
- HPS (High-Pressure Sodium): Great for flowering due to their red/orange spectrum, but they produce more heat and consume more electricity.
- MH (Metal Halide): Ideal for vegetative growth with their blue spectrum but also consume more energy and produce heat.
- CFL (Compact Fluorescent Lights): Suitable for small grow spaces and seedlings but less efficient for larger setups.
- Light Spectrum:
- Blue Light (400-500 nm): Crucial during the vegetative stage, promoting strong, healthy growth.
- Red Light (620-750 nm): Essential during the flowering stage, encouraging bud development and increased yields.
- Full Spectrum LEDs: Provide a balanced spectrum, mimicking natural sunlight, and are effective for both vegetative and flowering stages.
Light Schedule
- Vegetative Stage:
- Maintain an 18/6 light schedule (18 hours of light and 6 hours of darkness) to promote vigorous growth.
- Some growers use a 24/0 schedule, but this can stress some plant strains.
- Flowering Stage:
- Switch to a 12/12 light schedule (12 hours of light and 12 hours of darkness) to induce flowering.
- Ensure the dark period is uninterrupted to avoid stressing the plants and causing hermaphroditism.
Light Intensity and Placement
- Light Intensity:
- Measure light intensity using a PAR (Photosynthetically Active Radiation) meter to ensure plants receive the optimal amount of light.
- Aim for 400-600 µmol/m²/s during the vegetative stage and 600-900 µmol/m²/s during the flowering stage.
- Light Placement:
- Adjust the height of the lights according to the plant’s growth stage and light type.
- For LEDs, keep them 12-24 inches above the canopy. Adjust based on manufacturer recommendations and plant response.
- For HPS/MH lights, maintain a distance of 18-36 inches to prevent light burn and excessive heat.
Maximizing Light Distribution
- Reflective Surfaces:
- Use reflective materials like Mylar or white paint on grow room walls to maximize light distribution and reduce shadows.
- Reflective hoods and light movers can also help distribute light evenly across the canopy.
- Even Canopy:
- Employ techniques like topping, LST (Low-Stress Training), and ScrOG (Screen of Green) to create a flat, even canopy.
- An even canopy ensures all bud sites receive equal light, promoting uniform growth and maximizing yield.
Monitoring and Adjusting
- Regular Monitoring:
- Check light levels and plant health regularly to ensure optimal light exposure.
- Adjust light height and intensity as plants grow and develop.
- Respond to Plant Needs:
- If plants exhibit signs of light stress (bleaching, yellowing, or curling leaves), adjust the light distance and intensity immediately.
- Use light meters and visual cues to fine-tune light settings throughout the growth cycle.
Using high-quality nutrients is essential for achieving maximum cannabis yield. The following is a comprehensive tutorial on how to apply nutrients correctly to guarantee the health and growth of your plants:
Understanding Cannabis Nutrient Needs
- Macronutrients:
- Nitrogen (N): Crucial for vegetative growth, promotes leaf and stem development.
- Phosphorus (P): Essential for root development and flowering.
- Potassium (K): Important for overall plant health, disease resistance, and bud quality.
- Secondary Nutrients:
- Calcium (Ca): Supports cell wall structure and stability.
- Magnesium (Mg): Central to chlorophyll production and photosynthesis.
- Sulfur (S): Involved in the formation of amino acids and proteins.
- Micronutrients:
- Iron (Fe), Manganese (Mn), Zinc (Zn), Copper (Cu), Molybdenum (Mo), Boron (B): Required in smaller amounts but essential for various physiological processes.
Nutrient Formulations
- Organic vs. Synthetic Nutrients:
- Organic Nutrients: Derived from natural sources like compost, bat guano, and fish emulsion. They enhance microbial activity and the health of the soil.
- Synthetic Nutrients: Made using chemicals and designed to supply nutrients precisely.
- Complete Nutrient Solutions:
- Use formulations specifically designed for cannabis, available as separate nutrients for vegetative and flowering stages.
- Look for nutrient solutions that include a comprehensive blend of macro, secondary, and micronutrients.
Feeding Schedule
- Seedling Stage:
- Use a diluted nutrient solution with low nitrogen content.
- Avoid overfeeding; seedlings require minimal nutrients initially.
- Vegetative Stage:
- Increase nitrogen levels to support rapid growth.
- Use a balanced N-P-K ratio, typically around 3-1-2 or 4-2-3.
- Flowering Stage:
- Reduce nitrogen and increase phosphorus and potassium levels to promote bud development.
- Use a nutrient ratio of approximately 1-3-2 or 1-4-5.
Nutrient Delivery Methods
- Soil:
- Use slow-release organic amendments or liquid fertilizers.
- Regularly check soil pH (6.0-7.0) to ensure nutrient availability.
- Hydroponics:
- Use water-soluble nutrients specifically formulated for hydroponic systems.
- Maintain nutrient solution pH between 5.5-6.5.
- Foliar Feeding:
- Apply diluted nutrient solution directly to leaves for rapid nutrient uptake.
- Use during the vegetative stage or to correct nutrient deficiencies.
Monitoring and Adjusting Nutrients
- Nutrient Burn and Deficiencies:
- Signs of nutrient burn include leaf tips turning brown and curling.
- Nutrient deficiencies can cause yellowing leaves (nitrogen deficiency) or purpling stems (phosphorus deficiency).
- EC and PPM:
- Use an EC (electrical conductivity) or PPM (parts per million) meter to measure nutrient concentration.
- Adjust nutrient strength based on plant stage and response.
- Flush Regularly:
- Flush the growing medium with plain water every few weeks to prevent nutrient buildup and salt accumulation.
- Perform a final flush 1-2 weeks before harvest to improve bud flavor and quality.
Nutrient Brands and Products
- Reputable Brands:
- General Hydroponics, Advanced Nutrients, Fox Farm, and Canna are well-known for high-quality cannabis nutrients.
- Specific Products:
- Look for products tailored to each growth stage, such as General Hydroponics Flora Series, Advanced Nutrients’ Grow-Micro-Bloom, or Fox Farm’s Grow Big, Tiger Bloom, and Big Bloom.
Final Tips
- Observe Plant Response:
- Adjust feeding based on how your plants respond to the nutrients.
- Different strains may have varying nutrient requirements.
- Maintain Records:
- Keep a grow journal to track feeding schedules, nutrient concentrations, and plant health.
- Use this information to refine your nutrient regimen over time.
Implementing advanced growing techniques can significantly increase the yield and quality of your cannabis plants. Here are some detailed methods:
1. Topping
In order to promote the growth of several colas rather than just one major cola, topping entails chopping off the plant’s primary stem. With more blossom sites and a bushier plant, this strategy helps.
How to Top:
- Timing: Perform topping during the vegetative stage when the plant has at least 4-5 nodes (sets of leaves).
- Procedure:
- Identify the main stem and the top growth tip.
- Use sterilized scissors or a razor blade to cut the stem just above the second or third node.
- In order to encourage lateral growth, the plant will send its energy toward the lower branches.
Benefits:
- Increases the number of main colas.
- Promotes a bushier and more manageable plant structure.
- Enhances light penetration and airflow.
2. Low-Stress Training (LST)
Low-Stress Training (LST) involves bending and tying down the stems and branches to create a flat and even canopy. This technique maximizes light exposure to all parts of the plant.
How to Perform LST:
- Timing: Start during the vegetative stage when the stems are still flexible.
- Procedure:
- Gently bend the main stem and side branches horizontally.
- Use soft plant ties or garden wire to secure the branches to the rim of the pot or to stakes.
- Continuously adjust the ties as the plant grows to maintain an even canopy.
Benefits:
- Maximizes light exposure to all bud sites.
- Reduces the risk of mold and pests by improving airflow.
- Increases overall yield by promoting more bud sites.
3. Screen of Green (ScrOG)
Screen of Green (ScrOG) involves using a screen or net to train the plant branches horizontally, creating an even canopy. This technique ensures that all bud sites receive equal light.
- Timing: Install the screen during the vegetative stage when the plant is about 12-18 inches tall.
- Procedure:
- Place the screen 8-12 inches above the base of the plant.
- As the plant grows, gently tuck the branches under the screen, spreading them out horizontally.
- Continue tucking and training the branches until the screen is filled and the plant starts flowering.
Benefits:
- Creates a uniform canopy with maximized light distribution.
- Increases the number of bud sites and overall yield.
- Simplifies management of plant height in indoor grows.
4. Sea of Green (SOG)
Sea of Green (SOG) involves growing many small plants in a limited space to achieve quick harvest cycles. This technique focuses on maximizing the use of available space and light.
How to SOG:
- Timing: Start with clones or seeds that will grow into small, single-cola plants.
- Procedure:
- Plant clones or seeds densely in small pots, typically 1-2 gallons each.
- Begin the flowering stage early, usually when the plants are 8-12 inches tall.
- Harvest each plant when it reaches maturity, usually after 8-10 weeks of flowering.
Benefits:
- Maximizes space and light efficiency.
- Reduces the overall grow time with faster harvest cycles.
- Simplifies plant management and maintenance.
5. Super Cropping
Super Cropping is a high-stress training technique that involves slightly damaging the plant’s branches to encourage stronger, bushier growth and increased bud production.
How to Super Crop:
- Timing: Perform during the vegetative stage or early flowering stage.
- Procedure:
- Identify the branches you want to super crop.
- Gently squeeze and pinch the branch between your fingers until you feel the inner tissue soften.
- Bend the branch gently at the pinched area, creating a 90-degree angle.
- Secure the branch in its new position if necessary.
Benefits:
- Strengthens the plant’s structure and resilience.
- Increases light penetration and airflow to lower bud sites.
- Promotes larger and more numerous buds.
Final Tips
- Consistency: Be consistent with your training techniques and monitor plant response.
- Clean Tools: Always use sterilized tools to prevent infection and disease.
- Patience: Advanced growing techniques require patience and careful observation.
- Strain Considerations: Different cannabis strains respond differently to training. Research your specific strain’s characteristics and adjust your techniques accordingly.
Controlling the environment is crucial for maximizing cannabis yield and ensuring healthy plant growth. Here’s a detailed guide on how to create and maintain an optimal growing environment:
Temperature Control
Optimal Temperature Ranges:
- Vegetative Stage: 70-85°F (21-29°C)
- Flowering Stage: 65-80°F (18-26°C)
Tips for Temperature Control:
- Heaters and Air Conditioners: Use heaters to maintain warmth during colder periods and air conditioners to cool down the grow space during hot periods.
- Thermostats: Install thermostats to monitor and regulate temperature automatically.
- Fans and Ventilation: Use fans to circulate air and maintain an even temperature throughout the grow space.
- Insulation: Ensure your grow room is well-insulated to maintain consistent temperatures.
Humidity Control
Optimal Humidity Levels:
- Seedling Stage: 65-70%
- Vegetative Stage: 40-70%
- Flowering Stage: 40-50%
- Late Flowering Stage: 30-40%
Tips for Humidity Control:
- Humidifiers: Use humidifiers to increase humidity levels during dry periods.
- Dehumidifiers: Use dehumidifiers to reduce humidity, especially during the flowering stage to prevent mold and mildew.
- Hygrometers: Install hygrometers to monitor humidity levels accurately.
- Air Circulation: Improve air circulation with oscillating fans to prevent stagnant air, which can lead to high humidity and mold growth.
Ventilation
Importance of Ventilation:
- Provides fresh CO2 for photosynthesis.
- Removes excess heat and humidity.
- Prevents mold, mildew, and pests.
Tips for Effective Ventilation:
- Exhaust Fans: Use exhaust fans to remove hot, stale air from the grow space.
- Intake Fans: Install intake fans to bring in fresh air from outside.
- Ducting: Ensure proper ducting to direct airflow efficiently.
- Carbon Filters: Use carbon filters on exhaust fans to eliminate odors.
Light Control
Light Intensity:
- Ensure plants receive the right amount of light (measured in PPFD – Photosynthetic Photon Flux Density) appropriate for their growth stage.
Light Duration:
- Vegetative Stage: 18 hours of light, 6 hours of darkness (18/6 cycle).
- Flowering Stage: 12 hours of light, 12 hours of darkness (12/12 cycle).
Tips for Light Control:
- Timers: Use timers to automate light schedules and ensure consistency.
- Adjustable Lights: Adjust the height of lights to maintain proper distance from the plant canopy.
- Reflective Materials: Use reflective materials like Mylar or white paint to maximize light distribution.
CO2 Enrichment
Importance of CO2:
- CO2 is essential for photosynthesis and can increase growth rates and yields when properly managed.
Tips for CO2 Enrichment:
- CO2 Tanks: Use CO2 tanks and regulators to release controlled amounts of CO2.
- CO2 Generators: Install CO2 generators that produce CO2 by burning propane or natural gas.
- Proper Sealing: Ensure your grow space is sealed to maintain elevated CO2 levels.
- Monitoring: Use CO2 monitors to maintain optimal levels (800-1500 ppm) and avoid wastage.
pH and Nutrient Management
- Soil: 6.0-7.0
- Hydroponics: 5.5-6.5
Tips for pH and Nutrient Control:
- pH Meters: Regularly check the pH of your water and nutrient solution using pH meters.
- pH Adjusters: Use pH up or pH down solutions to adjust the pH to the desired range.
- Nutrient Testing: Regularly test your nutrient solution’s EC (electrical conductivity) or PPM (parts per million) to ensure proper nutrient concentrations.
- Flush Regularly: Flush your plants with clean water to prevent nutrient buildup and lockout.
Pest and Disease Control
Common Pests:
- Spider mites, aphids, thrips, and whiteflies.
Common Diseases:
- Powdery mildew, bud rot, root rot.
Tips for Pest and Disease Control:
- Check Frequently: Check plants frequently for indications of disease or pests.
- Neem Oil and Insecticidal Soap: To treat small pest infestations, apply neem oil or insecticidal soap.
- Beneficial Insects: To organically reduce pests, introduce beneficial insects like ladybugs or predatory mites.
- Sanitation: Maintain a clean grow space by removing dead leaves and debris.
- Quarantine: Isolate new plants before introducing them to your grow space to prevent pest and disease spread.
Final Tips
- Monitoring: Continuously monitor environmental conditions using digital sensors and controllers.
- Automation: Automate systems for lights, fans, CO2, and watering to maintain consistency.
- Adjustments: Be prepared to make adjustments based on plant growth stages and environmental changes.
Proper pruning and defoliation are essential techniques for maximizing cannabis yield and ensuring healthy plant growth. Here’s a detailed guide on how to properly prune and defoliate your cannabis plants:
Pruning
Pruning involves selectively removing certain parts of the plant to improve its overall structure, health, and productivity. It helps direct the plant’s energy to the most productive areas, such as the main colas, leading to higher yields.
Benefits of Pruning:
- Improves light penetration and airflow.
- Reduces the risk of mold and pests.
- Encourages the growth of larger, denser buds.
- Creates a more manageable plant structure.
Types of Pruning:
- Topping:
- Timing: Perform during the vegetative stage when the plant has at least 4-5 nodes.
- Procedure: Cut the main stem just above a node to encourage the growth of two new main colas.
- FIMing (Fk I Missed):**
- Timing: Similar to topping, during the vegetative stage.
- Procedure: Pinch off about 75% of the new growth at the top of the plant. This technique results in multiple new colas forming.
- Lollipopping:
- Timing: Usually done a week or two before switching to the flowering stage.
- Procedure: Remove the lower branches and leaves that do not receive adequate light. This focuses the plant’s energy on the upper, more productive parts.
Steps for Pruning:
- Sanitize Tools: Always use sterilized scissors or pruning shears to prevent infection and disease.
- Identify Target Areas: Look for lower branches and leaves that are shaded and unlikely to produce quality buds.
- Make Clean Cuts: Remove the identified branches and leaves with clean, precise cuts close to the main stem or branch.
- Monitor Plant Response: Observe how the plant responds to pruning and adjust your technique as needed.
Defoliation
Defoliation involves removing excess leaves to improve light penetration and airflow within the plant canopy. It is especially useful during the flowering stage to ensure that all bud sites receive adequate light.
Benefits of Defoliation:
- Enhances light exposure to lower bud sites.
- Improves airflow, reducing the risk of mold and pests.
- Redirects the plant’s energy to bud development.
Timing for Defoliation:
- Vegetative Stage: Light defoliation can be done to shape the plant and improve light penetration.
- Flowering Stage: Perform a major defoliation at the beginning of the flowering stage (after the first 2-3 weeks) and a second defoliation around week 6.
Steps for Defoliation:
- Identify Leaves to Remove:
- Focus on large fan leaves that block light to lower bud sites.
- Remove any yellowing or damaged leaves.
- Use Proper Tools:
- Use sterilized scissors or pruning shears to avoid spreading disease.
- Technique:
- Carefully remove the selected leaves by cutting them at the base of the stem.
- Avoid removing too many leaves at once to prevent stressing the plant.
- Monitor Plant Response:
- Observe the plant for signs of stress or recovery.
- Adjust the amount and frequency of defoliation based on the plant’s response.
Additional Tips
- Balance:
- Find a balance between pruning/defoliation and plant stress. Over-pruning can stress the plant, while under-pruning can limit light penetration and airflow.
- Strain Considerations:
- Different strains may respond differently to pruning and defoliation. Research your specific strain’s characteristics and adjust your techniques accordingly.
- Timing:
- Avoid heavy pruning or defoliation during late flowering as it can stress the plant and reduce yields.
- Recovery Time:
- Allow the plant time to recover after each pruning or defoliation session. Monitor its health and growth to ensure it is responding well.
Conclusion
In conclusion, maximizing cannabis yield requires a comprehensive approach that includes optimizing light exposure, using high-quality nutrients, employing advanced growing techniques, controlling the environment, and practicing proper pruning and defoliation. By paying attention to these key aspects, growers can significantly increase their harvest, producing healthier and more abundant cannabis plants. Regardless of cultivating skill level, these tactics will assist you in getting the most out of your cannabis garden.